Diamond Painting for Beginners: Everything You Need to Know Before Your First Canvas
- What Is Diamond Painting? The Basics Explained
- Diamond Painting Tools and Supplies: What Comes in Every Kit
- How to Choose Your First Diamond Painting Kit
- Round vs. Square Drills: Which Should a Beginner Choose?
- Setting Up Your Diamond Painting Workspace
- Step-by-Step Technique: How to Place Your First Diamond Drills
- Common Beginner Mistakes and How to Fix Them
- Sealing and Finishing Your Diamond Painting
- Why Diamond Painting Is So Relaxing
- Frequently Asked Questions
Diamond painting for beginners is one of the most satisfying creative hobbies you can pick up, but diving straight into a large kit without the basics can lead to crooked drills, sticky messes, and a half-finished canvas gathering dust in a drawer. This guide covers how diamond painting works, how to choose your first kit, what every tool does, and the simple techniques that make your first canvas enjoyable rather than frustrating. By the end, you'll be ready to place your first drill with confidence.
Quick answer: For your first diamond painting, choose a small or medium full-drill kit (roughly 30×40 cm to 40×50 cm) with round drills and a simple design built from bold blocks of color. Peel back only a small window of the protective film at a time, pick up each drill with a waxed applicator pen, press it onto its matching symbol, and work in rows from one corner.
What Is Diamond Painting? The Basics Explained
Diamond painting is a combination of cross-stitch, paint-by-numbers, and mosaic art. You apply hundreds or thousands of tiny, flat-backed resin "diamonds," also called drills, onto an adhesive canvas using a small applicator pen. The canvas is printed with colors and symbols, and a legend tells you which drill color belongs on each symbol. The result has the feel of a cross-stitch or mosaic, except that it sparkles.
Who Can Do Diamond Painting?
Diamond painting is for almost everyone: kids, adults, seasoned crafters, and complete beginners with no craft experience. You don't need any artistic skill, because the canvas tells you exactly where each drill goes. If you've always thought "I'm not artistic," a finished diamond painting may change your mind. With young children, keep an eye on the drills, since they are small enough to be a choking hazard.
3D vs. 5D Drills: What the Labels Mean
You'll see most kits labeled "5D." The label describes how the top of each drill is cut. Both round and square drills have a faceted top and a flat underside, and 5D drills carry more facets than older 3D drills, so they catch more light and give the finished piece more depth and shimmer. For a first project, 5D round drills give you plenty of sparkle with the least placement difficulty.
You may also come across AB (Aurora Borealis) drills, which have an iridescent coating that reflects rainbow-like color. They usually appear as accents in more detailed designs and are not something a first kit needs.
Diamond Painting Tools and Supplies: What Comes in Every Kit
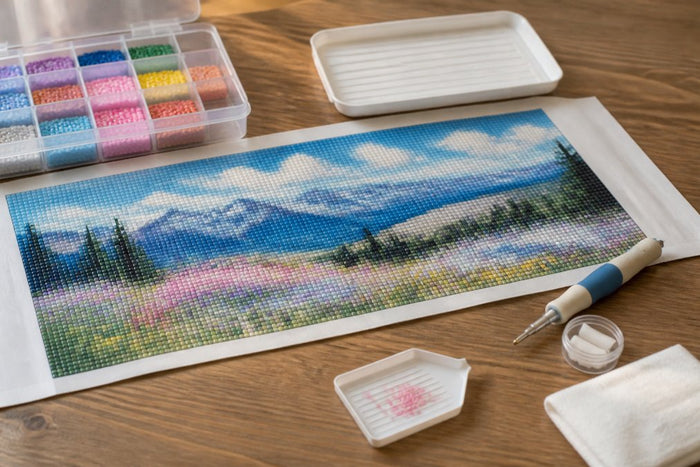
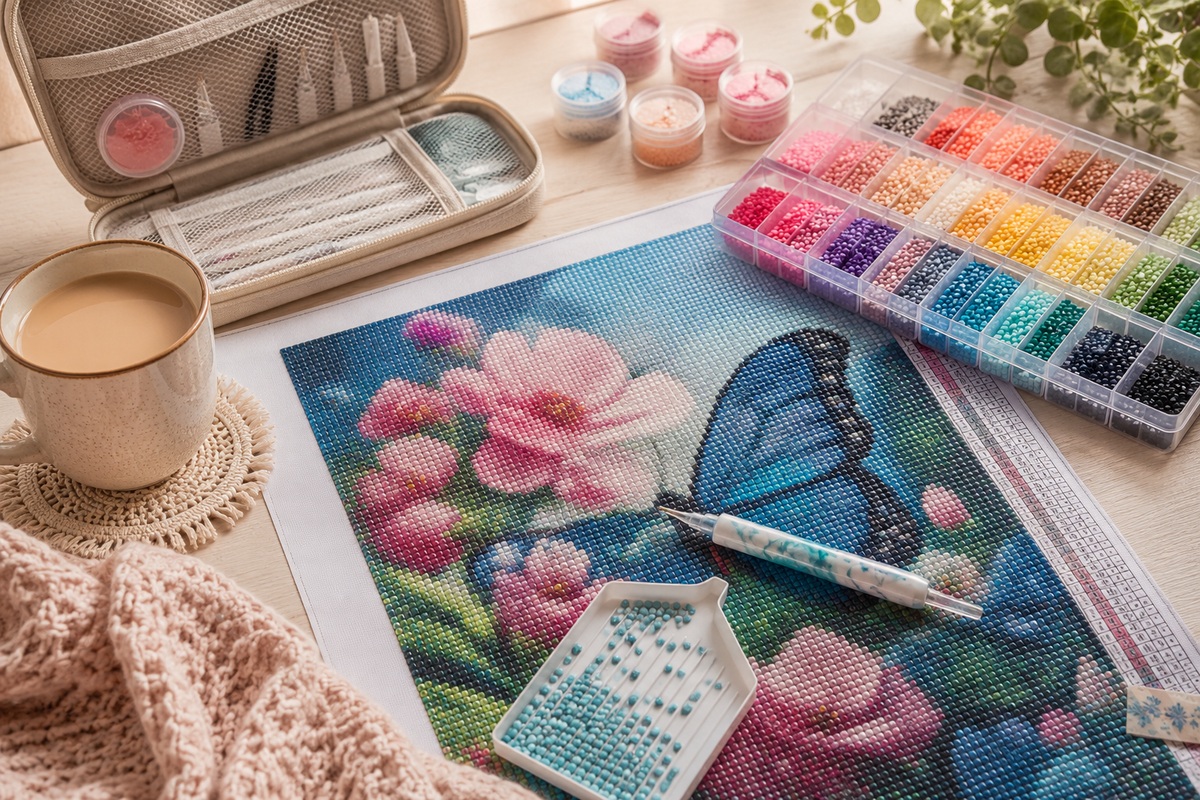
A beginner-friendly diamond painting kit contains the basics you need to start right away: a pre-printed adhesive canvas, resin drills, an applicator pen, wax, and a tray. Understanding what each item does before you start will save you a lot of frustration.
The Pre-Printed Adhesive Canvas and Color Chart
The canvas is printed with a color-coded pattern and covered in a protective film. Each symbol matches one drill color, and the chart (or legend) that comes with the kit links every symbol to its drill. Jeanne Argent kits use DMC-coded drills, so the code on each drill bag matches the code on the chart. Before you start, spend a few minutes studying the chart and finding the most common colors in your design, and take a photo of it with your phone so you can check codes without shuffling papers.
Keep the protective film in place until you're ready to work a section; the window method below explains how.
Applicator Pens and Multi-Placers: Finding What Works for Your Hand
The applicator pen (also called a drill pen or stylus) is the tool you'll hold for the whole project. Press its tip into the wax pad and it picks up one drill at a time, then releases it as soon as the drill touches the sticky canvas. Many pens are double-ended or come with swappable tips: a fine single placer for detail work and edges, and a wider multi-placer that picks up a short row of drills at once for large areas of a single color. Multi-placers speed up big color blocks but are awkward in busy sections with frequent color changes, so most crafters switch between both.
The basic plastic pens included in many kits are light and thin, which some hands find tiring during long sessions. If you plan to paint for more than a short stretch at a time, a pen with a more substantial grip is worth it. Our resin drill pen is made from solid resin and comes with two threaded metal tips, one fine single placer and one wider multi-placer.
The Diamond Tray
The grooved tray is used to organize and flip your drills. Pour a small amount of one color into the tray and give it a gentle shake; the grooves help the drills settle flat side down and facet side up, ready for the pen. It's a simple trick that saves a lot of time compared with turning drills over one by one. Our guide on how to use diamond painting trays covers more tray techniques.
Tweezers and a Light Pad
The drills are tiny, and you will occasionally place one in the wrong spot. Fingers are too clumsy to remove a drill from the adhesive, but small-headed tweezers are perfect for it: gently pry the drill up, return it to the tray, and place the correct color.
A light pad is an optional extra. This thin LED panel sits under the canvas and lights the symbols from behind, making them far easier to read, which helps most with darker or more complex designs and long sessions.
Complete Beginner Kit Checklist
- Pre-printed adhesive canvas: color-coded with symbols
- Resin drills: sorted in small labeled bags
- Applicator pen: single tip or double-ended with a multi-placer
- Wax pad: creates tack on the pen tip
- Grooved tray: flips drills right side up
- Tweezers: for removing and repositioning misplaced drills
- Chart or symbol legend: matches symbols to drill colors
If your kit is missing something, or you want upgrades like rulers, trays and organizers, browse our diamond painting tools and accessories. For a deeper look at each tool, read our guide to the best tools for diamond painting.
How to Choose Your First Diamond Painting Kit
Choosing the right kit is the most important decision you'll make before your first drill hits the canvas. A canvas that's too large or a design that's too complex is the most common reason first projects get abandoned. Look at five things: size, coverage, canvas quality, design, and drill shape (covered in the next section).
Choosing the Right Canvas Size
For your first project, small and medium sizes are your best friend. A canvas of roughly 30×40 cm to 40×50 cm is detailed enough to look great but not overwhelming, and it lets you learn how to handle drills and find your placement rhythm without committing to a months-long project. Larger canvases hold more drills, which means more detail but also far more sessions to finish.
When you compare listings, check whether the stated size describes the whole canvas or only the drilled design area. Every canvas has a blank border around the design, and you'll want to keep it: it's what you handle while working and what lets you frame the piece later.
Full Drill vs. Partial Drill
In a full-drill kit, the entire design area is covered in drills. In a partial-drill kit, only the main subject is drilled and the background stays printed. Partial kits can feel less intimidating, but full drill gives you the complete sparkling result and teaches consistent placement across a whole canvas. Read more in our comparison of full-drill vs. partial-drill kits.
Canvas Quality and Adhesive
The adhesive layer is what holds every drill in place, so it matters more than beginners expect. When your kit arrives, look for:
- Clear symbol printing: you should be able to tell similar symbols apart without squinting.
- Even, tacky adhesive: the sticky surface should feel uniform across the canvas.
- A sturdy canvas: it shouldn't tear or fray as you handle it.
- Accurate color coding: the symbols and codes on the chart should match the drill bags exactly.
- Consistent drills: drills of a uniform size and shape sit evenly and line up more easily.
Adhesive is also less tacky in a cold room. If your kit has been somewhere chilly, let it warm up to room temperature before you start.
Picking a Beginner-Friendly Design
Choose a design you'll enjoy looking at for a while, with clear sections and larger areas of color. Good first designs have:
- Large, distinct color blocks that are easy to fill without constantly checking the legend.
- Fewer total colors, which means less swapping between bags and fewer mix-ups.
- Bold, simple subjects such as flowers, animals, landscapes, and patterns.
- No fine portrait detail, since realistic faces need large canvases and a lot of precision.
The adult kits in our budget beginner kits collection are full-drill, round-drill designs at 40×40 cm or 40×30 cm, a comfortable size for a first canvas. Once you've finished a kit or two, browse all diamond painting kits or read our guide to premium full-drill kits for your next step.
Round vs. Square Drills: Which Should a Beginner Choose?
Round drills leave small gaps and sparkle more; square drills create a seamless mosaic with crisper detail. This is one of the first choices you'll make when buying a diamond painting kit.
Round Drills: The Beginner's Best Friend
Round drills are circular with a faceted top, and they're the type most beginners meet in their first kit. They have no orientation, so they look right no matter how they land on the canvas. You never need to rotate or align them, which makes placement faster and less fussy, and a slightly off-center drill still looks nearly perfect from a normal viewing distance.
That's why round drills are the usual recommendation for a first project. They let you focus on learning the basic mechanics, finding your rhythm, and discovering whether you enjoy the hobby, without the added challenge of precise alignment. Square drills aren't impossible for a beginner, but crooked rows and visible gaps between misaligned squares can make new crafters feel they're doing something wrong when they're simply still learning.
Square Drills: For When You're Ready to Level Up
Square drills fit together snugly with no gaps, giving sharp lines and a clean, full mosaic look when viewed from a distance. Lining them up perfectly takes some practice, but the finished artwork is very rewarding.
Round vs. Square: Quick Comparison
| Feature | Round Drills | Square Drills |
|---|---|---|
| Ease of placement | Very easy | Requires precision |
| Alignment needed | No orientation needed | Edges must line up |
| Sparkle | More glitter effect | Slightly less sparkle |
| Finish | Small gaps between drills | Seamless mosaic |
| Speed | Faster to complete | Slower, more deliberate |
| Best for | Beginners, landscapes, animals | Experienced crafters, portraits |
A good progression is to complete one or two round-drill projects to build confidence and muscle memory, then try a small square-drill project to feel the difference. Our 40 x 50 cm square-drill kits, such as Lakeside Cottage in Spring, are a manageable size for a first square-drill project. Many crafters end up with a favorite, and some enjoy both.
Setting Up Your Diamond Painting Workspace
A tidy, well-lit workspace makes the whole experience more enjoyable and prevents mistakes.
- A flat, hard surface: a dining table, desk, or craft table. Avoid beds and couches, where uneven pressure keeps drills from seating properly.
- Good light: natural daylight or a bright daylight-style lamp, angled so your hand doesn't cast a shadow over the symbols.
- A comfortable posture: sit supported, keep your wrists relaxed, and position the canvas so you aren't hunching over it. Take a short break every 30 to 45 minutes to stretch and rest your eyes.
- Everything within reach: keep your tray, wax, and pen close so you aren't stretching across the exposed adhesive.
How to Flatten a Wrinkled Canvas
Before you place a single drill, flatten your canvas completely. A wrinkled canvas makes drills sit at angles and causes alignment problems later.
- Book press method: roll the canvas the opposite way, then lay it face down under a stack of heavy books for several hours.
- Warm iron method: use a low-heat iron on the reverse side only, never on the adhesive side, to relax the fibers.
- Tape the edges: washi tape over the sticky borders keeps dust, hair, and fibers off the edges, and taping the corners to your table holds a curling canvas flat while you work.
For stubborn folds, see our guide on how to fix a creased diamond painting canvas.
Sorting and Organizing Your Drills
Organization is everything in diamond painting. Drills left in flimsy bags or scattered across the table almost guarantee spills and color mix-ups. A simple routine before you start saves hours of frustration later:
- Sort by code, not by eye. Use the chart to group drills by their number, since some shades look almost identical.
- Label everything. Keep each color in a labeled container or resealable bag; clear containers let you see colors at a glance.
- Work one color at a time. Pour only the color you're placing into the tray and keep the rest sealed.
- Keep the tray safe. Set it near the middle of your table, never at the edge where an elbow can knock it over.
If your drills come in packets, a stand-up organizer keeps them readable. Our Drill Packet Tray, 3D printed in our studio, holds 12 packets on edge like a recipe box so the labels face you. For more systems, read how to organize diamond painting drills.
Step-by-Step Technique: How to Place Your First Diamond Drills
Now for the actual process. Follow these steps and you'll have a rhythm going in no time.
Where to Start on the Canvas
Start in a corner and work in rows, planning your direction so your hand rests on the protective film rather than on exposed glue or freshly placed drills. Many right-handed crafters begin on the left and work to the right, while left-handed crafters often do the reverse. Whether you begin at the top or the bottom is personal preference. Avoid starting in the middle: it makes the canvas harder to manage and exposes more adhesive than you need.
The Row Fill and Window Methods
With the row fill method, you fill the canvas line by line from one edge. It's easy to learn, keeps you organized, and watching rows of sparkling drills fill the canvas is very satisfying.
The window method pairs well with it: peel back only a small section of film at a time, like opening a window on the canvas. The rest of the surface stays protected from dust and hair, which keeps the adhesive clean and sticky on long projects.
Step-by-Step Drill Placement Process
- Prepare your surface. Wipe down the table, lay the flattened canvas on a hard, level surface, and set your tray, wax, and pen within reach.
- Load your pen with wax. Press the pen tip firmly into the wax so a small amount clings inside the tip. Reload whenever drills stop picking up easily.
- Pour drills into the tray. Add a small number of one color and shake gently so they settle facet side up.
- Open a window. Peel back the film over just the area you're about to fill.
- Pick up and place. Touch the pen to a drill, set it on its matching symbol, and press for about a second so it seats. Use the printed grid lines to keep your rows straight.
- Check as you go. A drill sitting higher than its neighbors isn't fully seated, so press it down again. Fix any misplaced drill with tweezers right away, while the adhesive is fresh.
- Cover and press. When you pause, lay the film back over the open section. After finishing a section, press the drills down firmly with your fingertip or a roller.
Common Beginner Mistakes and How to Fix Them
Even experienced crafters made mistakes when they started out. Here are the most frequent diamond painting pitfalls and how to fix them.
Mistake 1: Choosing Too Large or Complex a First Canvas
Many first-timers pick a large, intricate design with tiny details, which can feel overwhelming and end up unfinished. Start with a smaller canvas and a simple pattern (see how to choose your first kit) so you build confidence and enjoy the process.
Mistake 2: Peeling Off All the Protective Film at Once
Peeling the entire film might feel faster, but dust sticks to the exposed glue, your hand drags across the adhesive, and placement becomes inconsistent. Work in small sections and re-cover them when you take a break.
Mistake 3: Working in Poor Lighting
Dim or yellow light makes symbols hard to read, leads to misplaced drills, and strains your eyes. Craft in a bright room and add a daylight lamp, a magnifying lamp, or a light pad. Our tips on avoiding eye strain while diamond painting can help with longer sessions.
Mistake 4: Crooked or Misaligned Drills
A slight tilt, a tiny gap, or an off-center drill is easy to fix early and hard to fix later, because one crooked drill can throw off an entire row. Correct errors as soon as you spot them.
The fix: while the adhesive is still fresh, use fine-tipped tweezers to adjust crooked drills. For square drills, lay a ruler along the edge of a finished row and gently nudge the drills into a straight line; our 3-piece ruler and drill straightener set is made for this job. If you spot empty spaces, see how to fix gaps in a diamond painting.
Mistake 5: Drills That Won't Stay Put
Drills that pop off usually weren't seated properly or went onto adhesive that had collected dust or cooled down. Press each drill firmly as you place it, press down any that sit higher than their neighbors, keep unused areas covered, and work in a room-temperature space. Our guide on why diamond painting drills pop off covers more causes and fixes.
Mistake 6: Running Out of Drills
Before you assume a color is short, check the bags thoroughly, because drills often hide in the folds. Most kits include some extra drills, so compare your bags against the chart before you start, and never throw leftovers away; they're handy for future projects (see how to store diamond painting kits). If you're genuinely short, note the DMC code of the missing color. For round-drill kits, our round replacement drills let you choose your DMC color by number.
Sealing and Finishing Your Diamond Painting
Congratulations, your canvas is complete! Now you need to decide whether to seal it, frame it, or both.
Do You Need to Seal Your Diamond Painting?
Sealing is optional. A well-made canvas with strong adhesive and firmly pressed drills usually holds up well on its own. Sealing is most useful for pieces that will be handled often or displayed without glass, where small movements can loosen drills over time.
Brush-on sealers, such as acrylic varnish or Mod Podge, create a protective layer that fills the small gaps between drills and adds the most hold. Spray sealers go on as a light mist; they're quick and keep more of the natural sparkle because the layer stays thin, but they don't fill the gaps as well.
- Press all drills firmly. Go over the finished canvas with a roller, or even a rolling pin, to push every drill into the adhesive.
- Clean the surface. Use a soft brush or lint-free cloth to remove dust, wax residue, and debris.
- Apply the sealant. Brush it over the whole painting, working it between the drills, or mist on a light, even coat of spray.
- Let it cure. Follow the drying and curing time on your sealant's label, and keep the painting somewhere dust-free until it's done.
For a full comparison of sealing methods, read our guide on how to seal diamond paintings.
Framing Your Finished Diamond Painting
Framing is one of the best ways to protect and display your work, shielding it from dust, moisture, and accidental bumps. A frame with glass or acrylic works well, and a shadow box has the depth to accommodate the raised surface of the drills. Mount the canvas with acid-free tape or mounting corners rather than glue or staples.
It's tempting to cut off the blank border around your canvas, but don't. Leave it intact so you can frame the piece properly; a mat or frame hides the edges. Hang the finished piece away from direct sunlight and damp rooms. Our guide on how to frame diamond painting artwork walks through the options.
Why Diamond Painting Is So Relaxing
Many people describe diamond painting as therapeutic. The repetitive motion of picking up and placing drills keeps your attention on the task in front of you, which can feel calm and meditative, and a lot of crafters pair it with music, a podcast, or an audiobook.
Finishing a piece, even a small one, also brings a real sense of accomplishment. Placing the final drill and seeing the whole image come together is a confidence boost for kids and adults alike.
Frequently Asked Questions About Diamond Painting for Beginners
How long does a beginner diamond painting take to complete?
It depends on the canvas size, the number of colors, and your pace. A small or medium canvas is realistic to finish over a number of relaxed sessions, often spread across a few weeks, while large canvases can take much longer. Starting small is the surest way to actually finish your first one.
What is the best canvas size for a first diamond painting?
A small to medium canvas, roughly 30×40 cm to 40×50 cm, is detailed enough to look great without being overwhelming.
Are round or square drills better for beginners?
Round drills are easier and faster to place because they need no alignment. Square drills give the sharpest detail but take more precision, so most beginners start with one or two round-drill projects before trying square.
Can kids do diamond painting?
Yes. It's a great way to build focus and fine motor skills. Choose simpler designs for younger children and supervise them, since the drills are small. Our budget beginner kits collection includes framed kits made for kids.
Do I need to seal my diamond painting?
Not always. Sealing is recommended if you plan to display the piece without glass or if it will be handled often.
What happens if I run out of drills?
Check the bags and their folds first, since drills often hide there. If you're genuinely short, note the missing color's DMC code and order a matching refill.
Diamond Painting for Beginners: Key Takeaways
- Diamond painting is a mosaic craft where you apply tiny resin drills to a color-coded adhesive canvas; no artistic talent is required.
- Every kit starts with a canvas, drills, an applicator pen, wax, and a tray.
- Start small and simple: a 30×40 cm to 40×50 cm full-drill canvas with bold color blocks is ideal for a first project.
- Choose round drills first; they're more forgiving, faster, and need no alignment.
- Sort drills by DMC code and work one color at a time to avoid mix-ups.
- Never peel all the film at once: work in windows to keep the adhesive clean and sticky.
- Fix mistakes early with tweezers while the adhesive is fresh.
- Sealing is optional but recommended for pieces displayed without glass.
Shop the Kits and Tools in This Guide
Ready for your first canvas? Start with our budget beginner kits for full-drill, round-drill designs sized for a first project, or browse all diamond painting kits when you're ready for something bigger. Drill pens, trays, rulers, and storage are in tools and accessories, and the Drill Packet Tray is 3D printed in our studio in Alexander, North Carolina. Shipping within the US is $5.95 on orders under $20, $8.95 from $20 to $99.99, and free on orders of $100 or more.