10 August 2026
Best Tools for Diamond Painting Artists
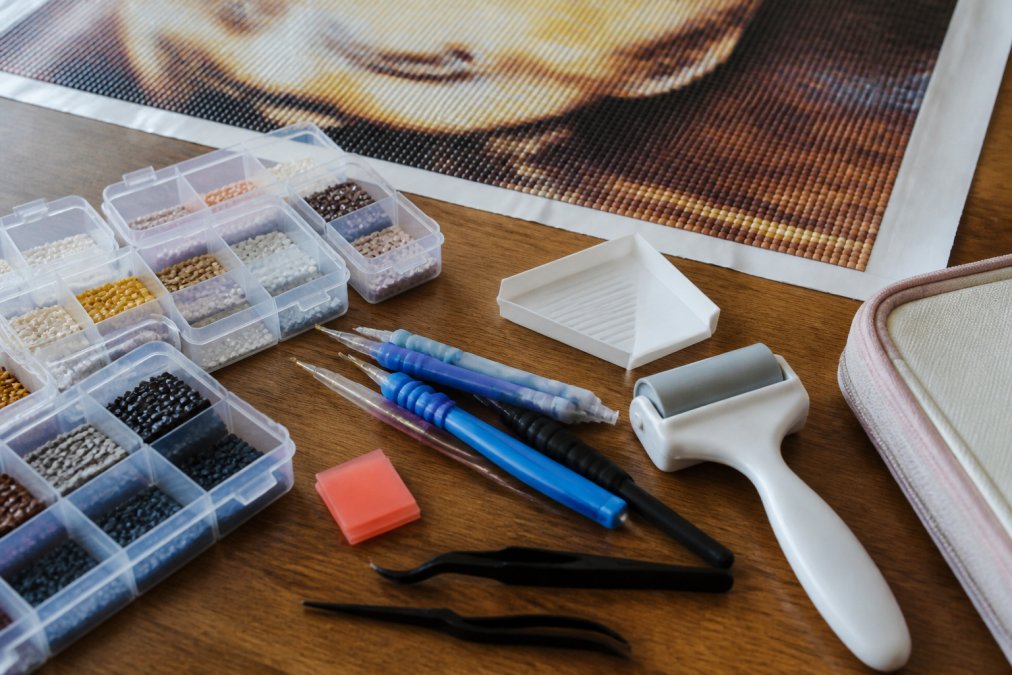
Table of Contents
- Essential Diamond Painting Tools for Beginners
- Diamond Painting Pens and Multi-Placers
- Best Diamond Painting Storage Containers
- Diamond Painting Light Pad Benefits
- Workspace Setup and Ergonomic Accessories
- Diamond Painting Tips for Beginners
- Tool Maintenance and Longevity
- Conclusion
Last Updated: August 11, 2026
Essential Diamond Painting Tools for Beginners
Diamond painting transforms a blank canvas into sparkling artwork through meticulous drill placement, but success depends entirely on having the right tools. Without proper equipment, even the most beautiful design becomes frustrating, drills slip off the adhesive, your hand cramps after 30 minutes, and colors get hopelessly mixed. The best tools for diamond painting artists aren't just accessories; they're the foundation that separates a rewarding creative experience from abandonment mid-project.
At Jeanne Argent Atelier, we've designed premium diamond painting kits that include specialized drill pens and trays specifically engineered to make the work easier. When you're choosing tools for diamond painting, you're really choosing between projects you'll complete and projects gathering dust. The difference comes down to ergonomics, precision, and organization, three areas where most beginner kits fall short.
Starting with diamond painting requires understanding what each tool category does. Your pen delivers drills to the canvas. Your storage system keeps colors organized and accessible. Your lighting eliminates eye strain. Your workspace accessories prevent hand fatigue and misalignment. Each element compounds: add one weak link, and the entire experience deteriorates. This guide covers the essential categories that separate amateur results from gallery-worthy finished pieces.
Quick Picks
- Best All-in-One Solution: Jeanne Argent Atelier premium kits with specialized drill pens and trays included
- Best for Speed: 7-Piece Diamond Painting Pen Multi Placer Set with ergonomic grip and multiple applicator heads
- Best for Organization: Stackable Diamond Painting Trays with lids and stoppers to prevent spills
- Best for Precision: Diamond Painting Straightening Tool for correcting misaligned drills
Diamond Painting Pens and Multi-Placers
The drill pen is your primary tool, and choosing the right one dramatically affects both speed and comfort. A standard single-head pen places one drill at a time, which works for detail areas but becomes tedious across large color blocks. Multi-placer pens, featuring 1, 3, 6, and 9-head options, let you place multiple drills simultaneously, cutting placement time by 60% or more on uniform sections.
The 7-Piece Diamond Painting Pen Multi Placer Set represents the efficiency standard for serious artists. Its ergonomic thick grip reduces hand fatigue during extended sessions, while the durable crystal resin construction and everlasting alloy applicator heads withstand hundreds of hours of use. The deep groove design in the heads holds more wax, minimizing how often you need to reapply adhesive to your pen tip. This matters more than it sounds, constant wax reapplication interrupts your workflow and reduces precision.
What separates quality pens from budget alternatives is the applicator head design. Premium heads maintain consistent wax contact, ensuring drills adhere reliably to the canvas. Cheap pens develop worn or uneven heads within weeks, causing drills to slip or fail to pick up at all. The multi-placer set's correction head solves another common problem: when you place a drill slightly off-target, the correction head lets you reposition it without damaging surrounding drills.
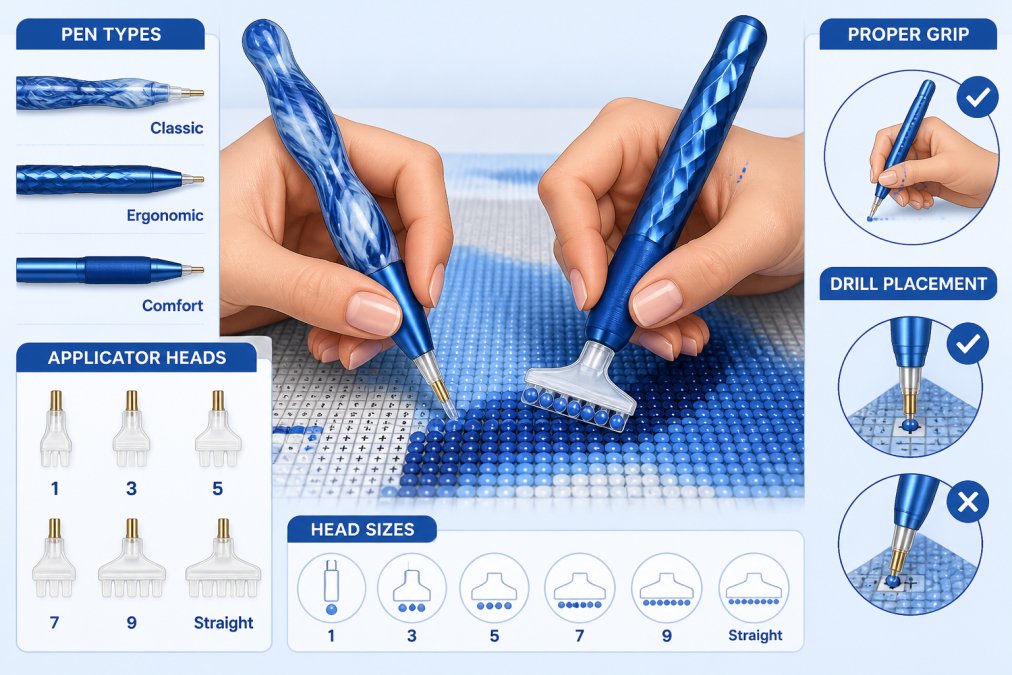
One practical consideration: multi-placers require practice. Beginners often apply too much pressure, causing multiple drills to stick together or the pen to drag across adjacent drills. Start with the 1-head pen for detail work, graduate to the 3-head for medium sections, and use the 6 or 9-head only for large solid-color areas. This staged approach builds muscle memory without frustration.
Adhesive choice affects pen performance significantly. Standard wax works adequately but requires frequent reapplication, especially in warm conditions where it softens. Diamond Painting Putty offers a superior alternative, it holds drills more securely and needs refilling far less often. If you're doing detailed work or working in a warm environment, putty transforms the experience from tolerable to genuinely enjoyable.
Best Diamond Painting Storage Containers
Organization determines whether you'll complete a project or abandon it halfway through. Mixing even two colors creates sorting chaos that kills momentum. The Diamond Painting Storage Box with 28 compartments solves this through clear plastic construction and individual snap-lid compartments. You see every color instantly, preventing the common mistake of thinking you're out of a color when it's simply lost in the pile.
The 28-compartment design accommodates most standard kits, which typically include 20-40 unique colors. Compartments are sized appropriately, large enough to hold useful quantities without being so spacious that drills shift around during transport, but small enough to prevent multiple colors from mixing if a lid fails. The clear plastic lets you identify colors from across the room, reducing setup time when you're ready to work.
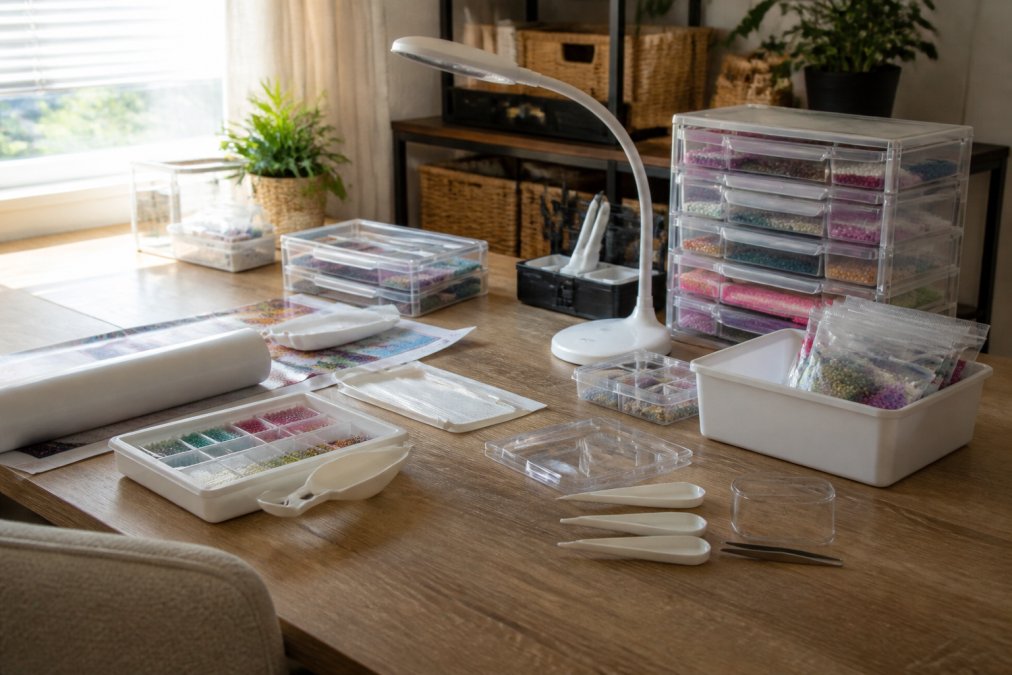
Stackable Diamond Painting Trays with lids and stoppers serve a different purpose: they're your active workspace organizers. Rather than storing all your drills in compartments, you load colors into trays as you work, keeping only the colors needed for your current session accessible. The extended spout design lets you pour drills back into storage containers without spilling, which is genuinely useful when you're juggling multiple colors simultaneously. The stoppers prevent accidental spills when trays are stacked or moved between rooms.
A practical workflow combines both: store your complete drill collection in the 28-compartment box, then load 4-6 active colors into trays during your session. This prevents color mixing while keeping your workspace uncluttered. The trays' stackable design means you can work on multiple projects simultaneously without creating separate storage systems for each one.
| Storage Solution | Best For | Key Advantage | Limitation |
|---|---|---|---|
| 28-Compartment Box | Complete collection storage | Clear visibility of all colors | Fixed compartment sizes |
| Stackable Trays | Active workspace | Spill prevention and portability | Requires compartment box for long-term storage |
| Combination System | Serious artists | Complete organization workflow | Requires investment in both systems |
Diamond Painting Light Pad Benefits
Eye strain destroys the meditative quality that makes diamond painting rewarding. Working under standard room lighting forces you to squint at symbol details, especially on canvases with dense patterns or small symbols. A dedicated light pad eliminates this struggle entirely.
Light pads provide even, shadow-free illumination directly beneath your canvas, making symbols crisp and colors distinct. LED light pads offer the best experience, they run cool, consume minimal electricity, and last for thousands of hours. The even light distribution prevents the harsh shadows that create eye fatigue, allowing you to work comfortably for 2-3 hours without strain.
The ideal light pad for diamond painting offers adjustable brightness, since different lighting conditions and canvas densities require different intensity levels. A pad that's too bright creates glare; one that's too dim defeats the purpose. Look for pads with at least three brightness settings. USB-powered pads offer convenience if your workspace has nearby outlets, while battery-powered options provide flexibility for crafting in different locations.
Positioning matters as much as the light itself. The pad should sit directly beneath your canvas, angled slightly toward you. This angle prevents light reflection on the canvas surface while keeping the illuminated symbols clearly visible. Many crafters position the pad on a stand or use a desk lamp with adjustable arms to achieve proper angle and height.
Workspace Setup and Ergonomic Accessories
Diamond painting sessions routinely stretch to 2-3 hours, and improper workspace setup creates repetitive strain that discourages continued crafting. Your hands, wrists, and neck bear the burden of maintaining precision while seated, making ergonomic accessories essential rather than optional.
Proper desk height positions your canvas at eye level when you're seated with relaxed shoulders. Your elbows should rest at 90 degrees, with forearms parallel to the floor. Many crafters find that a standard desk is too high, requiring a cushion to elevate their chair or a lap desk to lower the canvas. Experiment until you find the position where you can work for 30 minutes without neck or shoulder tension.
Wrist support becomes critical during extended sessions. A padded wrist rest positioned beneath your working hand reduces strain on the tendons that control fine motor movements. Some crafters use a small pillow or rolled towel; others invest in ergonomic wrist supports designed specifically for detailed work. The goal is supporting your wrist without restricting movement.
Hand positioning affects both comfort and precision. Keep your wrist relatively straight rather than bent upward or downward. Your fingers should do most of the work, not your entire hand. This positioning distributes effort across multiple muscle groups rather than concentrating strain on your wrist and forearm. Taking 5-minute breaks every 30 minutes, even just stretching your hands and rotating your wrists, prevents cumulative fatigue.
A cover minder or canvas cover prevents dust and debris from settling on uncovered canvas sections. This simple accessory prevents you from accidentally placing drills on dusty areas, which reduces adhesion and creates visible imperfections. Washi tape serves the same purpose and costs less, though it's less elegant than a dedicated cover.
Diamond Painting Tips for Beginners
Starting your first project successfully sets the tone for your entire diamond painting journey. Most beginners rush through setup and encounter preventable problems that create frustration. Taking 10 minutes for proper preparation prevents hours of rework.
Before placing your first drill, review the symbol key thoroughly. Different kits use different symbol systems, some use numbers, others use letters or shapes. Spend a moment confirming you understand which symbol corresponds to which color. This single step prevents the common mistake of placing entire sections in the wrong color.
Work from the center of your canvas outward rather than starting at the edges. This approach prevents the canvas from curling as you place drills, which creates gaps and misalignment in already-completed sections. The center-outward method also builds momentum, you see progress accumulating toward all edges simultaneously.
Place drills in horizontal rows or small sections rather than jumping randomly across the canvas. This systematic approach prevents the disorientation that comes from losing track of which symbols you've completed. Many experienced painters work in 2-inch square sections, completing each section fully before moving to the next one.
Maintain consistent pressure when placing drills. Too much pressure pushes drills too deeply into the adhesive, making them difficult to correct if misaligned. Too little pressure leaves them sitting loosely, vulnerable to falling off. Light, deliberate pressure ensures secure placement without excessive force.
Tool Maintenance and Longevity
Quality tools represent a meaningful investment, and proper maintenance extends their lifespan significantly. A well-maintained pen remains reliable for hundreds of hours of use, while neglected tools deteriorate within weeks.
Clean your pen tip regularly during work sessions. Wax or putty accumulation on the applicator head reduces adhesion quality, causing drills to fail to stick properly. Wipe your pen tip on a damp cloth every 20-30 minutes of work. This 10-second maintenance step prevents the frustration of drills suddenly refusing to adhere.
Store adhesive-coated pens in a cool location away from direct sunlight. Heat softens wax and putty, degrading their adhesive properties. If your pen becomes too warm or the adhesive becomes gooey, refrigerate it for 15 minutes to restore proper consistency. Extreme cold makes adhesive brittle, so avoid freezing, cool room temperature is ideal.
Replace pen tips when they become visibly worn or develop uneven edges. Worn applicator heads create inconsistent contact with drills, causing placement failures. Quality pens like those included with Jeanne Argent Atelier kits feature replaceable heads, extending the pen's useful life indefinitely. Budget pens with permanently attached heads require complete replacement when the tip wears out.
Clean your light pad monthly by wiping the surface with a soft, dry cloth. Dust accumulation reduces brightness and creates shadows. Never use liquid cleaners on LED pads, as moisture can damage the electrical components.
Store completed projects in a dry location away from direct sunlight. UV light fades the canvas and can yellow the adhesive over time. A closed storage box or plastic container protects finished artwork from dust, humidity, and light exposure. If you plan to display finished pieces, consider using UV-protective glass or acrylic to prevent fading.
Diamond painting's appeal lies in the meditative focus and tangible accomplishment of transforming a blank canvas into sparkling art. That experience depends entirely on having tools that support rather than hinder your progress. Jeanne Argent Atelier premium kits include specialized drill pens and trays designed specifically to make the work easier, eliminating the frustration that causes most beginners to abandon projects. Combined with proper lighting, ergonomic workspace setup, and quality storage solutions, you create an environment where completion becomes inevitable rather than aspirational. Start with the right tools, and you'll discover why diamond painting transforms from a novelty craft into a genuinely rewarding creative practice.
Frequently Asked Questions
What are the essential tools needed to start diamond painting?
Begin with a diamond painting pen, wax or putty for adhesion, sorting trays, and storage containers for your drills. A light pad significantly improves visibility and reduces eye strain during long sessions. A straightening tool helps correct misaligned diamonds for a polished finish. Quality pens with ergonomic grips are crucial to prevent hand fatigue, especially for beginners working on larger projects.
How do diamond painting light pad benefits improve your work?
A light pad illuminates your canvas from beneath, making symbols and gridlines sharper and easier to read. This reduces squinting, improves accuracy, and speeds up drill placement. Better visibility means fewer mistakes and less frustration, which is especially valuable during extended crafting sessions. Many artists find that a light pad transforms their experience, allowing them to work comfortably for hours without eye strain.
What's the best way to organize and store diamond painting drills?
Use best diamond painting storage containers like compartmentalized boxes or stackable trays with lids. Clear plastic containers let you see colors at a glance, reducing time spent searching. Label each compartment by color or number code. Stackable designs save space and keep your workspace tidy. For finished canvases, extendable carrying tubes protect rolled artwork from creases and dust damage during storage or transport.
Why do diamond painting tips for beginners emphasize tool quality?
Quality tools reduce hand strain, speed up your process, and improve final results. Ergonomic pens with thicker grips prevent fatigue during long sessions. Multi-placers with multiple drill heads let you place several diamonds at once, cutting work time significantly. Reliable adhesive, whether premium wax or putty, keeps drills secure so they don't pop off the canvas. Better tools make the hobby enjoyable rather than frustrating, especially for newcomers.
This article was written using GrandRanker