How to Frame a Diamond Painting: A Step-by-Step Guide
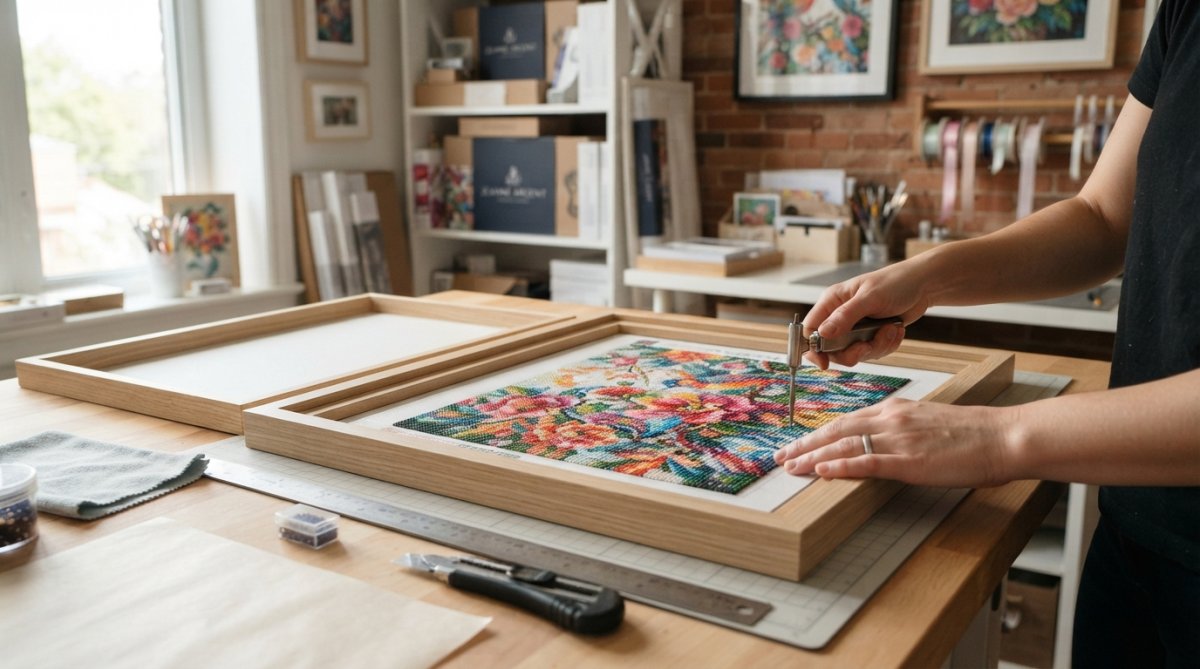
You spent weeks placing drills, so the last step deserves a little care. Framing a diamond painting is not difficult, but the order matters. A canvas framed before it lies flat, or pressed under glass that touches the drills, shows every shortcut once it is on the wall.
We're Jeanne Argent, a small studio in Alexander, North Carolina that sells full-drill diamond painting kits. This guide covers the whole job in seven steps, from checking the canvas to hanging it, followed by frameless options, odd-shaped canvases, and how to keep a framed piece looking good.
Quick answer: Flatten the finished canvas, measure the drilled area, and trim the blank border so a small margin remains. Stick the canvas to acid-free backing board with double-sided tape, then fit it in a frame deep enough that any glass or acrylic sits off the drills on a mat or spacers. Close the back with the frame's tabs and hang it with hardware rated for its weight.
What you'll need
| Item | What it does | Tip |
|---|---|---|
| Tape measure or ruler | Measures the drilled area | Measure in inches if you plan to buy a US frame |
| Craft knife or sharp scissors, plus a straightedge | Trims the blank border | A fresh blade cuts cleanly without fraying |
| Acid-free backing board | Holds the canvas flat and supports it | Acid-free foam board or mat board both work |
| Double-sided tape | Fixes the canvas to the board | Use archival or acid-free tape for pieces you want to keep |
| Frame or stretcher bars | Displays and supports the piece | Check the frame's depth before you buy |
| Glass or acrylic (optional) | Keeps out dust and fingers | UV-filtering versions add sun protection |
| Mat or frame spacers | Keeps glazing off the drills | Needed whenever you use glass or acrylic |
| Hanging hardware | Mounts the frame on the wall | Rated for more than the framed weight |
| Sealer (optional) | Helps hold drills and resists dust | Decide before mounting, not after |
Hold off on buying the frame until you reach Step 5. The size that matters is the size of your finished, trimmed canvas on its board, and that is easy to get wrong if you shop from the kit label.
Step 1: Inspect and flatten the canvas
Lay the canvas face up on a clean, flat table under good light and look across the surface at a low angle. Drills that sit higher than their neighbors throw small shadows, and rows that drifted show up as a wobble. Press raised drills back down, and use a ruler edge or a drill straightener to nudge crooked rows into line while the canvas adhesive still lets them move.
Loose drills and air bubbles
Run your palm lightly across the surface. A soft spot usually means air trapped under the canvas. Work it toward the nearest edge with a roller or the back of a spoon, slowly, because heavy pressure can crack drills or push them out of line. If a drill will not stay put, add a very small dot of clear craft glue with a toothpick and let it dry completely before you continue.
If drills keep lifting across a whole area, the cause is usually the canvas, not the framing. Our guide on why diamond painting drills pop off explains the causes and fixes, and how to fix gaps in a diamond painting covers empty spots you notice now.
Creases and curled corners
Canvases ship rolled, and a crease or curl will show through glass and stop the canvas from sitting flat on its backing board. It also puts uneven pressure on the drills over the bump. If your canvas still has creases or curled corners, follow our guide to fixing a creased diamond painting canvas before you go any further. Every later step depends on a flat surface.
Step 2: Measure the canvas and trim the border
Measure the drilled area
With the canvas flat, measure from the outer edge of the drills on each side, not the edge of the blank canvas. Write down the width and height in inches, then measure again. A half-inch error means the piece either slides around in the frame or will not fit at all.
Many kits are sized in centimeters, which do not line up neatly with US frames. A 40x50 cm canvas is about 15.7 by 19.7 inches, close to a 16x20 inch frame but not the same. The size on the label may also include the blank border, so measure the finished piece rather than trusting the box.
Decide how much border to keep
How much blank canvas to leave depends on how you plan to display it:
- In a frame with a mat: leave a margin of blank canvas, around a half inch, so the tape has something to grip and the mat window can rest on bare canvas rather than drills.
- In a frame without a mat: leave at least a quarter inch of blank canvas so the frame's lip covers bare canvas instead of hiding the outer row of drills.
- Wrapped on stretcher bars or a panel: trim very little. You need enough canvas to fold around the depth of the bars and reach the back for staples or tape.
Cut conservatively. You can always trim more later, but you cannot add canvas back.
Make the cut
Use a sharp craft knife against a straightedge and cut in one smooth pass instead of sawing back and forth. Never cut flush against the drills, because edge drills with no canvas around them loosen and fall off during handling. On square-drill paintings, check that each cut runs parallel to the rows, since a slightly angled edge is obvious once the piece is framed. If the cut edge frays, run a thin line of clear fabric glue along it and let it dry.
Step 3: Seal the canvas, if you want to
Sealing is optional. A clear sealer helps hold drills in place and makes the surface easier to dust, which matters most if you plan to display the piece without glass, but it can also change the look of the drills. If you decide to seal, do it now, before mounting, and let it cure fully. Our guide on how to seal diamond paintings covers which sealers to use, how to apply them without streaks, and when you can skip the step.
Step 4: Mount the canvas on a backing board
Mounting gives the canvas a rigid, flat support and gives the frame something solid to hold. Use acid-free board, either acid-free foam board or mat board. Ordinary cardboard and standard foam board can contain acids that may yellow the canvas over the years.
- Cut the board to the size of the trimmed canvas, or a little larger if you plan to add a mat or want blank board showing around the canvas. You will size the frame to this board in Step 5.
- Lay the canvas face up on the board and center it. Check that the rows run square to the board edges.
- Fold back one half of the canvas and apply double-sided tape to the board: a strip along each edge plus two or three across the middle, or parallel strips 3 to 4 inches apart. Lay that half down, then repeat with the other half.
- Press the canvas firmly from the center outward so no air gets trapped.

Double-sided tape is the best choice for most pieces because it can be undone if you ever need to remount. For very large canvases, a thin bead of craft adhesive around the perimeter adds hold, used sparingly. Never use hot glue or super glue, which bond permanently and damage the canvas if you try to remove them, and avoid spray adhesive and contact cement, which can leave residue and discolor drills.
Mounting cannot rescue a canvas whose own glue layer is failing. If you want to know why some canvases hold drills better than others, read why canvas adhesive quality matters.
Step 5: Choose the frame size and style
Now measure the mounted board. That is the frame opening you need. Standard US frame sizes include 8x10, 11x14, 16x20, and 20x24 inches, and square frames are easy to find in common sizes. If your board matches one, a ready-made frame will do. If not, you can trim the board to a standard size when there is enough blank margin, add a mat to fill the gap, or go custom.
| Frame choice | Best for | Keep in mind |
|---|---|---|
| Exact fit, no mat | Modern, minimal displays | Needs precise trimming and enough depth |
| Larger frame with a mat | Traditional rooms and canvases between standard sizes | The mat also holds glass away from the drills |
| Floating frame | Showing the canvas edges | Needs a gap around the board |
| Custom frame | Odd sizes and special pieces | Costs more and takes longer, but fits exactly |
Ready-made, thrifted, or custom
Ready-made frames are the practical choice for most finished pieces. They cost less, you can buy them today, and they come in wood, metal, and plastic finishes. Thrift stores are worth a look for a first project, since you can replace the glass or backing if needed. Custom framing lets you choose the molding, mat, glazing, and backing and fits any size, but it costs considerably more and you will wait for it.
Check the depth
Standard frames are built for paper prints. A finished diamond painting is thicker, and a full-drill canvas has drills across the whole surface, so look at the depth of the frame's rabbet, the recess the artwork sits in. It has to hold the glazing, any mat or spacers, the canvas, and the backing board, with the back still closing flat.
Step 6: Choose glass, acrylic, or no glazing
Whether to cover the painting comes down to where it will hang. Here is how the options compare:
| Option | Strengths | Drawbacks | Good for |
|---|---|---|---|
| Glass | Very clear, resists scratches, does not yellow | Heavy, can shatter, reflections can hide the sparkle | Permanent displays in calm rooms |
| Acrylic | Light and shatter-resistant | Scratches more easily and can yellow slightly after years of sun | Large pieces and homes with kids or pets |
| UV-filtering glass or acrylic | Cuts the ultraviolet light that harms colors and materials | Costs more | Rooms with strong daylight |
| No glazing | Shows the full sparkle; lightest and cheapest | Dust settles on the drills and the surface is exposed | Sealed canvases in low-traffic rooms |
Glass or acrylic makes sense in kitchens, children's rooms, hallways, and anywhere near a window. Direct sun fades colors over time, so a piece near a window gains the most from UV-filtering glazing. Going without glazing shows off the drills best, and a sealed canvas copes better with dust.
If you do use glazing, it must not touch the drills. Pressure from glass can shift drills or work them loose over time. A mat or frame spacers hold the glazing a little way off the surface, and the gap adds a sense of depth too.
Step 7: Assemble the frame and hang it
- Clean both sides of the glass or acrylic with a lint-free cloth. Anything left on the inside gets sealed in.
- Lay the frame face down and add the glazing, then the mat or spacers, then the mounted canvas, face down and centered.
- Set the frame's backing in place. If the canvas slides around, the opening is too big, so add a filler board or a mat to hold it snug. If it will not go in without force, recheck your measurements rather than pushing.
- Bend in the frame's tabs or points to close the back, then give the frame a gentle shake. Nothing should move.

Diamond paintings weigh more than they look once you add backing, glass, and a frame. Weigh the finished piece (stand on a bathroom scale holding it, then subtract your own weight) and choose hardware rated above that. A small, light frame can hang from a sawtooth hanger, while larger frames need D-rings and picture wire. Fix into a wall stud where you can, or use wall anchors made for your wall type, and spread a large or heavy frame across two hanging points.
Use a level, and hang the piece so its center sits at eye level. Galleries commonly place the center about 57 to 60 inches from the floor. Keep heavy frames away from spots over a bed or sofa where a fall could hurt someone.
Framing without a frame: stretcher bars and canvas wraps
A gallery-style wrap shows the drills with no glare and no frame edge. It works best when the design fills the canvas, because a small design with a wide blank border looks unfinished on the sides.
Choosing stretcher bars
Stretcher bars are sold by length at craft and art stores, so you can build a frame to fit the drilled area plus whatever blank edge you want on the sides. Standard bars are about three-quarters of an inch deep. For large canvases, heavier bars or a center brace help prevent sagging. A framing shop can cut bars for odd sizes.
Stretching the canvas
There are two common ways to do it:
- Over a ready-made stretched canvas or wood panel. Buy a blank stretched art canvas or panel the size of your drilled area, cover the face with double-sided tape, and press the diamond painting onto it from the center out. Fold the blank border around the sides and staple or tape it to the back.
- Directly onto stretcher bars. Assemble and square the bars, lay the canvas face down, and center the bars on it. Fold the border over the back and staple at the middle of each side first, then work toward the corners, placing staples every 2 to 3 inches. Pull the canvas taut as you go, but not so hard that the bars bend or the canvas wrinkles. Fold the corners neatly, like wrapping a gift.

When you are done, look across the surface at an angle. Wrinkles or slack areas mean uneven tension, so pull the nearest staples and redo that section. Add a sawtooth hanger or D-rings and wire to the bars, and the piece is ready for the wall.
How to frame an odd-shaped diamond painting
Round, oval, hexagonal, and irregular designs need a different plan, because standard frames are rectangles.
- Canvas wrap on a cut panel: stretch or mount the canvas on a panel or stretcher frame cut to the shape, or to a rectangle that contains it. This works best when the design reaches the edges.
- Shaped mat in a standard frame: mount the canvas on a rectangular board and have a framer cut a mat window that follows the design, such as a circle for a round mandala. The frame itself stays a standard size.
- Full custom framing: a framer can build a frame and mat around almost any outline. It is the most expensive option and takes the longest, but it suits a special piece or a gift.
Keeping a framed diamond painting looking good
- Light: hang it out of direct sun. If it has to go near a window, use UV-filtering glazing.
- Humidity and heat: skip bathrooms, basements, and attics, where humidity and temperature swing. Those swings make the canvas move and strain the adhesive.
- Dust: wipe glazing with a soft, dry cloth every few months. If you need a cleaner, spray it on the cloth, never on the glass, so it cannot seep under the frame edge. Dust an unglazed canvas with a soft, clean brush.
- Check-ups: look the piece over every six months or so for loose drills, dust inside the frame, or a loose hanger.
Not ready to hang everything you have finished? Our guide to storing finished diamond paintings explains how to keep them flat and safe until you frame them.
Common framing mistakes
- Framing a creased canvas. Bumps show through glass and stress the drills. Flatten first.
- Trimming too much. Cutting into the margin leaves nothing for the tape to grip and loosens the edge drills.
- Letting glass touch the drills. Use a mat or spacers every time.
- Buying the frame first. Measure the trimmed, mounted canvas, not the kit label.
- Using non-archival materials. Acidic board and tape can yellow the canvas over the years.
- Using permanent glue. Hot glue and super glue make the piece impossible to remount without damage.
- Stretching unevenly. On stretcher bars, staple opposite sides in turn, starting at the centers.
- Undersized hanging hardware. Weigh the framed piece and choose hardware rated above it.
Frequently asked questions
Do you put glass over a diamond painting when framing?
It is your choice. Glass or acrylic keeps dust and fingers off the drills and, if it is UV-filtering, cuts the light that harms colors, but it adds weight and glare and mutes some of the sparkle. If you use it, keep it off the drills with a mat or spacers. Many people leave sealed canvases unglazed in rooms with little dust and no direct sun.
Can you use a standard picture frame for diamond art?
Yes, as long as it is deep enough. Standard frames are made for paper, so check that the rabbet can hold the glazing, a mat or spacers, the canvas, and the backing board. If the canvas falls between sizes, use a mat to fill the gap or trim the blank border to fit.
What size frame do I need for a diamond painting?
Measure the trimmed canvas on its backing board after you have decided how much border to keep. That measurement is the frame opening. Kit sizes are often listed in centimeters and may include the blank border, so measure the finished piece instead of going by the label.
How do you display a diamond painting without a frame?
Mount it on stretcher bars, a stretched art canvas, or a wood panel and wrap the blank border around to the back, as described above. Add a sawtooth hanger or D-rings and wire. This shows the drills without glare, and it works best when the design fills the canvas.
Should you seal a diamond painting before framing?
It is optional, and it helps most when the piece will hang without glass. If you seal, do it before mounting and let it cure fully. Our sealing guide has the details.
Shop the tools in this guide
- Diamond Painting Tool Set, 3 Piece: a horizontal ruler, a right-angle ruler, and a slide straightener for squaring up rows and pressing drills flat before you seal and frame.
- Diamond Painting Tool Set, 3 Piece (Silk PLA): the same three tools, printed in our studio in silk PLA in ten colors.
- Tools and accessories: drill pens, trays, storage, and the rest of the tools we carry.
- All diamond painting kits: every kit we sell, including full-drill kits with DMC-coded drills, for your next canvas.
Choosing your next project? Our guide to premium full-drill kits explains what to look for, or you can browse everything in the shop.


