Premium Full Drill Diamond Painting Kits: 2026 Buyer's Guide
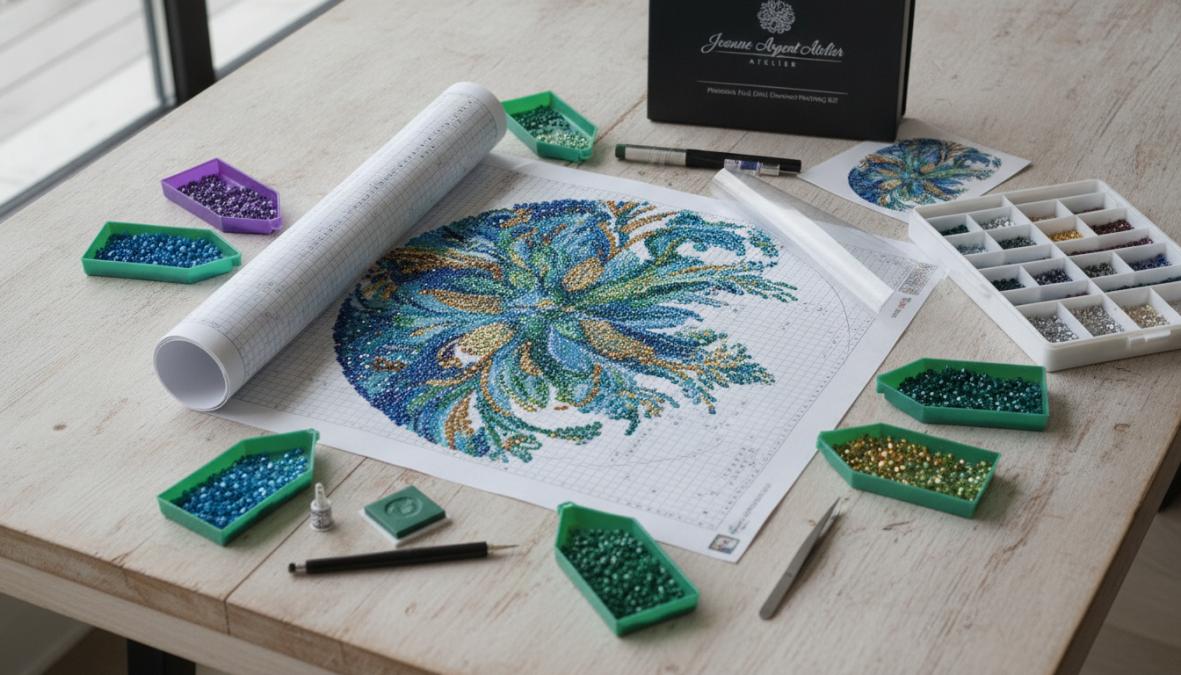
Premium full drill diamond painting kits give you complete canvas coverage, better materials and tools that stay comfortable over long sessions, which is what turns a craft kit into a finished piece worth hanging. This buyer's guide covers what separates a premium kit from a budget one, from canvas adhesive and drill quality to round versus square drills and canvas size, and shows how to match a kit to your experience. If you are still comparing kits in general, start with our roundup of the best diamond painting kits for adults.
Quick answer: The best premium full drill diamond painting kits pair an adhesive canvas that stays tacky with evenly cut, DMC-coded drills, a clear color legend and tools you can hold for hours. For a first kit, choose round drills on a canvas around 40x40cm; when you want a multi-week statement piece, step up to square drills or a large format such as 60x80cm.
In this guide:
- What are premium full drill diamond painting kits?
- How to judge a premium full drill kit
- Premium full drill kits compared
- Large full drill kits for serious crafters
- Choosing the right kit for your needs
- Tips for beginners starting with premium kits
- Finishing, framing and storing your work
- Frequently asked questions
What Are Premium Full Drill Diamond Painting Kits?
A full drill diamond painting kit covers the entire canvas with tiny resin drills, so the finished piece sparkles edge to edge with no bare printed areas. A typical kit includes an adhesive canvas printed with symbols, drills sorted by color, an applicator pen, wax, a tray and tweezers.
What makes a kit premium is how well those parts hold up over a project that can run for weeks: adhesive that stays tacky, drills that are evenly cut and color accurate, symbols that are easy to read, and tools you can hold for hours without hand fatigue. The design matters too. You will spend dozens of hours looking at it, so choose artwork you genuinely want on your wall.
Full Drill vs. Partial Drill Explained
Full drill coverage means drills cover the whole canvas, creating a uniform surface that is ready to frame. Setup and placement take longer, but the result looks finished from every angle.
Partial drill kits leave background areas as flat printed canvas. They use fewer drills and finish faster, which suits a quick project or a gift made on a deadline, but the mix of drills and bare print has less visual impact.
If you plan to frame and display your work, full drill is the clear choice. If you are not sure you will finish a big project, start with a smaller full drill kit rather than switching to partial drill. Our full drill vs. partial drill guide covers the tradeoffs in more detail.
Round vs. Square Drills: Which Delivers Better Results?
Round drills are circular, faceted drills that seat easily and forgive small misalignment, because the gaps between them hide slight wobbles. They go down faster, are easier to reposition and give a jewel-like shimmer. That makes them the friendlier shape for beginners and a good match for florals, landscapes and abstract designs.
Square drills sit edge to edge like mosaic tiles, hiding the canvas completely and giving a seamless finish that reads as one image. They hold fine detail and subtle color transitions better, so detailed portraits and complex designs benefit most. The tradeoff is precision: a crooked square drill shows, repositioning is fiddlier, and you will straighten rows as you go.
A simple rule: match the drill shape to the artwork and to your patience. Choose square for detail and a polished finish, and round for sparkle and a more relaxed pace. If you are torn, try one smaller kit in each shape; most painters settle on a preference after a single project.

How to Judge a Premium Full Drill Kit
Labels on the box tell you little. These are the points that decide whether a kit is a pleasure or a chore, roughly in order of importance.
Canvas Quality and Adhesive
Canvas adhesive matters most, because a canvas that loses its tack halfway through causes problems no other feature can make up for. Poured glue canvases carry a layer of liquid adhesive spread across the fabric and hold drills firmly once they are placed, which is why many painters prefer them for pieces they plan to display. Double-sided tape canvases are clean, odor-free and make repositioning easier, but the adhesive can dry out if it is left exposed to air for long periods.
Print quality matters as well. Crisp symbols and a clear color legend reduce eye strain and misplaced drills. A canvas that ships rolled rather than folded also avoids hard creases; if yours does arrive creased, see how to fix a creased diamond painting canvas.
Watch out: Lift a corner of the protective film in the first few days after your kit arrives. The adhesive should feel evenly tacky; patches that feel dry suggest the glue has degraded. Once you start, keep the film over every area you are not working on, especially if you have pets or a dusty room, because the adhesive picks up particles that get pressed under the drills and cloud the finish.
Drill Quality and Color Accuracy
Premium drills use clear resin with consistent faceting. Cheaper drills often have uneven cuts or cloudy resin, which leaves the finished surface looking flat rather than sparkling, and the difference is obvious once they sit side by side. Many kits are sold as 5D, a term for multi-faceted drills cut to catch more light. The label describes the cut, not the canvas or the tools, so judge the whole kit.
Look for DMC color codes. They make the legend easy to follow, and they make it simple to buy replacement drills by DMC number if you run short. Color count is also a useful clue to detail. Our Owl kit uses 48 DMC colors on a 60x80cm canvas, because white plumage needs many near-whites and grays to read as feathers rather than a white shape. The 40x40cm Cottage Garden kit keeps to 23 colors, so a first project stays manageable and you are not hunting through packets all evening.
Tools That Hold Up
Tools are where budget kits cut corners: pens that bend, wax that dries out and trays that do not hold drills securely. A comfortable applicator reduces hand fatigue over long sessions, a grooved tray lines drills up for easy pickup, and fine tweezers fix misplaced drills. If you paint for hours at a time, a solid resin drill pen with two metal tips and a tray set with lids and tweezers are worth adding, and a ruler and drill straightener set helps keep square drill rows true. Our guide to the best tools for diamond painting artists covers the rest.
Premium Full Drill Kits Compared
At Jeanne Argent, a small studio in Alexander, North Carolina, we sell full drill diamond painting kits with DMC-coded drills, along with 3D-printed tools and decor made here in the studio. The table below compares the kits in this guide by size, drill shape and the kind of painter each one suits.
| Kit | Size and drills | Best for | Good to know |
|---|---|---|---|
| Cottage Garden | 40x40cm, round drills, 23 DMC colors | A first full drill kit or a gift | Roughly 15 to 20 hours |
| Full-size kits | 40x55cm to 55x55cm, including 40x60cm and 45x60cm designs | A second or third kit | A step up in size |
| Owl, Enchanted Forest | 60x80cm, square drills, 48 DMC colors | Experienced painters | Roughly 45 to 60 hours; not a first kit |
| Prism Grove and Celadon Vale | 90x50cm, round drills | Statement wall art | Wide format; plan for framing |
Kits like the Owl and Cottage Garden pack their drills in sealed, numbered DMC color-coded packets that match the color legend on the canvas, alongside the usual pen, tray, wax and tweezers. Canvases ship rolled and unframed, so budget for a frame if you plan to hang the finished piece.
Large Full Drill Diamond Painting Kits for Serious Crafters
Once a kit that takes a weekend stops feeling like enough, a large canvas is the natural next step. At 60x80cm or 90x50cm, a finished piece works as real wall art, and the extra area gives the design room for fine detail. Our premium large-format kits include the square drill Owl at 60x80cm and two 90x50cm round drill designs, the Prism Grove tree of life and the Celadon Vale peacock.
Large canvases call for a different approach:
- Work in sections. Divide the canvas into quadrants or blocks and finish one completely before moving to the next, peeling back the film only over the block in front of you. Regular milestones keep motivation up over a project that runs for weeks.
- Pick the drill shape for the scale. Round drills are the more relaxed choice on a big canvas, since small gaps blend together at viewing distance. Square drills give a more striking finish if you enjoy precise work over many sessions.
- Put quality first. When you are investing this many hours, canvas and adhesive quality matter far more than extras in the box.
- Plan the frame early. Large pieces are worth framing properly; see how to frame diamond painting artwork.
Choosing the Best Premium Full Drill Diamond Painting Kit for Your Needs
- Experience level: For a first kit, choose round drills, a canvas around 40x40cm and a modest color count. Experienced painters can take on square drills and higher color counts, where the extra shades show up as finer detail.
- Time you can commit: Be honest about your hours. A 40x40cm round drill kit takes roughly 15 to 20 hours, or a week or two of evenings, while the 60x80cm square drill Owl takes roughly 45 to 60. A kit that needs more time than you have is the one most likely to end up unfinished.
- Design: Pick artwork that genuinely excites you and suits the room it will hang in, or the person you are giving it to.
- Comfort: If you have arthritis or sensitive hands, prioritize an ergonomic pen and a well-stocked wax pad, and plan shorter sessions.
- Display plans: If the piece will hang on a wall, choose full drill and set aside budget for a frame.
You can compare every size and drill shape in our full collection of diamond painting kits.
Diamond Painting Tips for Beginners Starting with Premium Kits
- Flatten the canvas first. Canvases ship rolled, so leave yours under something heavy overnight before the first drill goes down. It is the step new painters most often skip and then regret.
- Organize your drills before you start. Pour each color into a tray compartment or a labeled container instead of working from the packets, so you are not hunting for a color mid-session. Our guide on how to organize diamond painting drills has more ideas.
- Get the lighting right. Work in bright light. Natural daylight is ideal, but a desk lamp positioned to avoid glare works well and makes symbols easier to read.
- Manage the wax. Keep just enough wax on the pen tip to pick up drills without leaving residue on them, and keep the wax covered when you are not using it.
- Use light pressure. Press each drill just firmly enough to seat it in the adhesive and let the glue do the work. Pressing too hard tires your hand and can mark the canvas.
- Mind your posture. Set the canvas at a comfortable angle rather than flat on the table so your arms rest naturally, and take a break every 45 to 60 minutes.
- Work systematically. Finish sections methodically rather than jumping around. Many painters work top to bottom, left to right.
If drills start lifting or you spot uneven spacing, see why diamond painting drills pop and how to fix gaps in a diamond painting. New to the craft altogether? Read diamond painting for beginners: everything you need to know before your first canvas.
Finishing, Framing and Storing Your Diamond Painting
- Seal it. Once every drill is firmly seated, a clear sealant, sprayed or brushed on in thin, even coats, locks drills in place and keeps dust out. Our guide on how to seal diamond paintings walks through the process.
- Frame it. A frame with glass or acrylic protects the surface from dust and accidental contact. Hang it out of direct sunlight and away from heating vents, air conditioning units and humid rooms, since heat and moisture swings strain the adhesive.
- Store it. If you are not framing yet, roll the finished piece gently with the drill side facing out, wrap it in acid-free tissue and keep it somewhere cool and dry. Avoid plastic bags, which trap moisture. For kits you have not started, see how to store diamond painting kits.
- Look after your tools. Clean wax buildup from pen tips regularly and store tools somewhere dry. Good tools last for many projects with basic care.
Completing a premium full drill diamond painting kit is a genuine creative accomplishment. The combination of a design you love, quality materials and comfortable tools turns a craft hobby into a rewarding practice, and leaves you with a finished piece worth displaying with pride.
Frequently Asked Questions
What is a full drill diamond painting kit?
It is a kit in which resin drills cover the entire canvas, so no printed background shows once the piece is finished. Partial drill kits leave parts of the print bare, which makes them faster to complete but less striking on a wall.
What makes a diamond painting kit premium?
Mostly the things you only notice after hours of work: adhesive that stays tacky to the last row, evenly cut drills with DMC color codes, and tools that stay comfortable. The checklist in How to Judge a Premium Full Drill Kit covers each point.
Are full drill diamond painting kits worth it?
For a piece you plan to frame, yes, and the case for paying for premium quality grows with the canvas. On a small kit, a canvas that loses its tack is a nuisance; on a project of 45 to 60 hours, adhesive that holds and drills that sparkle evenly decide whether the finished piece is worth hanging.
Are 5D diamond painting kits good for beginners?
Yes. 5D kits can be excellent for beginners, especially at smaller sizes. Start with round drills on a canvas around 40x40cm, choose a kit with good adhesive to avoid frustration, and make sure your workspace has good lighting. The repetitive, steady rhythm of placing drills is also why many people find the craft relaxing.
What's the difference between round and square drills in diamond painting?
Round drills are circular and leave small gaps between them, giving a softer, sparkling surface. They are easier to place and forgive small misalignment. Square drills fit together with no gaps, giving full coverage and a uniform, mosaic-like finish with sharper color definition, but they demand more precision. Square drills suit detailed designs, while round drills suit a more relaxed pace and extra sparkle.
How do I preserve my finished diamond painting long-term?
Seal the finished canvas with a clear sealant applied in thin, even layers to lock drills in place and keep dust off. Frame it behind glass or acrylic and hang it away from direct sunlight, heat sources and moisture. Store unframed pieces rolled with the drill side out, wrapped in acid-free tissue, in a cool, dry place. See our guides on sealing and framing diamond paintings for step-by-step help.
Shop the Kits in This Guide
Start with the Cottage Garden kit for a first full drill canvas, move up to our full-size kits for more detail, or take on the Owl and our other premium large-format kits when you want a statement piece. Browse all diamond painting kits, and find pens, trays and alignment tools in tools and accessories. Shipping within the US is $5.95 on orders under $20, $8.95 from $20 to $99.99, and free on orders of $100 or more.


