How to Store Diamond Painting Kits and Unfinished Projects
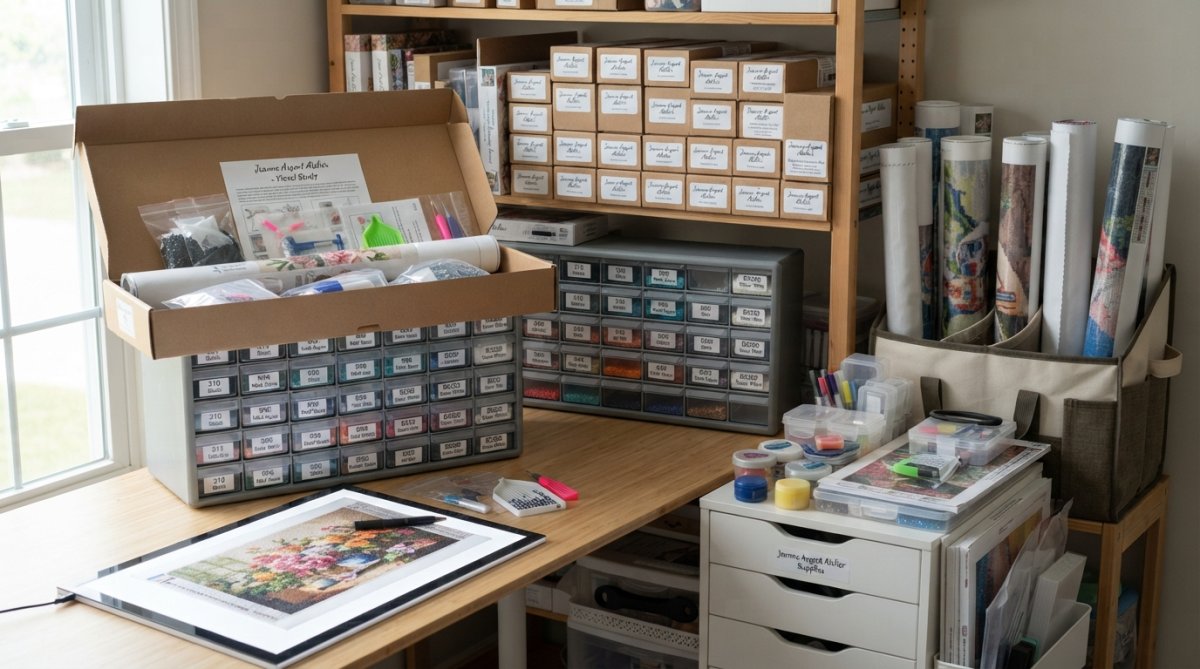
A diamond painting kit is easy to store until you open it. Once the release film comes off, the canvas has exposed adhesive that grabs dust, lint and pet hair, and a canvas left rolled or bent for weeks can crease or shed drills. Large canvases add one more problem: they do not fit in ordinary boxes.
This guide covers unopened kits, paused projects and large canvases still in progress, from sizing your storage to adjusting it for a short break or a long one.
Quick answer: Keep unopened kits in their packaging in a cool, dry room. For a project in progress, put the release film back over the exposed adhesive, lay the canvas flat on a rigid board, and store it in a lidded box or under-bed bin sized to the canvas, with its drills bagged and labeled alongside. Roll a canvas only for a break of a day or two, drills facing out, and keep it out of attics, garages and basements.
Measure the canvas and check its stage first
Two things decide how you store a canvas: its size and how much adhesive is still exposed. Check both before you buy a box or clear a shelf.
Measuring for storage
Measure the canvas width and height, including the blank border, and write the numbers down. The size on the kit listing is a good starting point, but once a canvas has been unrolled and worked, measure the canvas itself. Our premium large-format kits include canvases of 90x50 cm (36x20 inches) and 60x80 cm, wider than many ordinary storage boxes.
Add a little room on each side for the board the canvas will lie on, then choose a container that fits with as little spare space as possible. A canvas with room to slide shifts every time the box moves.
Unfinished projects vs. completed paintings
An unfinished canvas still has tacky, exposed adhesive, and drills near the working edge can shift if the canvas is tilted or flexed. A completed canvas is far more stable: every cell is filled, so storage is mostly about dust, moisture, light and pressure.
| Project stage | Main concern | Best storage |
|---|---|---|
| Unopened kit | Heat, damp and crushing | Original packaging on a shelf in a cool, dry room |
| Under half done | Large area of exposed adhesive | Flat, film on, in a lidded box or bin |
| Half done or more | Exposed adhesive plus drills along open edges | Flat on a rigid board, covered, nothing on top |
| Nearly done | Small exposed areas | Flat and covered; finish it before a long break if you can |
| Completed | Dust, moisture, light and pressure | See how to store finished diamond paintings |
How to Store Diamond Painting Kits: Best Practices for Unfinished Projects
Unopened kits
An unopened kit needs very little. Keep it in its original packaging, in a cool, dry room, away from direct sun and heat sources. Store it where nothing heavy sits on it, since pressure on the package can crease the canvas inside.
Choosing the right storage setup
Once you start a kit, give the project one dedicated container and keep everything for it together:
- The canvas, covered and lying flat on its board
- The leftover drills, each color sealed in its own bag or jar and labeled
- Your drill pen, tray and wax
- The color chart and symbol key
Label each bag with the symbol from the chart and its DMC code rather than a color name. Symbols are what you match on the canvas, and color names vary from kit to kit. Every kit we sell uses DMC-coded drills, so the number on each packet makes a reliable label.
Before you put a project away, photograph the color chart and the symbol key. If the paper chart goes missing, the photo saves you from guessing which symbol matches which drill.

Flat storage vs. rolling for unfinished canvases
Flat storage is the better default for any project you plan to resume, because the canvas never takes on the curve of a roll. Rolling is acceptable only for short breaks, and only with the drills facing outward.
| Method | Best for | Risk | Space needed |
|---|---|---|---|
| Flat on a rigid board | Any pause longer than a few days | Dust if left uncovered | Large, level surface |
| Rolled, drills facing out | Breaks of 1 to 3 days with no flat space | Creasing, drills lifting near the edges | Small |
| Rolled, drills facing in | Never | Adhesive sticks to the back of the canvas | Small |
| Hanging or standing upright | Never for unfinished work | Loose drills slide, the canvas sags | Wall or closet space |
Storing a canvas flat
Lay the canvas on a rigid board such as foam board, a cutting mat or acid-free mat board cut slightly larger than the canvas. Cover the adhesive, then put the board somewhere level where nothing presses down. A canvas left on a lumpy surface for weeks takes on that shape. Do not stack boxes or other canvases on top: the weight presses drills unevenly into the adhesive and can leave flat spots.
When rolling is acceptable
Roll only when you have no flat space and the pause is a day or two. Put the release film back first, then roll loosely around a cardboard tube at least 3 inches across, drills facing out, never tighter than the tube itself. A creased canvas is harder to work than a dusty one. If a crease does form, our guide on how to fix a creased diamond canvas walks through flattening it.
When you move a canvas, keep it horizontal and slide it on its board rather than lifting it by the corners. Flexing the canvas is one of the common reasons diamond painting drills pop off near the edges.
Protecting the exposed adhesive
The rule is simple: nothing touches the sticky side except the release film that came with the kit, or a clean substitute. Keep the film when you peel it back. It is reusable as long as it stays clean.
If you lose the film, parchment paper or a clean sheet of acetate works. Press it down gently so it contacts the adhesive without trapping air. Do not use plastic wrap, which clings, wrinkles and can leave residue that dulls the tack. Do not lay tissue paper directly on bare adhesive either, because it sticks; tissue is useful only as an extra layer on top of the film or between stacked boards.
Never store a canvas with the film folded or bunched. Adhesive under a fold can pull drills loose at the edges, and those gaps are where dust gets in first.
Before you cover the canvas, brush any loose drills off the open adhesive and back into their bag. A stray drill left on the sticky surface bonds in the wrong cell. Adhesive also varies between kits, and good adhesive tolerates breaks much better; our post on why canvas adhesive quality matters explains what to look for.
Keeping the canvas clean between sessions
Much of the damage blamed on bad adhesive is really dust, lint or hair that landed while the canvas was open.
The basic routine
- Cover the exposed area the moment you stop working
- Keep the canvas away from kitchen and pet areas
- Wipe the work surface before you unroll or uncover anything
- Wash and dry your hands before handling the canvas
- Never eat over an open project
Drills are plastic and can hold a static charge, and a charged object attracts light, neutral particles such as dust and lint (The Physics Classroom). It is one more reason to keep the canvas covered whenever you are not working on it.
Pet hair and dander
In homes with animals, pet hair is often what ends up stuck to exposed adhesive. A single hair can lie across many cells, and pulling it out can lift the drills around it. Dander, the fine flakes pets shed, settles everywhere and is hard to see until it is stuck. If you have a pet, adjust your setup in four ways:
- Keep the canvas off the floor in rooms your pet uses. Hair settles downward, so a canvas under a bed or on a low shelf in a pet-accessible room collects it even when covered. Store it above counter height or in a closed closet.
- Seal, do not just cover. Hair that lands on the film transfers to the adhesive when you peel it back. Between sessions, slide the covered canvas on its board into a large zip bag or a lidded bin.
- Keep a lint roller at your work station. Run it over the film before you peel it back, so loose hair comes off before the adhesive is exposed.
- Put a door between the project and the pet. If you cannot give the hobby a room, give it a closet shelf.
Do not use compressed air to blow hair off an open canvas. It can drive fibers into the adhesive rather than off it, and it spreads dust across the whole surface.
Removing hair that has already stuck
Deal with it before you place more drills. Use fine-tipped tweezers and lift the hair at a shallow angle, working from one end to the other; pulling straight up lifts drills. If tweezers will not free it, press a small piece of the kit's release film onto the spot and peel it back. Do not use tape. Its adhesive can be stronger than the canvas adhesive and can pull drills loose.
Static and air
Work away from carpet, which builds static as you move, and never point a running fan at the canvas. In a very dry home, a small room humidifier reduces static; keep it well away from the canvas, since you want humidity in the air, not on the project.
A ten-second check before you cover it
Before you put the film back for the night, look across the exposed adhesive under a lamp held at a low angle. Hair and lint show up clearly. Lifting a fiber now takes seconds; finding it next week, after it has bonded, can cost you drills.
Short breaks vs. long-term storage
A canvas you will pick up tomorrow and one you will not touch until next season are different storage problems. Match the method to the length of the pause.
Short pause: overnight to one week
The goal is speed: walk away in under a minute and pick up exactly where you left off.
- Cover the exposed adhesive with the release film or parchment paper and press it flat.
- Leave the canvas on a rigid surface such as a cutting mat, foam board or large hardcover book. Do not leave it on fabric, carpet or a tablecloth, which shed fibers onto the sticky side.
- Leave your drills, tray and pen out if the area is pet-free and out of foot traffic. A tray with a lid keeps sorted drills in place until the next session.
Two to four weeks
This middle range is easy to get wrong: long enough for dust to matter, short enough that people skip sealing. A reasonable compromise is to cover the adhesive, keep the canvas on its board, slide both into a zip bag or lidded bin, and bag the drills. That handles the two real risks, dust and warping, without turning a three-week break into a project of its own.
One month or longer
Over months, dust builds up even in a covered room, humidity changes with the seasons, and temperature swings make the canvas expand and contract. Long-term storage means sealing the project against the room, not just covering the sticky side. A workable setup has four parts:
- Adhesive protection. Release film or acetate over every exposed area, pressed flat with no folds. Replace any film that has picked up lint.
- Rigid backing. Foam board or acid-free mat board cut slightly larger than the canvas, so it cannot warp or crease.
- An outer seal. A large zip bag, an art portfolio sleeve or a lidded plastic bin, with the canvas lying flat inside.
- A stable location. An interior closet shelf, or under a bed in a pet-free room that stays comfortable year round. Avoid attics, garages, basements and spots against an exterior wall.
Write the date you last worked on the project on the bag or bin. When you come back, knowing how long it sat tells you whether to check the adhesive before you start.
Restarting after a long pause
Before you place a drill after a month or more, take two minutes to inspect the canvas. Touch a clean, dry finger to a corner of the exposed adhesive. If it still grips, you are fine. If it feels slick or shows fibers, deal with that area first, because drills placed on dead adhesive will need redoing. If the corners have curled, lay the canvas flat under a clean board with even weight for a day or two before you resume.
Storing large canvases in progress
Everything above applies to large canvases, but size changes which containers work. Keep a large canvas horizontal at all times while it is unfinished, since tilting it lets loose drills slide and puts strain on the open adhesive.
Flat boxes
A shallow, rigid box is the safest home for a large canvas because it cannot bend. A clean, dry cardboard box works for short periods; avoid any box that held food or got damp. Choose a box the canvas fits with little spare room, and label the outside with the project name, canvas size, how far along it is and the date you last worked on it.
Under-bed bins
Shallow under-bed containers suit large canvases well because they are wide, flat and out of the way. Choose rigid plastic rather than soft fabric, which flexes and lets dust in. A bin with wheels and a tight-fitting lid is easiest to live with. Use under-bed storage only in a pet-free room that stays about as warm or cool as the rest of the house.
When no box is big enough
If a canvas is wider than any bin you can find, sandwich it between two sheets of foam board cut slightly larger than the canvas, tape the boards together at the edges, and slide the bundle flat under a bed or onto a high, deep shelf. Flat file cabinets, with their wide, shallow drawers, are the best option for anyone with several large projects at once; they are expensive new but sometimes turn up secondhand.
Storing drills and tools
Drill storage is a topic of its own. In short: keep each color sealed and labeled with its symbol and DMC code, never let colors mix, and keep the drills for a paused project in the same container as its canvas so you never hunt for a missing bag. Our guide to organizing diamond painting drills covers containers, labeling systems and sorting in detail.
Climate, light and dust
Temperature and humidity swings are the slow threats to a stored canvas. They make the canvas expand and contract against its backing, and over months that can warp it. An interior closet or bedroom is better than any room that follows the weather outside. A hygrometer is an inexpensive way to see whether a closet holds steady or swings more than the rest of the house.
Sealed bags and lidded bins keep dust out, but they also hold in any moisture that goes in with the canvas. Seal only a dry canvas, in a dry room. For storage measured in months, a rigid plastic bin with a lid keeps out dust and damp better than cardboard, which softens and sheds over time.
Keep stored projects out of direct sunlight, which fades the printed canvas and warms the adhesive. A dark closet or an opaque bin solves this. Keep canvases away from radiators, heat vents and anywhere paint or solvents are used. Open long-term projects every few months to check for dust, damp or curling.
How to store finished diamond paintings
A finished painting has different needs. There is no exposed adhesive left, but the drill surface still needs protection from pressure, dust, damp and light. Flat storage with a protective layer between pieces is the usual approach, with rolling, drills facing out, kept for short periods. Our guide on how to store finished diamond paintings covers sleeves, portfolios and rolling in detail. If you plan to display the piece, start with how to seal diamond paintings and how to frame diamond painting artwork.
Common storage mistakes
- Leaving an unfinished canvas rolled for weeks. Roll only for a day or two, drills facing out.
- Putting plastic wrap or tissue directly on the adhesive. Use the release film, parchment paper or acetate.
- Storing projects in an attic, garage or basement. Heat, cold and damp there are hard on adhesive and canvas, even inside a sealed bag.
- Stacking things on a canvas or standing it upright. Weight leaves flat spots, and tilting lets loose drills slide.
- Skipping labels. Unlabeled drills and bins turn a ten-minute restart into an evening of sorting.
Frequently asked questions
Can I roll up a diamond painting while it is unfinished?
Only for a short break. Put the release film back over the exposed adhesive, then roll loosely around a cardboard tube at least 3 inches across with the drills facing outward. For anything longer than a few days, store it flat on a rigid board instead, because rolling risks creasing the canvas and lifting drills.
How do I keep dust off an unfinished diamond painting?
Cover the exposed adhesive with the kit's release film whenever you stop, store the canvas in a zip bag, portfolio sleeve or lidded bin, and keep it away from pets, open windows, fans and carpet. Check the adhesive under a lamp before you cover it so you catch lint before it bonds.
Where should I store a large canvas I am still working on?
Flat, on a rigid board, in a shallow box or rigid under-bed bin sized to the canvas, in a pet-free room with steady temperature. If no container is big enough, sandwich it between two sheets of foam board and slide it flat under a bed or onto a deep shelf. Never stand it upright.
How long can an unfinished diamond painting sit before the adhesive is a problem?
There is no single safe period, because it depends on the adhesive and on how the canvas is stored. A canvas kept covered, flat and away from heat, sun and damp is protected from the main threats. Before you resume after a long pause, touch a corner of the exposed adhesive: if it still grips, carry on.
Shop the tools in this guide
- Diamond Painting Storage Containers: 60 clear screw-top jars, each 1 inch across and 2 inches tall, in one divided box, with 447 pre-printed DMC labels and 64 blank ones.
- Diamond Painting Tray Set with Lid and Tweezers: a grooved tray with a snap-down lid, so sorted drills stay put when you stop mid-row.
- The Tool Keeper Drill Pen and Tool Case: a padded zip case with elastic loops for drill pens and mesh pockets for wax, tweezers and spare tips.
- Premium large-format kits: full-drill kits with large canvases, including 90x50 cm and 60x80 cm designs.
- Tools and accessories: drill pens, trays, alignment tools and storage, including tools 3D printed in our studio.
Shipping within the US is $5.95 on orders under $20, $8.95 from $20 to $99.99, and free on orders of $100 or more.


