3 August 2026
How to Fix Creased Diamond Canvas: 7 Methods
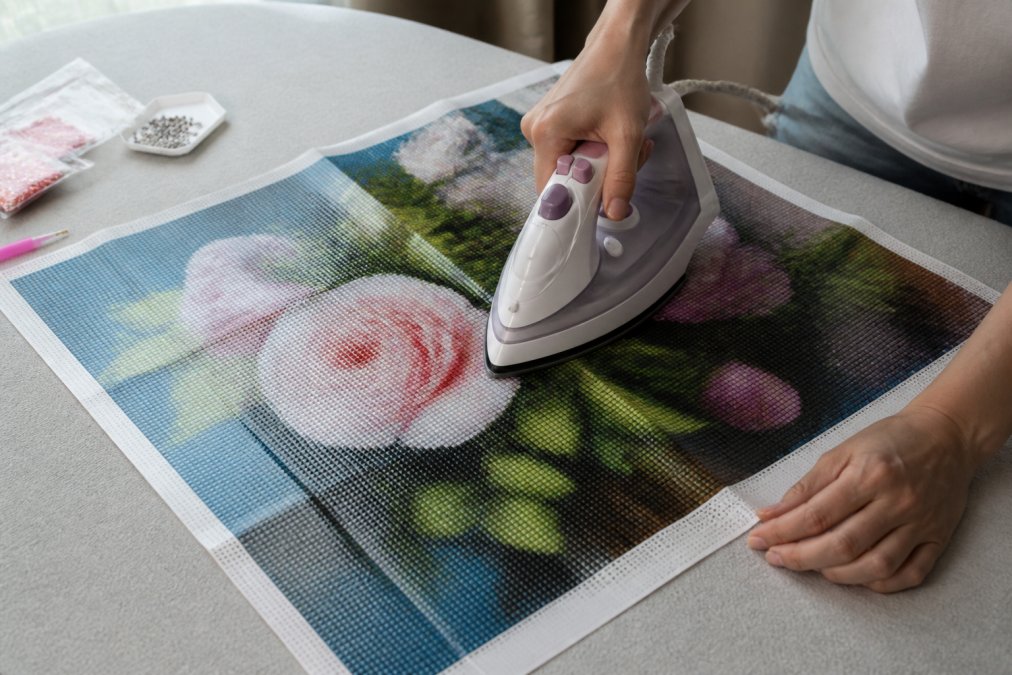
Table of Contents
- How to Fix Creased Diamond Canvas: Preparation and Assessment
- The Best Way to Flatten Diamond Painting Canvas
- Ironing Diamond Painting Canvas Safely
- Diamond Painting Tools for Flattening and Alternatives
- Removing Air Bubbles and Restoring Adhesive
- Post-Completion Flattening for Finished Diamond Paintings
- Common Mistakes to Avoid When Fixing Creased Diamond Canvas
- Conclusion
Last Updated: August 4, 2026
How to Fix Creased Diamond Canvas: Preparation and Assessment
Learning how to fix creased diamond canvas is essential for completing high-quality diamond painting projects. Creases happen during shipping, storage, or improper handling before you place drills. At Jeanne Argent Atelier, we understand that a wrinkled foundation undermines the entire finished piece. The good news is that multiple proven methods exist to restore your canvas to a smooth, work-ready state.
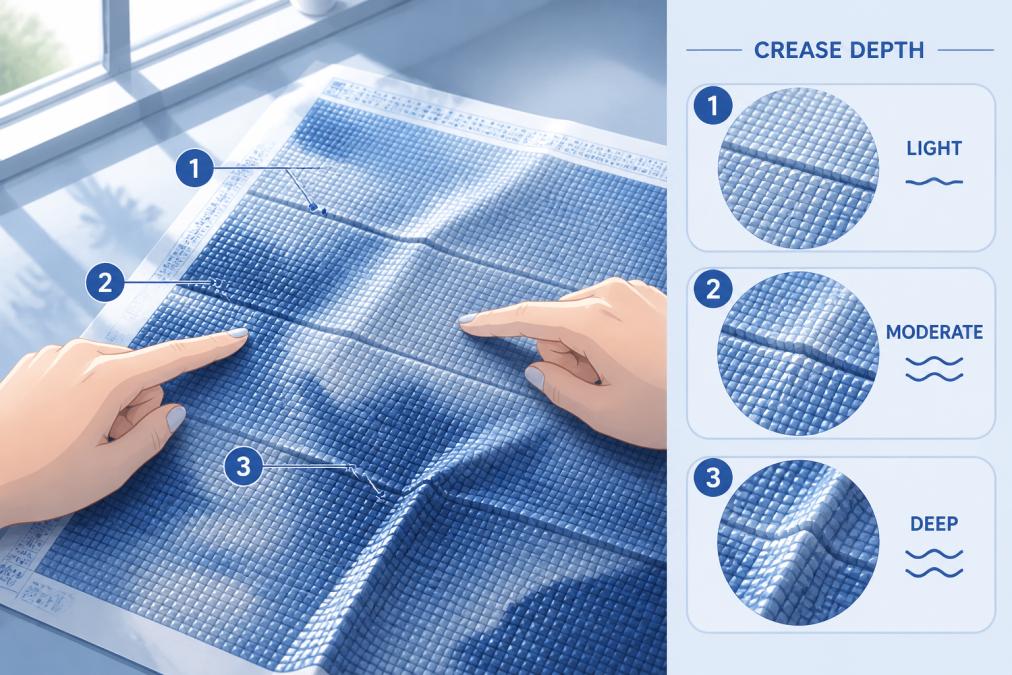
Before attempting any flattening technique, assess what you're dealing with. Not all creases are equal, light wrinkles might disappear with gentle pressure, while deep folds require more aggressive methods.
Identifying crease severity and canvas type
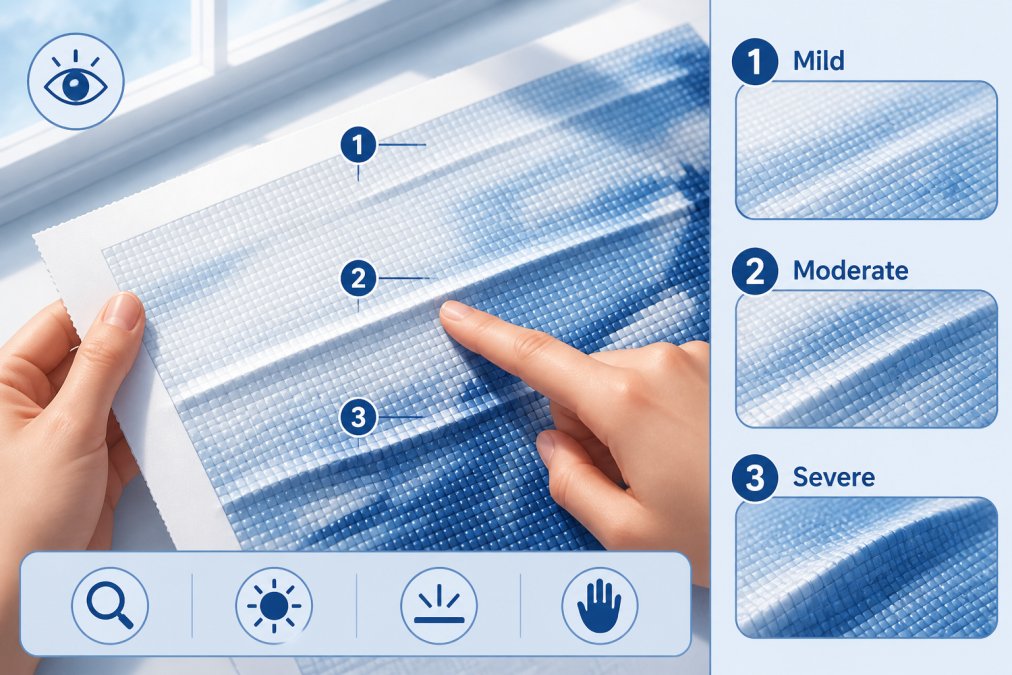
Examine your canvas closely to distinguish between surface wrinkles and deep creases. Light wrinkles sit on the surface and often disappear with gentle pressure or minimal heat. Deep creases have bent the canvas structure and may require more aggressive flattening.
Canvas type matters significantly. Most diamond painting canvases use synthetic fabric backing with adhesive designed to hold drill stones. Thin, delicate backing requires more caution with heat and pressure than thicker material.
Check whether your canvas still has protective release paper attached. If so, you can work with the paper in place, which provides extra protection during flattening and helps distribute pressure evenly.
Pre-work preparation before flattening
Choose a clean, flat surface where you can lay the canvas without folding or bunching. A large table or clean hardwood floor works well.
If your canvas is tightly rolled or folded, gently unroll it and let it rest flat for several hours. Many minor creases disappear during this rest period without any intervention. Keep the release paper on during this phase to protect the adhesive and prevent dust from settling on the sticky surface.
Gather your chosen flattening tools before starting, whether heavy books, a craft roller, an iron, or wrinkle release spray. Never walk away from a canvas under heat or pressure.
The Best Way to Flatten Diamond Painting Canvas
The reverse rolling method stands out as one of the safest and most effective approaches for fixing creased diamond canvas, working by gently encouraging canvas fibers to return to their original position without applying direct heat or excessive pressure to the adhesive layer.
Reverse rolling to remove wrinkles
Canvas naturally wants to lie flat. When your canvas arrives tightly rolled in one direction, the fibers remember that shape. By rolling it in the opposite direction, you reset the fiber memory.
Unroll your canvas completely and lay it flat for at least two hours. Then gently roll it in the opposite direction from how it arrived, using moderate hand pressure. Leave it rolled for 24 to 48 hours. After this time, unroll and lay it flat again. Many creases will have disappeared or significantly diminished.
This method works particularly well for creases from shipping or storage and is gentler than heat-based methods.
Using heavy books and weights for pressure
Applying steady, even pressure encourages wrinkles to flatten without the risks of heat. Heavy books distribute pressure across a large area, preventing concentrated damage.
Stack several heavy books across the creased areas of your canvas on a hard surface. Leave the weights in place for 24 to 48 hours. Check periodically to ensure books haven't shifted and the canvas remains flat.
For stubborn creases, rotate the weight positions to apply pressure from different angles. Avoid stacking weights so heavily that you compress the canvas into a permanent depression.
Ironing Diamond Painting Canvas Safely
Ironing offers faster results than pressure-based methods but requires careful temperature control to avoid damaging the adhesive layer.
Temperature control and synthetic fabric protection
The synthetic fabric backing has a specific melting point. Excessive heat will melt the fibers, permanently damaging the canvas and adhesive. Always use low heat settings, never medium or high.
Set your iron to the lowest heat setting available, typically the synthetic or polyester setting. Test the temperature on scrap fabric before applying it to your canvas.
Never place the iron directly on the canvas. Always use a protective barrier, a clean cotton cloth, pressing cloth, or thin towel. Avoid using the steam setting; stick with dry heat only. If you notice dampness after ironing, stop immediately and allow the canvas to dry completely.
Step-by-step ironing process
Lay your canvas flat on a sturdy, heat-safe surface. Place your protective cloth over the creased area and position the iron on the cloth with gentle, steady pressure. Move the iron slowly across the creased section using smooth, controlled motions.
Work in small sections, spending about 30 seconds on each area before moving to the next. Check your progress frequently by lifting the protective cloth.
If creases persist, allow the canvas to cool completely before repeating. Multiple gentle passes spaced over time work better than aggressive single passes. After ironing, allow the canvas to cool and rest for at least an hour before placing any drills.
Diamond Painting Tools for Flattening and Alternatives
Specialized tools designed for crafting offer effective flattening options without the risks of heat or excessive pressure.
Craft rollers and DIY tool substitutes
A craft roller, or brayer, applies even pressure across a broad surface area. Roll it slowly and deliberately across creased areas using moderate pressure.
If you don't have a craft roller, household items work as substitutes: a smooth drinking glass rolled on its side, a smooth-bottomed bottle, or a wooden dowel. The key is finding something smooth and heavy enough to apply consistent pressure without scratching the canvas.
Apply pressure in multiple directions, horizontally, vertically, and diagonally, to prevent developing new creases. For best results, combine rolling with resting: apply pressure for 15-20 minutes, then allow the canvas to rest for several hours. Repeat this cycle over 24-48 hours.
Wrinkle release spray and clear plastic covers
Wrinkle release spray, designed for fabric care, can help relax canvas fibers without applying heat. Test any spray on a small, inconspicuous area first to confirm compatibility with the adhesive.
Lightly mist the creased areas, do not saturate the canvas. Excess moisture can damage the adhesive. Lay the canvas flat and allow it to air dry completely, which takes 4-8 hours depending on humidity and air circulation.
A clear plastic cover placed over the canvas can help maintain moisture and protect the surface while the spray works. Remove the plastic once the canvas has dried completely.
Removing Air Bubbles and Restoring Adhesive
Sometimes what appears to be a crease is actually an air bubble trapped between canvas layers or a section where the adhesive has lost its grip.
Distinguishing creases from adhesive issues
Press your finger gently on the suspected crease. A true crease feels like a permanent bend in the fabric. An air bubble feels slightly hollow or compresses under pressure and pops back out.
Air bubbles typically appear as smooth, rounded depressions rather than sharp creases. Adhesive separation occurs when the backing paper pulls away from the canvas, often from temperature extremes or high humidity during storage.
True creases require flattening techniques. Air bubbles and adhesive issues require different solutions.
Multiplacer technique and release paper handling
The multiplacer tool applies targeted pressure to eliminate air bubbles. Press it firmly over the bubble area, then release. The pressure forces out trapped air and allows layers to settle back together. Repeat multiple times, working from the center outward.
If you don't have a multiplacer, a smooth, hard object like a screwdriver handle or wooden dowel can apply similar pressure. Press firmly and hold for several seconds.
The release paper protects the adhesive from dust and debris. When ready to place drills, peel back the release paper slowly. If adhesive seems weak in certain areas, reapply the paper and wait another day or two.
Post-Completion Flattening for Finished Diamond Paintings
Even after completion, creases might appear from storage or handling. Flattening a finished piece requires extra care to avoid dislodging drills.
Safe flattening after drills are set
Allow your finished painting to rest for at least 24 hours after placing the final drills. This allows the adhesive to fully cure and drills to set firmly.
For light wrinkles in finished pieces, heavy book pressure works well. Place the painting face-up on a flat surface, then layer heavy books across the back.
Never iron a finished diamond painting, heat can loosen adhesive and cause drills to shift or fall off. Never apply wrinkle release spray to finished pieces, as moisture can weaken adhesive. If creases developed during storage, try the reverse rolling method, which poses minimal risk to set drills.
Protecting the finished surface during storage
Store finished diamond paintings flat whenever possible. Rolled storage can create permanent creases. If you must roll a painting, use a large diameter tube for a gentle roll.
Wrap finished paintings in acid-free tissue paper or clean cotton cloth. Store in a climate-controlled environment between 65-75°F and 40-50% humidity. Keep paintings away from direct sunlight, which can fade drills and degrade adhesive.
| Storage Method | Best For | Risk Level | Duration |
|---|---|---|---|
| Flat storage with book weight | Finished paintings, light creases | Very low | Indefinite |
| Rolled storage (large diameter) | Temporary storage, transport | Low | Up to 3 months |
| Reverse rolling | Active creases in finished pieces | Low | 24-48 hours |
| Framed display | Long-term preservation | Minimal | Years |
Common Mistakes to Avoid When Fixing Creased Diamond Canvas
Understanding what not to do is as important as knowing the right techniques.
Why excessive heat damages adhesive and canvas
High heat melts synthetic fabric fibers and breaks down the adhesive bond permanently. The canvas becomes weak and brittle, and the adhesive loses stickiness permanently.
Never assume high heat works faster. It works differently, causing damage that low heat avoids. Prolonged exposure to even low heat can accumulate damage. Multiple short passes with cooling periods work far better than one long continuous application.
Avoid hair dryers or heat guns, which concentrate heat in small areas and reach damaging temperatures. Stick with irons set to the lowest setting, or use pressure-based methods instead.
Material-specific handling for different canvas types
Budget canvas uses thinner fabric and lower-quality adhesive more sensitive to heat and pressure. Avoid heat-based methods entirely; use pressure and time-based approaches like reverse rolling and book weights.
However, even premium canvas shouldn't be subjected to high heat.
Canvas with paper backing requires different handling than plastic backing. Paper absorbs moisture more readily, so wrinkle release spray should be applied sparingly. Plastic backing is more moisture-resistant but more prone to melting under heat.
Always check your kit's instructions for specific guidance about your particular canvas. If unsure, use the gentlest method available.
Conclusion
Fixing creased diamond canvas requires patience, the right technique, and understanding how heat and pressure affect synthetic fabrics and adhesives. Reverse rolling, pressure application, careful ironing, and specialized tools each have their place depending on canvas type and crease severity.
Start with the gentlest method first, reverse rolling or pressure-based flattening. Only move to heat-based approaches if gentler methods don't achieve results. Always prioritize protecting the adhesive layer. With the right approach and patience, you can restore even significantly creased canvas to a smooth, work-ready state and create the display-worthy finished piece you envisioned.
Frequently Asked Questions
Can you iron a diamond painting canvas, and is it safe?
Yes, you can iron diamond painting canvas safely with proper precautions. Use low heat (below 250°F), place a protective cloth barrier between the iron and the canvas, and iron the back side only. Never apply direct heat to the diamond drill side, as high temperatures can damage the adhesive and synthetic fabric backing. Test on a hidden area first. For canvases with poured glue or double-sided tape adhesive, ironing carries more risk of compromising the bond.
How long does it take to flatten a diamond painting canvas under heavy books?
Flattening under heavy books typically takes 24 to 48 hours for noticeable improvement, though deeper creases may require 3 to 7 days of continuous pressure. The timeline depends on crease depth, canvas thickness, and adhesive type. Place books evenly across the canvas surface and ensure even pressure distribution. This method works best for mild to moderate wrinkles and is gentler on adhesive than heat-based methods.
What's the difference between fixing creases before versus after completing the diamond painting?
Fixing creases before starting is easier and safer because the adhesive hasn't set and the canvas is more flexible. Post-completion flattening requires caution to avoid dislodging drills or damaging the finished work. For completed paintings, use gentle methods like heavy books or reverse rolling rather than heat or aggressive pressure. If your canvas arrives creased, flatten it immediately before applying drills to prevent adhesive issues and ensure optimal drill placement.
Are DIY tool alternatives effective for flattening diamond painting canvas?
Yes, DIY alternatives can work well. Smooth household items like rolling pins, wooden spoons, or even clean bottles can substitute for craft rollers when flattening canvas. Heavy objects like water bottles, canned goods, or stacked books provide effective pressure for creases. The key is applying even, consistent pressure without sharp edges that might damage the canvas. Avoid tools with rough surfaces that could snag the synthetic fabric or compromise the adhesive layer.
A creased canvas doesn't have to derail your diamond painting project. By understanding how to fix creased diamond canvas using proven techniques, you can rescue even problematic canvases and complete your work with confidence. Jeanne Argent Atelier's premium kits are designed to minimize these issues from the start, but when creases do occur, the methods in this guide will help you restore your canvas and finish your masterpiece.
This article was written using GrandRanker