Best Diamond Painting Kits for Arthritis: What to Look For
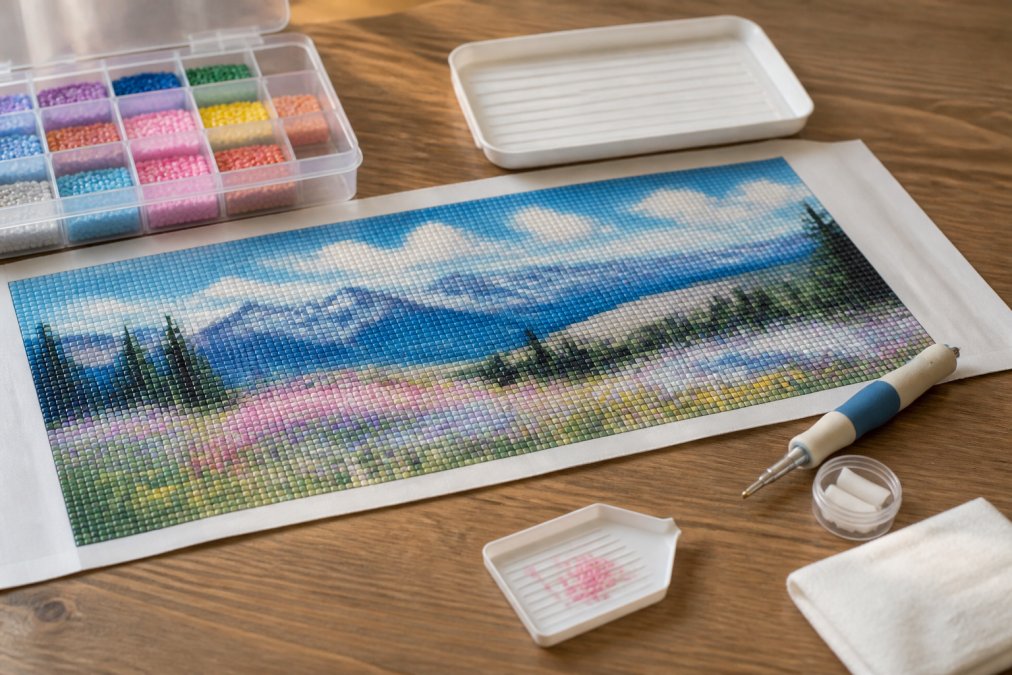
If arthritis has left your hands stiff or sore, diamond painting can still be a craft you enjoy. What changes is how much the kit and tools you choose matter. The things that make a difference are not brand names. They are the drill shape, how the design is laid out, the pen in your hand, and how easy it is to stop and pick up again later.
This guide walks through what to look for and how to set up, using general guidance on living with arthritis from the NHS and the US National Institute of Arthritis and Musculoskeletal and Skin Diseases (NIAMS). It is general information, not medical advice. If crafting brings on pain, swelling or stiffness that does not settle, talk to your doctor or an occupational therapist.
Quick answer: For arthritic or sore hands, choose a full-drill kit with round drills, a modest color count and large blocks of color, then swap the thin kit stylus for a solid drill pen and use a lidded tray so you can stop whenever your hands need a rest. Work in short sessions, and ask your doctor or an occupational therapist about pain that keeps coming back.
Why kit choice matters when your hands hurt
According to NIAMS, osteoarthritis commonly affects the hands, at the ends of the fingers and at the base and ends of the thumbs. People with it often have joint pain and a short spell of stiffness after rest, and everyday tasks such as gripping a pan can get harder over time. Rheumatoid arthritis is a different condition, and the NHS notes that it can affect the hands and wrists too.
Diamond painting is built on one small motion repeated many thousands of times: pick up a drill with a waxed pen tip, then press it onto a sticky canvas. Nothing about that is strenuous on its own. What adds up is how tightly you pinch the pen, how long you hold that pinch, how far you reach across the canvas, and how much fiddly nudging each drill needs before it sits right.
So the goal when you choose a kit and tools is simple. Look for anything that lets you hold the pen more loosely, pick up drills more easily, reach less and stop more often. The sections below take those one at a time.
Round drills are usually kinder to sore fingers
Diamond painting kits come with either round or square drills, and for sore hands the difference is bigger than it looks.
- Round drills seat easily, and small gaps between them do not show. You can place a drill slightly off center and the finished picture still reads well, so there is less need to go back and straighten rows.
- Square drills sit edge to edge in a tight grid. They give a crisp, tiled finish, but the edges have to line up, and getting them there often means extra nudging with a fingertip, tweezers or a straightening tool. That is precisely the kind of fine pinching work you may want to cut back on.
If you already love the look of square drills, you do not have to give them up. Just know that a round-drill kit is the more forgiving place to start when your hands are having a bad stretch. Our guide to square vs. round drills covers the trade-offs in more detail, and you can browse our round-drill diamond painting kits to see what is available.
Pick a design with big color areas and a modest color count
The picture itself changes how hard a kit is on your hands. Two things to check on any listing are the number of colors and how the colors are spread across the design.
Busy designs scatter single drills of one color among drills of other colors, a pattern crafters call "confetti." Each one of those means switching packets, finding the right symbol and placing one drill at a time. Designs with broad areas of one color let you settle into a rhythm, and they let you use a multi-placer tip that picks up a short line of drills at once.
Canvas size works in two directions:
- A larger canvas gives the same picture more drills, so each color area is bigger and there tends to be less confetti. The trade-off is more total placements, more hours and a wider surface to reach across.
- A smaller canvas finishes sooner, but fine details get packed into fewer drills, so you may end up placing more scattered single drills.
A middle size is a sensible starting point. Our Cottage Garden floral kit is 40 x 40 cm (16 x 16 in) with round drills and 23 DMC colors, so the drill areas stay fairly large and there are fewer packets to sort through than on a busier design. The listing estimates roughly 15 to 20 hours. The Golden Hour floral kit is a step up at 45 x 45 cm (18 x 18 in) with 21 DMC colors and an estimated 25 to 30 hours. Its golds look close to one another under a lamp, so work from the printed DMC number rather than by eye.
If you would like a shorter project to test how your hands feel, our small diamond painting kits are a low-commitment way to try. All of our kits are full drill with DMC-coded drills, so matching a symbol on the canvas to its packet is straightforward.
Choose a drill pen you do not have to pinch

The pen is the tool your hand holds for the whole session, so it deserves more thought than it usually gets. The basic stylus that comes in most kits is usually a light plastic pen. It does the job, but it gives your fingers very little to hold.
NIAMS notes in its guidance on treating osteoarthritis that people with arthritis in their hands may find it helpful to use devices that help them grip, such as jar openers. A drill pen is a craft tool, not a medical aid, but the same thinking is useful at the craft table: a pen with more substance to it gives your fingers something to rest against instead of something to squeeze.
Our resin diamond painting drill pen is made from solid resin rather than hollow plastic, so it has a more substantial feel in the hand. It comes with two threaded metal tips:
- a fine single placer for edges, details and one-drill-at-a-time work
- a wider multi-placer that picks up a short line of drills at once, which cuts down on separate pick-up motions in long single-color stretches
It works with round and square drills and standard diamond painting wax. Wax is not included. The tips screw in and can occasionally loosen with repeated use, so if twisting small parts is hard on your fingers, consider keeping two pens: one fitted with the single placer and one with the multi-placer. That way you switch pens instead of tips.
A few habits help whichever pen you use:
- Hold the pen loosely and let it rest against your fingers rather than gripping it hard.
- Press each drill straight down onto the adhesive, then set each finished section by rolling over it with a craft roller or a clean, empty glass bottle using firm, even pressure. Rolling uses your palm and arm rather than a pinch, and our guide to why diamond painting drills pop off explains why this step matters.
- If the pen still feels thin, a soft foam pen grip slipped over the barrel can make it easier to hold.
For a wider look at pen shapes and tips, see our diamond painting pens compared.
Keep pens, wax and drills where your hand expects them
A lot of hand strain in this hobby comes from small, unplanned movements: chasing a pen that rolled under the canvas, digging through a pile of packets, or pouring drills back into a bag with fingers that do not want to pinch. Good organization removes many of those movements.
- A pen station. Our Drill Pen Station is printed and finished in our studio. It holds four resin drill pens upright, tip up, plus a round wax well, so a pen is always standing where you left it and the waxed point never touches the table. A wax refill is included.
- A tray with a lid. The Diamond Painting Tray Set with Lid and Tweezers has a wide grooved bed, so a gentle shake turns drills face up. A snap-on spout funnels leftovers back into the packet, and the lid closes over sorted drills, so you can stop mid-row without tipping anything back. The set includes curved tweezers, two lidded storage cups and a mini funnel set.
- A packet tray. Our Diamond Art Drill Packet Tray stands up to 12 drill packets on edge in tilted slots with the labels facing you, so the color you need is one reach away instead of buried in a pile. It is printed to order in our studio, and a second tray clips on when a design has more colors.
- A case for the lot. The Tool Keeper is a padded zip case with elastic loops for pens and mesh pockets for wax, tweezers and spare tips. It comes empty, and it keeps everything together between sessions so setup takes less rummaging.
You can read more about getting the most from a tray in our guide on how to use diamond painting trays, and our roundup of the best tools for diamond painting covers the wider tool kit.
Set up your table to cut down on reaching and leaning
How you sit and where the canvas sits can matter as much as the tools.
- Flatten the canvas first. Kit canvases usually ship rolled. Leaving it under something heavy and flat for several hours, or overnight, before you start means you are not holding down a curling edge with your other hand.
- Work close to you. Keep the part you are working on near the table edge and move or rotate the canvas as you go, rather than stretching across it.
- Keep tools on one side. Put the pen station, tray and packet tray on the side of your working hand, in the same spots every time, so your hand learns where they are.
- Light the canvas well. Good light makes symbols easier to read, so you lean in less. If you are thinking about a light pad, our guide to light pads for detailed work explains what to look for.
- Sit comfortably. A chair and table height that let you work without hunching or raising your shoulders will help a long session feel easier.
Pace your sessions and take breaks
The NHS advice on living with rheumatoid arthritis talks about finding a balance between rest and exercise. Rest can make inflamed joints more comfortable, but without movement joints tend to stiffen. The NHS also advises that if an activity makes your joints warm and swollen or causes severe pain, you should stop and rest.
For a craft like this, that balance might look like:
- Short sessions. Decide on a session length that feels comfortable for you and set a timer, rather than finding out later that you overdid it.
- Natural stopping points. Finishing a color block or a single row gives you a clean place to stop. A lidded tray means stopping costs nothing.
- Mixing up the work. NIAMS suggests trying to avoid repetitive motions. Placing drills is one motion repeated over and over, so alternate it with lighter jobs such as reading the chart or setting out the next few packets.
- Choosing your time of day. NIAMS notes that osteoarthritis stiffness often follows rest and usually lasts less than 30 minutes. You may find painting easier once that first stiffness has eased.
- Listening to flare-ups. On a bad day, a few minutes of sorting may be plenty. The canvas will wait.
When to talk to a doctor or occupational therapist
Comfort tips only go so far. NIAMS describes occupational therapists as specialists who teach ways to protect joints, minimize pain, carry out daily activities and conserve energy. In its guidance on rheumatoid arthritis, the NHS notes that an occupational therapist can advise on protecting your joints and may suggest supports such as splints or helpful devices. For osteoarthritis, the NHS says a GP (family doctor) may refer you to a physiotherapist or occupational therapist if the condition is making everyday tasks difficult.
Talk to your doctor or an occupational therapist if crafting regularly leaves your hands painful, swollen or stiff, if symptoms are getting worse, or if you are not sure whether a hobby like this suits your joints right now. It can help to bring your pen and tray to an appointment so they can see the grip and motions involved and suggest adjustments that suit your hands.
A quick checklist before you buy
- Drill shape: round drills for easier, more forgiving placement.
- Canvas size: a middle size such as 40 x 40 cm to start, unless you know you enjoy long projects.
- Color count: a modest number of DMC colors, with broad areas of each color rather than lots of confetti.
- Listing details: clear information on drill shape, size and colors, and an estimated time if one is given.
- What is in the box: our Cottage Garden and Golden Hour listings include a stylus pen, grooved tray, wax refill and tweezers, but no frame. Upgraded pens, pen stations and packet trays are sold separately.
- Tools that reduce gripping and reaching: a solid drill pen, a lidded tray, a pen station and a packet tray.
Shop round-drill kits and hand-friendly tools
- Round-drill diamond painting kits: full-drill kits with the more forgiving drill shape.
- Cottage Garden floral kit: 40 x 40 cm, round drills, 23 DMC colors, $32.00.
- Resin drill pen: solid resin pen with single and multi-placer metal tips, $9.99.
- Drill Pen Station: studio-printed stand for four resin pens plus a wax well, $28.00.
- Tray set with lid and tweezers: grooved tray with pour spout and lid so you can pause mid-row, $9.99.
- Drill packet tray: 12 tilted slots that keep packet labels facing you, printed to order, $16.99.
- Tools and accessories: pens, trays and cases, all sold separately from the kits.


