Advanced Diamond Painting Techniques and Tips
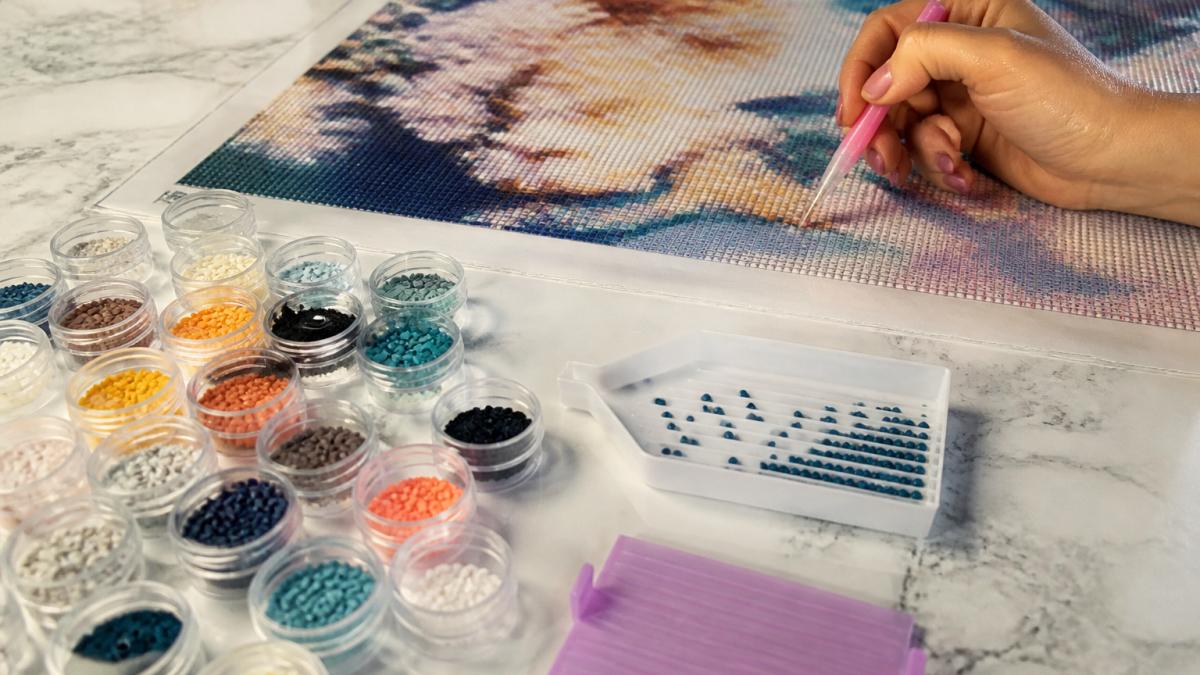
Table of Contents
- Advanced Diamond Painting Techniques and Tips: What Separates a Clean Finish From a Crooked One
- Sectioning the Canvas Before You Place a Single Drill
- Organizing Drills, Trays, and Containers for High-Detail Kits
- The Diamond Painting Checkerboard Method for Perfectly Straight Lines
- Diamond Painting Multi-Placer Tips for Large, Repetitive Sections
- How to Fix Diamond Painting Gaps and Crooked Drills Without Starting Over
- Best Diamond Painting Sealing Techniques for Long-Lasting Canvas Art
- Lighting, Workspace Setup, and Ergonomics for Long Sessions
- Framing Finished Projects and Choosing Between Release Paper and Plastic Covers
- Conclusion: Building a Repeatable Advanced Workflow
- Frequently Asked Questions
Last Updated: September 30, 2026
Advanced Diamond Painting Techniques and Tips: What Separates a Clean Finish From a Crooked One
Advanced diamond painting techniques and tips come down to one principle: control the canvas before the canvas controls you. Crooked lines rarely come from bad kits, they come from skipped preparation. Most guides stop at "peel the cover and start placing," which produces the crooked rows, popped drills, and uneven gaps that make a finished piece look handmade in the wrong way.
Here's the short version of what matters most:
| Stage | Goal | Common Failure | Fix |
|---|---|---|---|
| Sectioning | Manageable working zones | Whole canvas exposed at once | Washi tape grid |
| Organization | Fast drill retrieval | Mislabeled containers | Numbered tray system |
| Placement | Straight rows | Freehand drift | Checkerboard method |
| Sealing | Permanent hold | Drills popping over time | Proper sealer |
Sectioning the Canvas Before You Place a Single Drill
Sectioning means dividing an exposed canvas into small working zones so you never have more adhesive open than you can finish in one sitting. The simplest method uses washi tape or release paper strips to isolate a block of symbols, usually a 10x10 grid. Poured glue adhesive degrades when exposed to air, dust, and skin oils, so a canvas left fully open for a week holds drills less firmly at the edges.
A practical routine:
- Identify a natural landmark on the canvas, usually a bold symbol or color change.
- Lay washi tape along the grid lines to create a border.
- Work only inside that border until it's complete.
- Peel and reposition the tape, overlapping slightly to avoid gaps.
Organizing Drills, Trays, and Containers for High-Detail Kits
High-detail kits can run past 40 colors, where organization stops being optional. Build a system:
- Numbered containers that match the kit's color legend, not the color name.
- One active tray per working section, holding only the colors in that block.
- A backup bin for overflow drills, kept sealed.
- A labeling routine using the symbol, not just the number, since symbols are what you actually see on the canvas.
The Diamond Painting Checkerboard Method for Perfectly Straight Lines
The diamond painting checkerboard method fills alternating positions in a grid, creating a staggered pattern that keeps rows aligned and reveals drift early.

- Place your first drill in the top-left position of your section.
- Skip the next position and place the one after it.
- Complete the row in that alternating pattern.
- Return to the skipped positions and fill them on the second pass.
- Repeat row by row, checking alignment against the grid line every few placements.
Square Drills vs Round Drills: Which Method Demands the Checkerboard
Square drills benefit most from the checkerboard method because their edges must meet cleanly, one drill at a slight angle creates a visible gap that ripples down the row. Round drills are more forgiving, but still drift if placed freehand across a wide section. Treat the checkerboard as standard for square drills; for round drills, use it on long straight runs and skip it in small detail areas.
Diamond Painting Multi-Placer Tips for Large, Repetitive Sections
Multi-placer tips are the biggest time saver in the hobby, and the biggest source of crooked rows if used carelessly. A multi-placer picks up several drills at once and lays them in a single press, ideal for large blocks of one color. Use one without wrecking your alignment:
- Match the placer to the drill type. Square drills need a placer sized exactly to the grid; round drills tolerate slight variation.
- Load the tray evenly. Drills should sit flat and level, not stacked. A tilted drill places crooked every time.
- Press straight down. Rolling or dragging the placer shifts the whole row.
- Work in short runs. Long runs amplify any angle error. Realign every few presses.
- Check your first press before continuing. If the first row is off, the next twenty will be too.
How to Fix Diamond Painting Gaps and Crooked Drills Without Starting Over
Fixing gaps and crooked drills is almost always possible without abandoning the canvas, provided you catch the problem before sealing. The right fix depends on your adhesive system.
Know Your Adhesive System First
Kits ship with one of two adhesive types, and they fail differently:
- Poured glue is a liquid adhesive covered by a clear plastic film. It's thicker and more forgiving of a drill placed slightly off, but can develop soft or dead spots where the film lifted early, dust settled, or the glue layer was thin from the factory.
- Double-sided tape is a grid of adhesive strips under the printed symbols. It holds firmly on the strips but has thin or bare channels between them, so drills placed exactly on a grid line can sit slightly lower or pop loose over time.
Fixing a Crooked Drill
- Slide fine-tip tweezers under the drill edge and lift gently, never pry upward with force, which can tear the adhesive layer.
- Inspect the drill base; if it carries adhesive or lint, wipe it clean on a scrap of release paper.
- Reposition using the printed grid line as your reference, not the neighboring drills, they may themselves be off.
- Press firmly and hold for several seconds; the adhesive needs sustained pressure to bond.
Fixing Gaps
Gaps are almost never missing drills, they're spacing drift. Work backward from the gap and nudge adjacent drills into alignment rather than forcing it closed, which pushes the error down the row. For a genuine missing drill, place a spare of the correct color and press firmly. If the gap sits on a channel between tape strips, it may need a small dot of craft glue.
Restoring Lost Tack on a Weak Spot
The most common advanced problem is a localized dead spot where drills won't hold. The cause is one of three things:
- Contamination: skin oils, dust, or pet hair on the adhesive. Avoid touching the exposed surface with bare fingers; use a scrap of release paper as a hand rest.
- Overexposure: adhesive weakens when left open for days, the strongest argument for sectioning your canvas.
- Manufacturing thin patch: a spot where the glue layer or tape strip was thin from the start.
When to Stop Fixing and Start Over
Starting over is rarely necessary, but two cases make it the honest answer: a section where the adhesive layer has been torn or lifted away, and a color error placed and sealed before you noticed. For everything else, crooked rows, popped drills, localized weak spots, the canvas is salvageable with tweezers, a toothpick, and patience.
Best Diamond Painting Sealing Techniques for Long-Lasting Canvas Art
The best sealing techniques lock drills in place without dulling the sparkle. Sealing turns a finished canvas into a display piece, and skipping it is why so many projects shed drills over time. Options worth knowing:
- Brush-on sealers designed for diamond art, applied in thin coats.
- Spray sealers for even coverage on large canvases.
- Mod podge-style finishes for a matte look, though these can reduce shine.
Lighting, Workspace Setup, and Ergonomics for Long Sessions
Ergonomics determines whether you can keep painting for years. A full-drill canvas can take 40 to 80 hours in a near-static posture with the head tilted down, shoulders rounded forward, and the dominant hand making thousands of small pinch-and-press motions, a textbook setup for repetitive strain injury (RSI): carpal tunnel syndrome, de Quervain's tenosynovitis, and cervical neck strain.
The Three Zones of a Sustainable Setup
Zone 1, The canvas angle. A flat canvas forces you to flex your neck roughly 30 to 45 degrees for the entire session. Tilting the working surface 30 to 45 degrees brings the canvas closer to eye level and cuts that flexion substantially. A drafting table, an adjustable laptop stand, or a stack of books under the far edge of a board all work.
Break Structure That Actually Prevents Injury
"Take breaks" is useless without a structure. A workable pattern:
- Every 20 to 30 minutes: 30 seconds of hand open-and-close stretches and wrist circles, restoring circulation before stiffness sets in.
- Every 60 to 90 minutes: stand, walk for two to three minutes, and roll the shoulders back. Static posture, not just hand motion, drives most neck and back complaints.
- Every session: alternate the hand you hold the pen in for low-precision fill areas. Even ten minutes of switching gives the dominant hand's tendons a recovery window.
Lighting and Eye Strain
A light pad under the canvas does more than make symbols readable, it lets you work with a lower overhead light level, reducing glare and eye fatigue. Position it so the glow comes from beneath and slightly behind the canvas, not into your eyes. For overhead lighting, use a bright, diffuse source to the side of your dominant hand so your shadow doesn't fall across the working section.
Tools That Reduce Load
- Thicker-grip drill pens with molded rests reduce pinch force.
- Angled or tilted trays let you pick up drills without flexing the wrist repeatedly.
- A rolling cart or side table at elbow height keeps trays, spare drills, and tools within reach so you're not twisting or reaching across the canvas.
- A magnifying lamp on an articulated arm reduces the forward head lean that comes from straining to see small symbols.
If you have arthritis or an existing hand condition, these adjustments move from helpful to essential. The goal isn't to power through a session, it's a setup you can return to tomorrow without pain.
Framing Finished Projects and Choosing Between Release Paper and Plastic Covers
Framing decisions start before the last drill goes down. The two protective options most painters weigh are release paper and plastic covers, and each suits a different purpose.
| Cover Type | Best For | Trade-Off |
|---|---|---|
| Release paper | Working in sections, repositioning | Must be replaced as it loses tack |
| Plastic cover | Storage and shipping | Can trap dust if not sealed |
| Clear sealer + frame | Display pieces | Permanent, no repositioning |
Conclusion: Building a Repeatable Advanced Workflow
The gap between a clean finish and a crooked one isn't talent, it's process: section the canvas, organize the drills, use the checkerboard method on square drills, seal properly, and protect your hands and posture. Jeanne Argent Atelier sells full-drill kits with DMC-coded drills, plus drill pens and trays to support that workflow.
Frequently Asked Questions
What is the checkerboard method in diamond painting?
The checkerboard method means placing drills in an alternating pattern, leaving empty squares between each one, then filling the gaps in a second pass. This reduces the chance of neighboring drills shifting while you work and keeps rows straighter on square-drill canvases. It is slower per pass but cuts straightening time at the end, which matters most on large full-drill kits.
How do you achieve perfectly straight lines in diamond painting?
Work in small sections rather than long rows, use washi tape or release paper to isolate the area you are filling, and place square drills with the flat edge aligned to the grid line rather than the printed symbol. The checkerboard method helps here because each drill has a settled neighbor to butt against. Check alignment every few rows instead of at the end.
How can you prevent diamond drill popping on large canvases?
Popped drills usually come from weak adhesive, dust on the canvas, or pressing drills down too hard and displacing the glue. Keep the cover sheet on unused areas, avoid touching exposed adhesive with bare fingers, and press each drill with light, even pressure. After finishing, a sealer applied over the full canvas locks drills in place and reduces popping during framing or hanging.
What is the best way to seal a finished diamond painting for longevity?
Apply a thin, even coat of a dedicated diamond painting sealer over the finished canvas, working in small sections with a foam brush. Let each coat cure fully before adding another. Avoid heavy brush pressure, which can lift drills. Sealing protects against popping and dust, and it is especially worth doing on pieces you plan to frame or display long term.
What are the benefits of using a multi-placer tool for advanced projects?
A multi-placer picks up several drills at once, which speeds up large blocks of one color and keeps spacing consistent across the row. It works best on solid color fields and borders, not on detailed areas. Load the tray with the drills aligned in the grooves, pick up a full row, and place with steady pressure so all drills seat at the same depth.
How do you organize drills for complex, high-detail kits?
Label each container with the symbol and DMC number from the legend, not just the color name, since similar shades are easy to confuse. Sort drills into small lidded containers or a storage case before you start, and keep the tray for the color you are currently placing. Working one section at a time with only the needed colors out reduces misplacement on dense canvases.
Long sessions and detailed canvases test your setup as much as your patience. Jeanne Argent Atelier offers full-drill kits with DMC-coded drills, along with drill pens and trays sold separately. Explore the collections and find the kit that matches your next project.


