27 August 2026
Diamond Painting Checkerboard Method Explained
Table of Contents
- What Is the Checkerboard Method in Diamond Painting?
- Why the Checkerboard Technique Works Better Than Row-by-Row
- Step-by-Step Guide to Applying the Checkerboard Method
- Diamond Painting Drill Alignment Tips for Precision
- How to Fix Gaps in Diamond Painting Using This Method
- How to Use a Multi-Placer Tool With the Checkerboard Approach
- Common Mistakes to Avoid When Using the Checkerboard Method
- Conclusion
Last Updated: August 28, 2026
What Is the Checkerboard Method in Diamond Painting?
The diamond painting checkerboard method is a strategic drill placement technique that alternates filled and empty squares across your canvas in a diagonal pattern. Instead of completing rows sequentially, you place drills in every other square, creating a checkerboard grid that guides your workflow and improves precision.
This approach differs fundamentally from traditional row-by-row methods. Rather than filling one horizontal line completely before moving to the next, you fill alternating squares first, then return to complete the gaps. This creates visual anchors that keep subsequent rows aligned and prevents the drift that occurs when working linearly across a canvas.
The checkerboard pattern also reduces fatigue. By alternating between filled and empty squares, you vary your hand position and drill pen angle slightly with each placement, reducing repetitive strain during long crafting sessions (peer-reviewed research).
Why the Checkerboard Technique Works Better Than Row-by-Row
The row-by-row method feels intuitive because it mirrors how we read, but this linear approach creates alignment problems that compound as you progress across the canvas. Small spacing inconsistencies in early rows cascade into visible gaps and misalignment by the middle sections.
The checkerboard method interrupts this cascade. By placing drills in alternating squares, you create a visual grid that acts as constant reference points. Each empty square becomes a target for the next phase, and those targets keep your spacing consistent. When you return to fill the gaps, your eye has already calibrated to the established spacing pattern, so subsequent placements snap into alignment naturally.
This technique also improves the adhesive bond between drills and canvas. The alternating placement pattern means your drill pen approaches each gap from a slightly different angle, distributing pressure more evenly across the adhesive layer and reducing the likelihood of drills popping off later (peer-reviewed research).
Once you've completed the alternating checkerboard, the remaining empty squares form clear visual clusters. You can see exactly where gaps exist and address them systematically, rather than discovering misalignments only after moving to a new section.
Step-by-Step Guide to Applying the Checkerboard Method
Setting Up Your Canvas and Tools
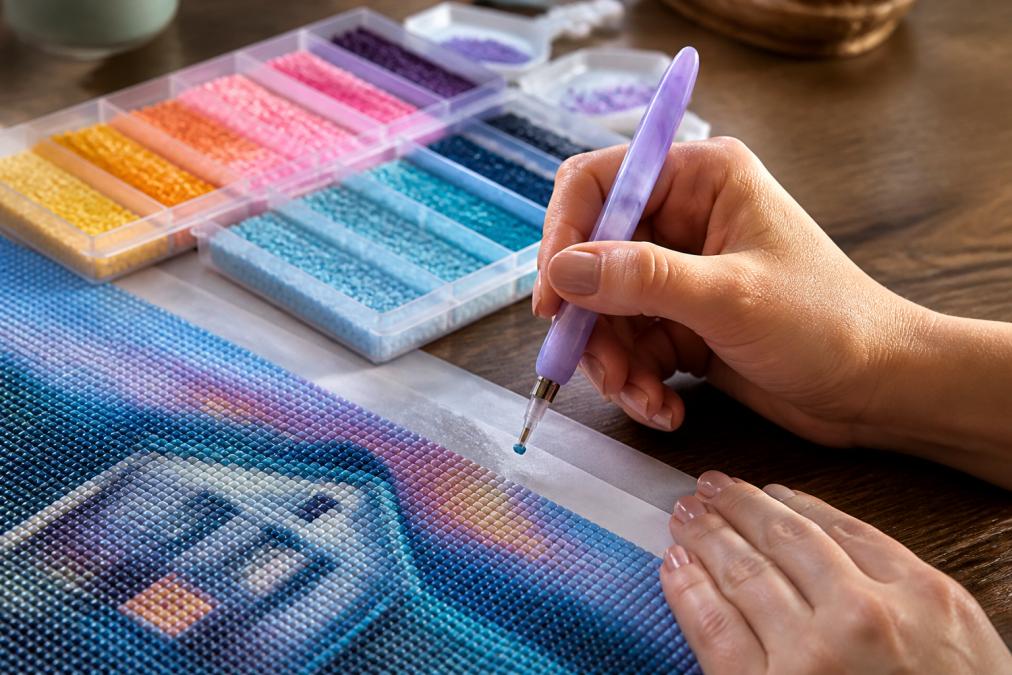
Lay your canvas flat on a smooth, hard surface like a desk or craft board. Avoid soft surfaces, which shift under pressure and throw off your spacing.
Organize your drills by color into your tray, keeping colors you'll use in the checkerboard phase easily accessible. Position your drill pen comfortably in your dominant hand. The pen should feel like an extension of your hand, not a tool you're gripping tightly. Tension in your grip transfers to placement accuracy, so a relaxed hold is essential.
Placing Your First Diagonal Pattern
Identify your starting point, typically the top-left corner or the center of your canvas. Many crafters prefer starting at the center because it reduces the risk of running out of space if spacing drifts.
Look at your canvas grid and place drills in a diagonal pattern across alternating squares. Start by placing a drill in the first square, skip the next square, place a drill in the third square, skip the fourth, and continue this pattern diagonally across the canvas. This first diagonal line establishes your spacing reference. Take your time with these initial placements, as they set the tone for everything that follows.
Once you've completed the first diagonal, move to the next diagonal line, maintaining the same spacing and alignment. You're creating a series of diagonal lines that form the first phase of your checkerboard pattern.
Filling In the Alternating Squares
After completing your diagonal lines, you'll have a grid of filled and empty squares. The empty squares are now your targets, and they're clearly visible.
Begin filling the gaps by working systematically through each row or column. The empty squares provide a visual boundary that keeps your new placements aligned with the existing drills. Your eye naturally references the filled squares on either side of each gap, so spacing becomes almost automatic.
Press each drill firmly into the canvas with consistent pressure. The sticky surface should grip the drill with gentle pressure. As you fill gaps, the pattern emerges and sections that looked sparse suddenly feel complete.
Diamond Painting Drill Alignment Tips for Precision
Alignment is the difference between a finished kit that looks polished and one that looks amateur. Maintain consistent drill pen pressure throughout your work. Varying pressure changes how the drill sits in the adhesive. Develop a consistent pressing motion that feels natural, then replicate it for every placement.
Keep your canvas flat and level throughout your session. If you need to reposition yourself, adjust your body position rather than tilting the canvas. Use the grid lines on your canvas as continuous reference points. Don't rely on memory of where the previous row ended; visually trace the grid line forward to confirm your current placement aligns with established rows.
Round drills and square drills require slightly different alignment approaches. Square drills must align edge-to-edge with no gaps, so spacing becomes critical. Round drills allow tiny gaps between placements without appearing misaligned, giving you slightly more forgiveness.
How to Fix Gaps in Diamond Painting Using This Method
Gaps appear when drills pop off the canvas after placement or when spacing creates unintended empty squares during the filling phase. The checkerboard method actually prevents many gaps because it distributes adhesive pressure more evenly.
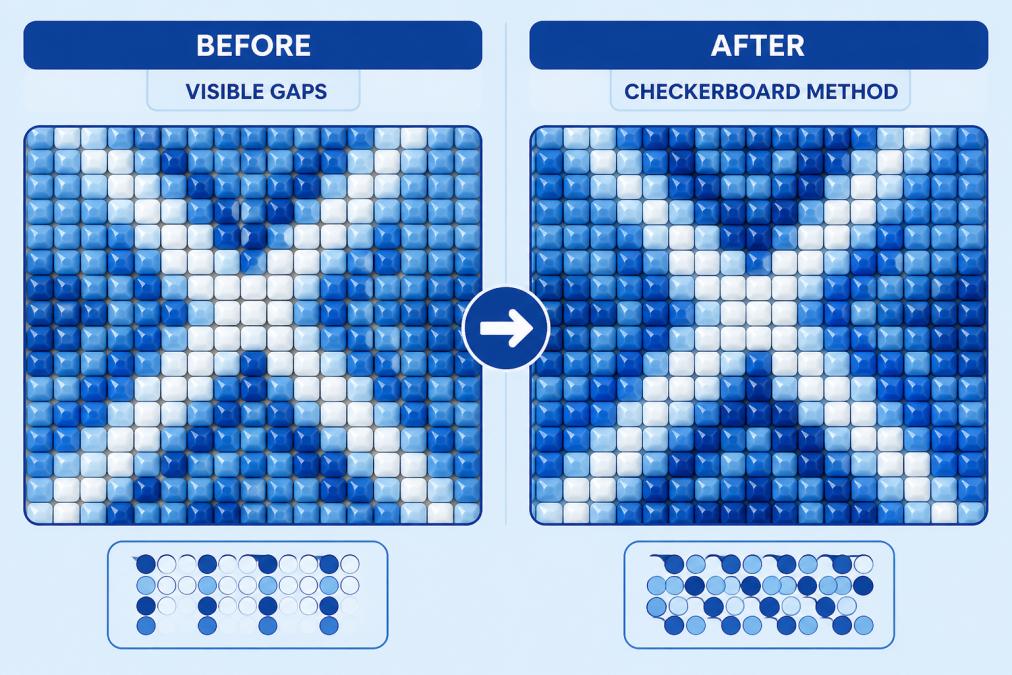
When you identify a gap, assess whether it's a missing drill or a spacing error. A missing drill leaves a visible empty square where a drill should be. A spacing error is a gap between existing drills caused by inconsistent placement.
For missing drills, simply pick up a drill of the correct color and press it into the empty square. The adhesive underneath is usually still sticky enough to grip a new drill. For spacing errors, you can nudge adjacent drills slightly to close small gaps, or remove and re-place drills with corrected spacing. The checkerboard method's two-phase structure helps here, as you have a visual reference for correct spacing.
How to Use a Multi-Placer Tool With the Checkerboard Approach
Multi-placer tools hold four to nine drills simultaneously, allowing you to place multiple drills in a single motion. The checkerboard method pairs beautifully with multi-placer tools because the alternating pattern creates natural placement zones.
Load your multi-placer tool with drills of the same color, arranged in the same orientation as your canvas grid. When you press the tool down, all drills should land in their designated squares simultaneously. The key to multi-placer success is consistent tool angle and pressure. Any tilt causes some drills to press deeper than others, creating uneven heights.
For the checkerboard phase, multi-placer tools work best when placing drills in a regular pattern. You can often complete an entire diagonal with a few multi-placer motions. During the gap-filling phase, switch back to a single-placer pen, as remaining gaps are scattered across the canvas and a multi-placer tool would place more drills than needed.
Common Mistakes to Avoid When Using the Checkerboard Method
The most frequent error is inconsistent spacing during the checkerboard phase. Slow down during this phase, as this is where precision matters most. The filling phase will be faster and easier if your checkerboard grid is accurate.
Another common mistake is skipping the visual reference step. Use the established checkerboard pattern actively. Trace the grid line visually before each placement to prevent alignment drift.
Some crafters abandon the checkerboard method partway through because they feel it's slower than row-by-row work. The checkerboard phase does take longer, but the filling phase is significantly faster because alignment is already established. Commit to the full two-phase process before deciding whether it works for you.
Pressing too hard during placement doesn't improve adhesion; it just wastes energy and increases hand fatigue (peer-reviewed research). Use firm, consistent pressure that feels comfortable. Finally, avoid using degraded or old adhesive canvases. The checkerboard method works best when the sticky surface is fresh and grips reliably.
The diamond painting checkerboard method is more than a placement technique; it's a workflow that transforms how you approach precision and alignment. By breaking the canvas into a structured grid and using visual reference points, you reduce errors and complete projects with greater confidence. Whether you're working with square drills or round drills, using a single-placer pen or multi-placer tool, the checkerboard method adapts to your workflow and improves your results.
At Jeanne Argent Atelier, we've designed our premium full-drill kits with precision crafters in mind. Our canvases feature clear grid lines that work seamlessly with the checkerboard method, and our specialized drill pens provide the ergonomic comfort you need for extended sessions. Combined with high-quality adhesive that grips reliably and drills that maintain uniform height, our kits give you the foundation to execute the checkerboard method flawlessly. Explore our collections and discover how the right kit elevates your diamond painting experience.
Frequently Asked Questions
What is the checkerboard method in diamond painting?
The checkerboard method is a diamond placement technique where you fill your canvas in an alternating diagonal pattern, like a checkerboard grid. Instead of completing rows or columns sequentially, you place drills in alternating squares across sections, then fill the gaps. This approach improves alignment, reduces spacing errors, and creates a more uniform appearance. It works with both square and round drills and is especially effective for maintaining consistent drill placement throughout your project.
Does the checkerboard method help with diamond painting drill alignment tips?
Yes. The checkerboard method naturally enforces alignment because the alternating pattern creates visual guides. By placing drills in a grid-like sequence, you establish spacing landmarks that keep subsequent drills straight and evenly spaced. This reduces the drift that occurs with row-by-row placement. The method also forces you to pause between sections, giving you time to assess uniformity and correct misaligned drills before moving forward. Many crafters report fewer crooked lines and tighter overall neatness.
How do I fix gaps in diamond painting using the checkerboard method?
After completing your initial alternating pattern, gaps appear naturally between your placed drills. The second phase of the checkerboard method fills these gaps systematically. Go back and place drills in the empty squares you skipped, working section by section. This two-pass approach helps prevent drills from popping off because you're not forcing drills into tight spaces on the first pass. The adhesive has time to set on the first layer, creating a stable base for the second layer. Check each gap for proper spacing before moving to the next section.
Can I use a multi-placer tool with the checkerboard method?
Yes, a multi-placer tool works well with the checkerboard technique. Load your multi-placer with drills of the same color and follow the alternating grid pattern just as you would with a single-placer drill pen. The multi-placer speeds up the first phase significantly, allowing you to fill alternating squares faster. After completing the diagonal pattern, switch to a single-placer or reload the multi-placer for the second phase to fill gaps. This hybrid approach combines efficiency with the precision benefits of the checkerboard method, especially for large sections with uniform colors.
This article was written using GrandRanker