Caring for Your Diamond Painting Masterpiece: 2026 Guide
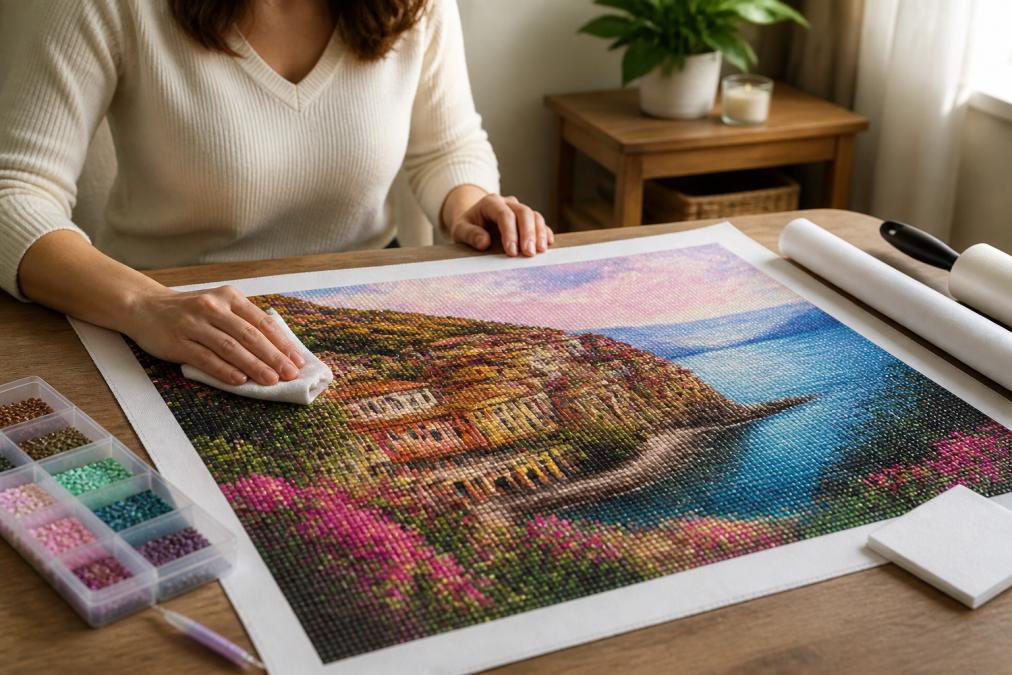
Table of Contents
- Start With a Clean, Flat Workspace
- Cleaning Diamond Art Without Lifting Drills
- Choosing the Best Diamond Painting Sealant
- How to Frame Diamond Painting for Display
- Repairing Damaged or Missing Diamonds
- Storing Finished and Unfinished Projects
- UV Protection, Humidity, and Long-Term Care
- Conclusion
- Frequently Asked Questions
Last Updated: September 26, 2026
Start With a Clean, Flat Workspace
Caring for your diamond painting masterpiece begins with where you work. A clean, flat, stable surface prevents the two most common causes of damage: dust trapped under the adhesive and canvas warping from uneven pressure.
A common mistake is working on a soft or sloped surface like a bed or couch cushion: the canvas flexes, drills shift, and you press them deeper on one side. A simple folding table with a smooth top works better than any dedicated craft station.
Set up your space with these essentials:
- A rigid, flat surface (a large cutting mat or board helps)
- Good overhead lighting to reduce eye strain and missed symbols
- A lint-free cloth nearby for quick dust removal
- Small trays to keep resin drills contained and sorted
At Jeanne Argent Atelier, our full-drill kits are printed on firm canvas with clearly defined symbols, which makes this setup stage easier from the first session.
Cleaning Diamond Art Without Lifting Drills
Cleaning diamond art safely means removing dust and debris without pressing down on the drills or introducing moisture to the adhesive. The technique matters more than the tool.
Most finished pieces collect dust, lint, and pet hair, and static electricity pulls particles toward the glossy surface. A soft brush loosens debris; a microfiber cloth lifts it away. Never scrub.

Dust, Lint, and Static Buildup
Dust settles into the gaps between drills and lint clings to the glossy finish, especially in dry indoor air. A dry microfiber cloth handles routine dust removal; for stubborn lint, a soft-bristle brush or clean dry toothbrush works well on the crevices between beads.
Avoid pressing hard.
Safe Cleaning Solutions and Tools
Water is the enemy of most diamond painting adhesive. A barely damp cloth can work for sticky residue, but moisture that seeps under the drills weakens the bond and clouds the finish. Household glass cleaner or alcohol wipes degrade the adhesive and dull the resin.
Stick to dry methods first:
- Microfiber cloth for surface dust
- Soft brush or toothbrush for crevices
- Lint roller for loose fibers on the canvas border
Choosing the Best Diamond Painting Sealant
The best diamond painting sealant locks drills in place without dulling their shine, yellowing, or cracking as the canvas flexes. It's the single most effective step for long-term preservation, and the difference between a good and bad choice usually shows up 12-24 months later, not on day one.
| Sealer Type | Typical Base | Finish | Reversible? | Best For |
|---|---|---|---|---|
| Brush-on craft sealer | Acrylic polymer emulsion | Gloss or matte | No | Full-drill display pieces |
| Spray acrylic coating | Solvent- or water-based acrylic | Gloss, satin, matte | No | Large canvases, even coverage |
| Brush-on polyurethane | Oil- or water-based urethane | Gloss or satin | No | Heavy-handling pieces |
| Mod Podge-style decoupage medium | PVA/acrylic blend | Gloss, matte, sparkle | No | Budget projects, sealed-and-framed |
What Each Base Actually Does
Acrylic polymer emulsions (the most common craft sealers) cure by water evaporation followed by polymer coalescence. They stay slightly flexible, which matters because resin drills and canvas expand and contract at different rates with temperature; a rigid sealer on a flexible canvas is the leading cause of hairline cracks.
Gloss vs. Matte Finishes and Curing Time
Gloss sealers preserve the sparkle of resin drills and suit display pieces where shine is the point. Matte sealers cut glare under bright overhead lighting or behind glass. Satin sits between the two and is the safest default for framed work.
What to Avoid
Silicone-based sealers and furniture polishes are the wrong tool: silicone migrates, repels later coatings, and makes touch-ups nearly impossible. Oil-based varnishes for wood can soften the adhesive under the drills, and any sealer labeled 'removable' or 'peelable' defeats the purpose, the whole point is a permanent bond.
How to Frame Diamond Painting for Display
To frame diamond painting, choose a frame with enough depth to accommodate the canvas and drills, then mount the piece on a rigid backing before inserting it. Standard picture frames are often too shallow.
| Frame Type | Best For | Key Consideration |
|---|---|---|
| Shadow box | Full-drill pieces | Depth for drills; no glass contact |
| Standard frame with mat | Smaller canvases | Add spacers to avoid glass pressure |
| Floating frame | Modern display | Rigid backing required |
| Custom archival frame | Heirloom pieces | UV glass and acid-free materials |
Repairing Damaged or Missing Diamonds
Missing or damaged diamonds can be repaired, provided you saved leftover drills from the kit, most kits include extras for exactly this reason.
Storing Finished and Unfinished Projects
Proper storage protects both the work in progress and the finished project from dust, humidity, and physical damage. The approach differs for each.
- Unfinished: cover adhesive, roll around a tube, store upright
- Finished: store flat, separate layers, keep in a cool dry space
- Long-term: use an archival box or portfolio for valuable pieces
UV Protection, Humidity, and Long-Term Care
Sunlight and humidity are the two slowest but most damaging threats to a finished diamond painting. UV exposure fades resin color and embrittles adhesive over months and years; humidity warps canvas and lets adhesive creep; temperature swings do the rest.
UV Protection: Glass Types and What They Actually Block
Not all framing glass is equal. Standard clear glass blocks almost no UV. UV-filtering glass blocks most UV wavelengths but still lets visible light through, so it slows fading rather than stopping it. Museum glass adds anti-reflective coating on top of UV filtering, giving protection without the glare that washes out drill sparkle.
| Glass Type | UV Blocking | Glare | Typical Use |
|---|---|---|---|
| Standard clear glass | Minimal | High | Budget framing, low-light rooms |
| UV-filtering glass | High | Moderate | Most display pieces |
| Museum glass | High | Very low | Heirloom or high-value pieces |
| Acrylic (UV-filtered) | High | Low | Large or shipped pieces |
How Temperature and Humidity Affect the Adhesive
Most diamond painting adhesive is a pressure-sensitive acrylic. It stays tacky across a moderate range, but extremes work against it:
- Heat softens the adhesive and lets drills shift or slide, especially on a vertical canvas.
- Cold makes the adhesive brittle and the resin drills more prone to cracking if bumped.
- Repeated temperature swings, an attic in summer, a garage in winter, cycle the adhesive through soft and brittle states until the bond fatigues.
- High humidity lets moisture migrate under the drills, clouding the finish and weakening the grip.
Long-Term Care Routine
Long-term preservation is mostly about consistency, not effort. A workable schedule:
- Every 1-2 months: dust gently with a dry microfiber cloth; check for loose or lifted drills.
- Every 6 months: inspect the sealant for cloudiness, cracks, or dull spots; re-seal only the affected area if wear shows.
- Annually: check the frame for glass contact, verify the backing hasn't warped, and confirm humidity in the display room is still in range.
UV glass slows fading, stable temperature and humidity protect the adhesive, and a simple quarterly dust-and-inspect routine catches almost every problem while it's still cheap to fix. Consistency beats intensity.
Conclusion
A finished diamond painting can hold its sparkle for years, but only if the care matches the effort that went into it. Dust, sunlight, humidity, and rough handling all take their toll, and the fixes are far easier when caught early. Start with a clean workspace, seal and frame with depth and UV protection in mind, and store everything flat and dry.
Frequently Asked Questions
What is the best thing to seal your diamond art with?
Water-based polycrylic sealants in a gloss or matte finish are the most common choice because they dry clear and don't yellow over time. Apply thin coats with a soft brush, let each coat cure for the time stated on the label, and avoid thick layers that can pool between drills. Always test on a small corner first to confirm the finish you want.
How do I prevent diamonds from falling off my finished project?
Sealing the canvas is the most reliable step. Use a water-based sealer, apply two or three thin coats, and let each one cure fully. Store the piece flat rather than rolled, keep it out of direct sun, and handle it by the edges. If a drill does pop off, a small dot of craft glue or a spare drill from your kit will fix it in minutes.
What should I do if my diamond painting isn't sticky anymore?
Adhesive can lose tack from dust, humidity, or age. Try pressing the drill back into place with a small dot of clear craft glue or adhesive putty. If a large area has gone flat, apply a thin line of glue along the affected zone and reset the drills with tweezers. Sealing the finished piece afterward prevents the problem from spreading.
How can I clean dust off a finished diamond painting?
Start with a dry, soft-bristled brush or a clean makeup brush to lift surface dust. For stubborn spots, wipe gently with a lint-free microfiber cloth. Avoid paper towels, which leave fibers, and never soak the canvas in water. A quick pass every few weeks keeps the drills bright and the surface free of buildup.


