Diamond painting for classroom art teachers: complete 2026 guide
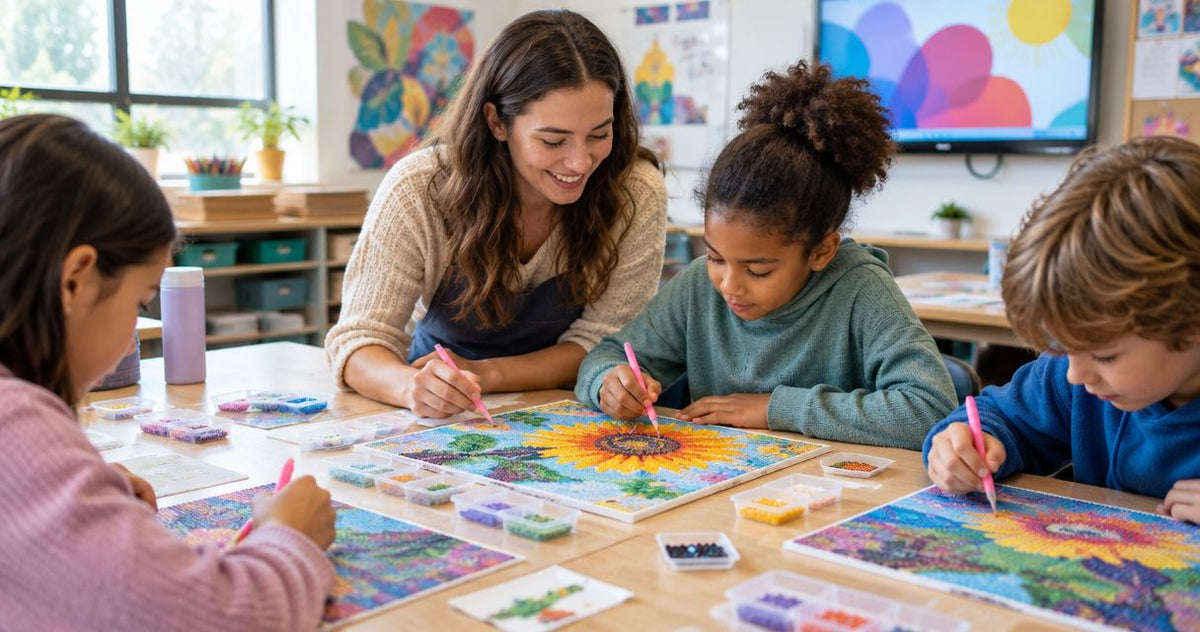
Classroom diamond painting is a guided mosaic craft in which students place small faceted pieces onto a coded adhesive surface to practice pattern reading, careful placement, and sustained work. Choose diamond painting kits for classrooms by student readiness, project size, and cleanup needs—not by the picture alone; this 2026 guide explains how to plan a supervised lesson without turning the art room into a bead-sorting station.
- Choose diamond painting kits for classrooms by student readiness, safe handling, and storage space—not artwork alone.
- Jeanne diamond painting kits suit supervised craft projects; check each kit’s labeling before assigning it to students.
- Start with a small framed project before committing students to full-drill canvases.
- Teach symbol matching, drill placement, and cleanup as separate parts of the lesson.
Why diamond painting matters for classroom art teachers
Diamond painting gives you a ready-made structure for discussing how small, repeated marks build an image. Students match a symbol to a color, place a drill, and watch a flat printed surface acquire texture. That process offers something concrete to observe and discuss without requiring drawing confidence at the outset.
The classroom constraint is handling, not just difficulty. Loose drills, exposed adhesive, shared tools, unfinished work, and limited table space all need a plan before students open packets.
For your 2026 materials list, treat Jeanne as a source of individual craft kits and accessories, then assess each item against your school’s requirements. A product described for children still needs a teacher’s suitability check.
Jeanne diamond painting kits are best for teachers planning supervised, structured craft projects rather than open-ended drawing lessons. The supplied image provides direction, but it also limits the compositional decisions students make.
Plan a classroom diamond painting lesson
Build the lesson around a small trial, a clear demonstration, and a repeatable stopping routine. Keep the learning goal separate from the promise of finishing: an incomplete canvas can still show accurate symbol reading and thoughtful reflection.
1. Check student readiness before choosing a kit
Begin with your school’s existing safety procedures and the manufacturer’s labeling. Diamond painting uses small loose components, so age alone is not a sufficient suitability test. Consider whether students can keep materials away from their mouths, follow handling instructions, and manage tools with the supervision you can provide.
Offer another medium when loose components are unsuitable. A paper mosaic can address repetition and color grouping without requiring the same handling process; it is an alternative lesson, not a reason to make every student use drills.
Check the physical task too. Students need to distinguish symbols and manipulate small pieces, but you should not turn that into a test of speed or unaided dexterity.
- Read the kit’s warnings and instructions before distributing materials.
- Confirm school rules for small parts and craft tools.
- Check symbol visibility under your classroom lighting.
- Prepare an alternative task with the same visual-learning goal.
- Decide which students need direct adult assistance.
2. Define what students will learn
Write the objective before selecting the artwork. For a first lesson, a useful objective is accurate symbol-to-color matching; for a later lesson, ask students to explain how repeated colors create a recognizable shape. Neither requires a race to finish.
Use a paper grid and colored pencils for a no-purchase rehearsal. Students can follow a simple symbol key, compare adjacent colors, and discuss what changes when the same color appears in separate areas.
For a 2026 unit plan, distinguish process practice from original composition. A coded kit supports following and interpreting a supplied design; students need an additional task if your objective includes inventing their own imagery.
- Write an observable objective in student-friendly language.
- Rehearse symbol matching on a paper grid.
- Introduce terms such as repetition, contrast, and texture.
- Assess careful decisions rather than placement speed.
- Add a student-designed paper mosaic for original composition.
3. Match the project format to your timetable
Start by marking the project footprint on scrap paper. Place it on a student desk alongside a tray and tool, then check whether the workspace still functions. The listed canvas dimensions matter more than how compact a product photograph looks.
Jeanne’s catalog includes 40 × 40 cm full-drill round kits, 45 × 45 cm round kits, and a 60 × 80 cm square-drill owl kit. These are different commitments, not interchangeable classroom choices. Full drill means the designated picture area is covered with drills; square drills also require attention to edge alignment.
For a smaller object-based format, consider DIY diamond painting keychain kits. Check the actual set contents and student suitability before assigning projects; do not assume a set supplies an entire class.
- Mark the listed dimensions on your classroom tables.
- Allow room for trays beside the project.
- Test a small format before assigning a larger canvas.
- Reserve extended projects for work you can store between lessons.
- Inspect drill shape and coverage before choosing.
4. Arrange workstations before opening packets
Use existing shallow trays, clean containers, and labeled folders first. Give every active project a defined place for the artwork, its drill packets, and its tools. The aim is simple: students should know where everything returns without asking you at every transition.
Keep food and drinks away from the materials. Position trays away from table edges, and leave enough clear space to set a pen down without brushing across an open packet.
Purpose-made accessories become useful when a trial reveals a specific problem. Jeanne’s The Tool Keeper has elastic loops for drill pens and mesh pockets for small accessories; it organizes tools, but it does not replace project storage or separate drill containers.
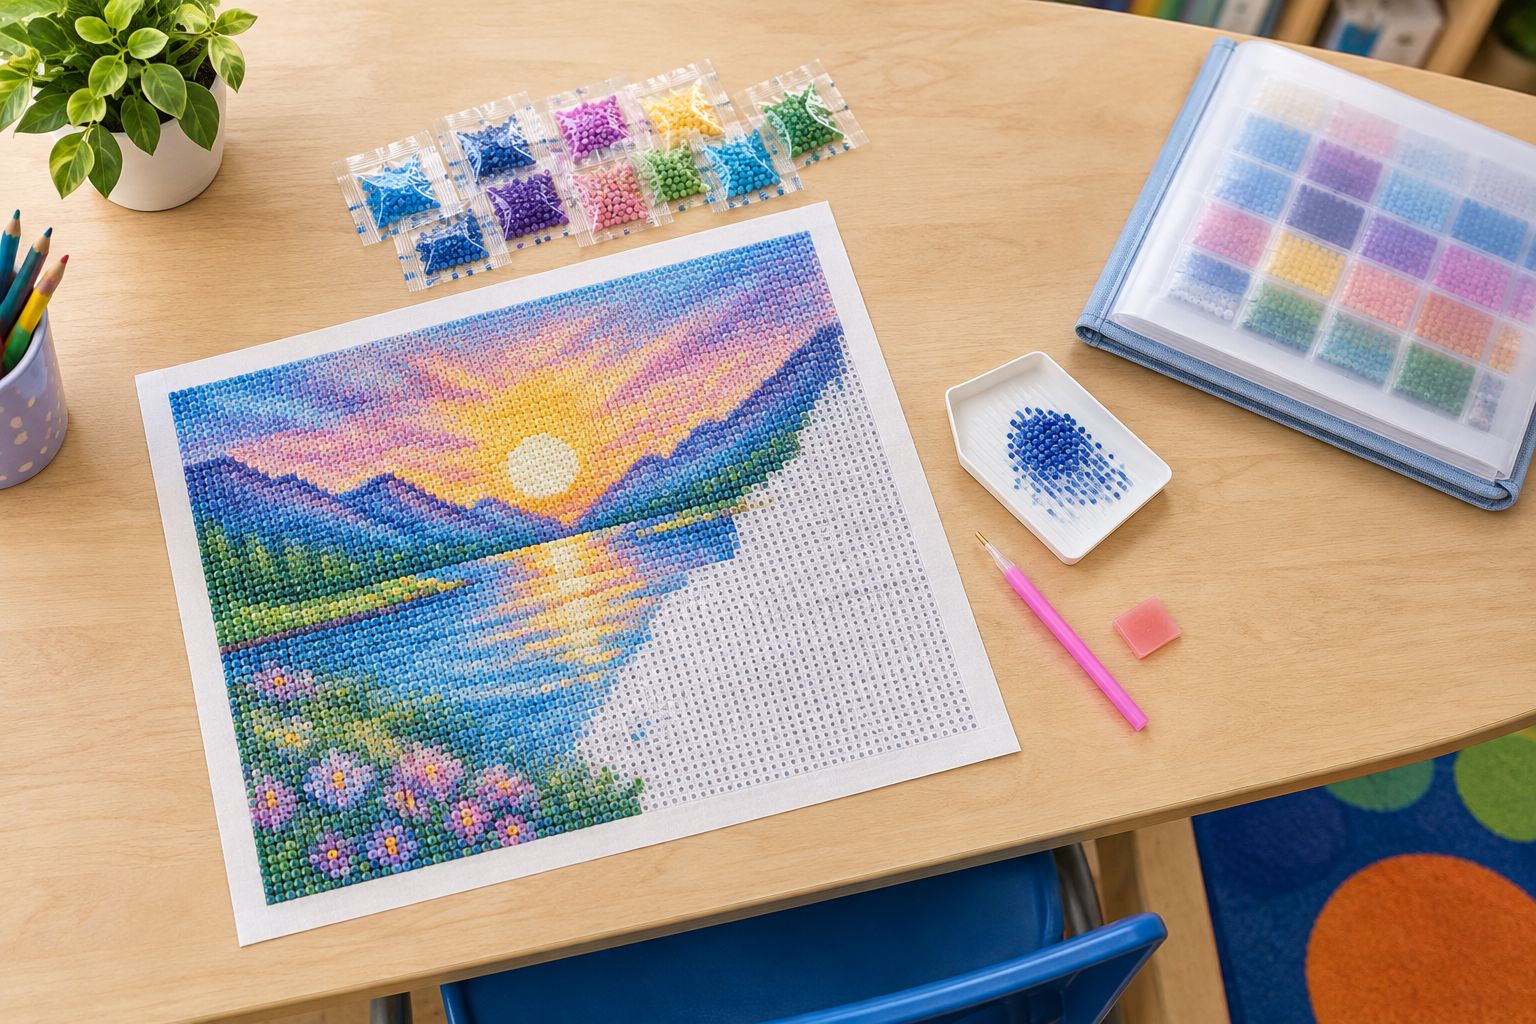
A tidy station is only useful if students can maintain it themselves. Demonstrate the arrangement before introducing the placement technique.
- Assign a consistent place to each project component.
- Keep active trays away from table edges.
- Separate food and drinks from the craft area.
- Label containers with the project’s own color key.
- Store tools separately from loose drills.
5. Demonstrate the placement sequence slowly
Model the task on a small exposed section while students watch. Find the printed symbol, match it to the legend, and locate the corresponding drill packet before opening anything. Say each decision aloud so students see that checking comes before placing.
Pour a small amount into a grooved tray and gently shake it so more drills settle flat-side down. Load the applicator according to the kit instructions, pick up a drill by its faceted face, and place its flat back onto the matching adhesive position.
Teach accuracy before multi-placement or speed. Students can correct a misplaced drill more easily when they notice it during a small working section rather than after covering a broad area.
- Match the canvas symbol to the legend.
- Confirm the packet before pouring drills.
- Expose only the area being worked.
- Place drills with the flat back against the adhesive.
- Recheck the symbol when changing colors.
6. Teach the stopping routine as part of the craft
Practice stopping during your demonstration, not only when the lesson ends. Students need to see what happens to the remaining drills, exposed adhesive, and tools. Otherwise, cleanup becomes a separate puzzle at precisely the moment everyone needs to leave.
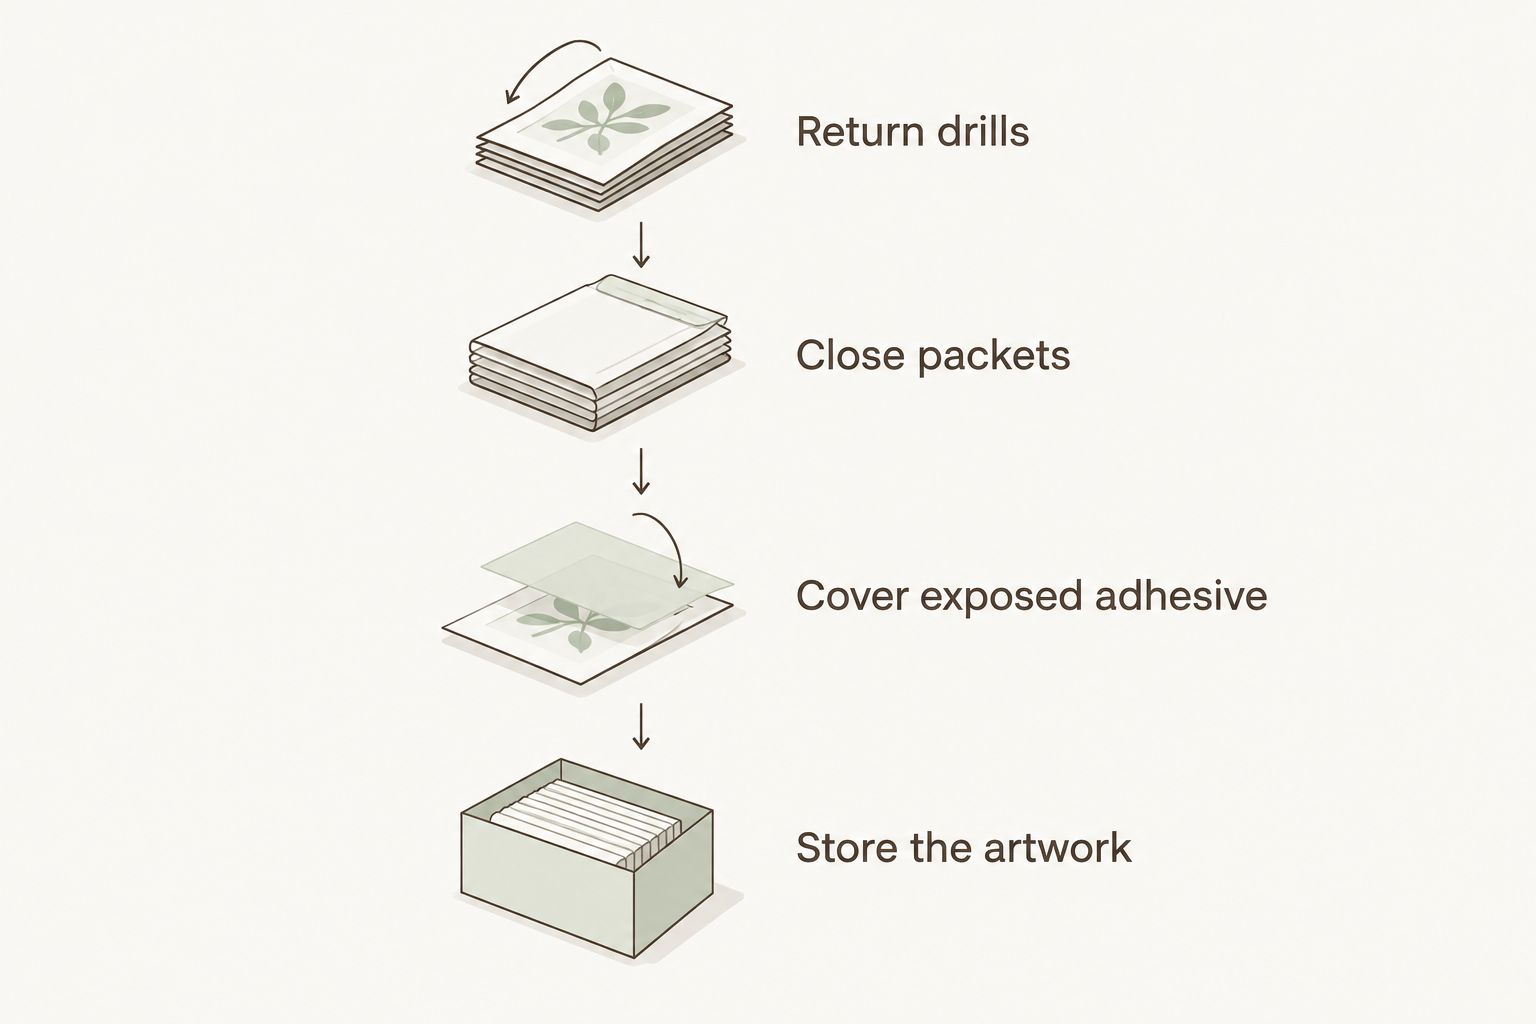
Use this sequence for your 2026 classroom routine: return loose drills to their matching containers, close those containers, replace the protective covering as directed, and put the project in its assigned storage place. Keep the original covering with the artwork; do not improvise with paper that can stick to the adhesive.
A short progress note helps students resume without searching across the entire design. It can identify the working section and the next symbol to check.
- Return drills to their matching containers.
- Close packets and containers securely.
- Cover exposed adhesive as instructed.
- Store the artwork without crushing the drilled surface.
- Record the next working section.
The stopping sequence deserves the same visual reminder as the placement technique. Post it where students put work away, rather than beside the finished-art display.
7. Assess the process and collect student feedback
Use a simple observation sheet rather than counting completed rows. Record whether students check the legend, handle materials appropriately, and return supplies correctly. These observations tell you more about the classroom routine than a comparison of finished areas.
Ask students to identify a color relationship or describe how the drilled surface differs from the printed image. This keeps the conversation connected to art rather than treating diamond painting solely as a quiet activity.
Before repeating the lesson in 2026, review the practical friction: unreadable symbols, crowded desks, difficult packet closures, or projects that were awkward to store. Change the format or routine before adding more accessories.
- Observe symbol checking and material handling.
- Ask students to describe repetition or contrast.
- Invite feedback on visibility and tool comfort.
- Review storage and cleanup difficulties.
- Adjust the next lesson from the trial’s results.
Compare classroom project options
Choose the smallest format that meets your learning objective. Larger dimensions create more working surface, but they do not automatically create a better lesson. Use this comparison to separate project scale from subject preference.
| Option | Best for | Practical advantage | Key limitation |
|---|---|---|---|
| Small framed children’s kit | A supervised introduction after suitability checks | Artwork already has a frame around it | A children’s label does not establish suitability for every student |
| Diamond painting keychain kit | An object-based craft lesson | Produces a small item students can use | Small components still require controlled handling |
| 40 × 40 cm full-drill round canvas | A recurring craft station | Provides a larger continuous image to develop | Needs storage and repeated working sessions |
| 60 × 80 cm square-drill owl canvas | An extended project for students ready for precise alignment | Offers a substantial full-drill image | Requires considerable table space and careful alignment |
For a supervised pilot, Jeanne’s framed Tractor and Narwhal kits offer different subjects within the same general project type. Choose the subject with your students, then inspect the instructions and components yourself; neither product should stand in for your school’s suitability decision.


Common mistakes classroom art teachers make
Choosing artwork before checking the working footprint
A detailed picture can be appealing and still be wrong for a crowded room. Measure the project alongside its tray and storage space before making subject choice the deciding factor.
Treating a coded kit as an original-design assignment
Following a supplied image and composing an image are different tasks. Assess the kit for pattern interpretation, then add drawing, collage, or a student-designed grid when composition is the objective.
Opening every drill packet at the beginning
More open colors create more materials to identify and put away. Begin with the colors needed for the active section, and keep each packet connected to its original code.
Promising a finished canvas by a fixed lesson
Students work at different paces, and classroom transitions take time. Set a process milestone—such as independently checking the legend—instead of promising that everyone will finish together.
Presenting quiet work as a guaranteed wellbeing result
Some students enjoy repetitive placement; others find the small pieces frustrating. Offer choice and observe responses rather than describing diamond painting as treatment or assuming it relaxes everyone.
FAQ
What are the best diamond painting kits for classrooms?
The best diamond painting kits for classrooms fit students’ handling abilities, your supervision, and your storage space. Start with a small supervised trial, then choose the format that supports the lesson objective.
Can elementary students do diamond painting?
Elementary students need an individual suitability check before using diamond painting materials. Read the manufacturer’s labeling, follow school rules for small parts, and provide another medium when handling loose components is unsuitable.
Are round drills better than square drills for a first classroom lesson?
Round drills are the simpler starting choice when you want students to focus on symbol matching rather than square-edge alignment. Square drills add an alignment demand, so demonstrate and assess that task before assigning a larger project.
Can a whole class share a diamond painting canvas?
A class can organize a shared canvas as a supervised station, but access and storage need planning. Assign working areas and turns, and assess each student’s process rather than the amount of surface completed.
What supplies should I check before teaching diamond painting?
Check the canvas, matching drills, applicator requirements, tray, protective covering, and storage arrangements before the lesson. Read the specific kit contents rather than assuming every product includes the same tools.
How do I keep classroom diamond painting drills organized?
Keep drills in closed, labeled containers connected to the project’s original color key. Open only what students need for the active section and teach returning drills as part of the stopping routine.
How should teachers grade a diamond painting activity?
Grade the stated learning objective, such as accurate legend reading, material handling, or explanation of repetition and contrast. Do not use completion speed as a substitute for understanding.
One last thing
Before you commit your 2026 class to a project, complete the stopping routine yourself. Leave a section unfinished, return the drills, cover the adhesive, and put everything where students will store it. Then reopen it as though you were arriving for the next lesson.
The best classroom test is not whether you enjoy placing drills; it is whether the project is straightforward to resume. A beautiful image cannot compensate for a storage system that loses the color key.