4 September 2026
Why Use Diamond Painting Accessories: 7 Tools That Matter
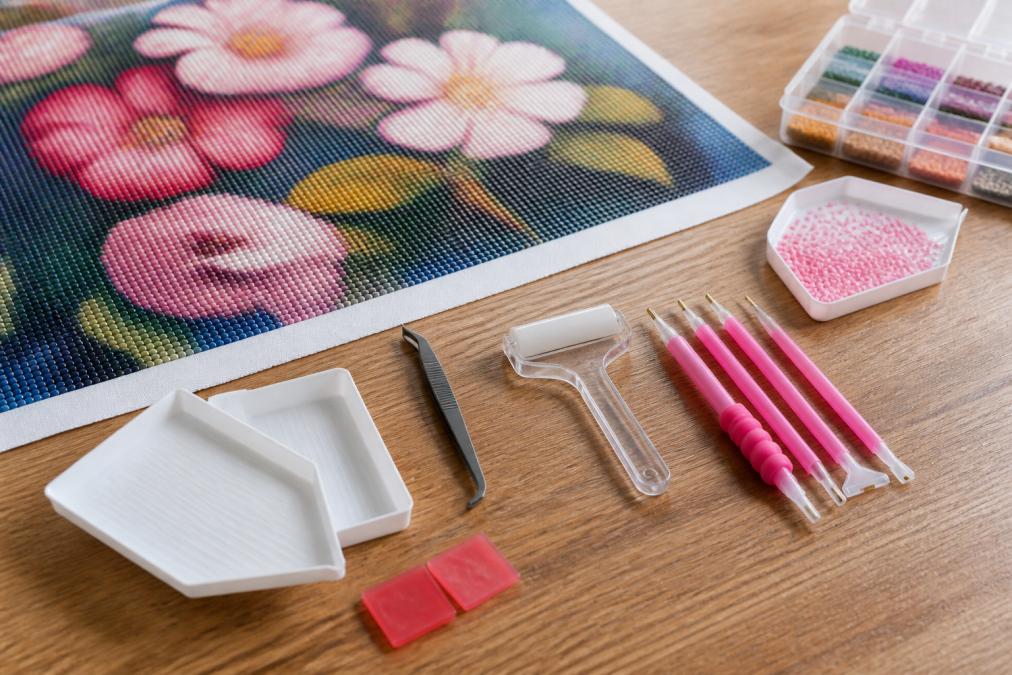
Table of Contents
- Why Diamond Painting Accessories Matter More Than You Think
- The 7 Essential Diamond Painting Accessories for Every Crafter
- Ergonomic Diamond Painting Pens: Comfort for Long Sessions
- Diamond Painting Light Pad Benefits: See Every Symbol Clearly
- How to Organize Diamond Painting Drills for Faster Workflow
- Troubleshooting Common Tool Failures and Fixes
- Conclusion: Upgrade Your Kit, Transform Your Craft
- Frequently Asked Questions
Last Updated: September 5, 2026
Why Diamond Painting Accessories Matter More Than You Think
Diamond painting accessories are the difference between a frustrating evening of squinting and dropped drills and a flow state where hours pass unnoticed. Starter tools are designed for the first project, not for the hundreds of hours of crafting that follow.
At Jeanne Argent Atelier, we build premium full-drill kits from original artwork, and we have seen how the right tools transform both the process and the final result. Below, we show you which tools matter and how they prevent the frustrations that push hobbyists to abandon projects.
Accessories are not about luxury; they are about ergonomics, accuracy, and speed. A better pen reduces hand fatigue, a light pad protects your eyes, and proper storage cuts project time dramatically.
The 7 Essential Diamond Painting Accessories for Every Crafter
The essential diamond painting accessories fall into three functional groups: precision tools, organization systems, and comfort upgrades. You do not need everything at once, but these seven items solve the most common problems crafters face.
| Accessory | Primary Problem Solved | Best For |
|---|---|---|
| Drill pen with ergonomic grip | Hand fatigue and poor control | Long sessions and detailed sections |
| Multi-placer applicator | Slow placement of single drills | Large color blocks and backgrounds |
| Light pad | Eye strain and missed symbols | Low-light rooms and dense patterns |
| Sorting trays with lids | Spilled drills and mixed colors | Working with multiple active colors |
| Storage containers | Lost drills and cluttered desks | Large projects with many colors |
| Wax caddy and alternatives | Wax loss and messy fingers | Frequent color changes |
| Tweezers and release paper | Hard-to-reach drills and canvas protection | Fixing mistakes and finishing edges |
Precision Applicators and Multi-Placers
The standard plastic pen works, but its metal tip is often too narrow, causing drills to sit crooked. A quality pen with a comfortable grip and properly sized tip allows for precise placement every time.
Multi-placers pick up three, six, or even nine drills at once, letting you fill large sections of a single color in a fraction of the time. For backgrounds and large areas, a multi-placer cuts hours off a project; for detailed sections, stick with the single-tip pen.
Sorting Trays, Containers, and Wax Caddies
A common mistake is pouring drills directly from their original bags onto the canvas; one wrong move mixes 500 loose drills of different colors. Sorting trays with multiple wells keep active colors separate, and trays with lids protect against spills and pets.
Storage containers with labeled compartments let you pause a project for weeks and resume without re-sorting. Wax caddies keep your adhesive within reach, so you are not hunting for the tiny pink pad every time you reload.
Ergonomic Diamond Painting Pens: Comfort for Long Sessions
Ergonomic pens are not a gimmick; gripping a thin plastic pen for hours causes hand cramps, finger strain, and wrist fatigue. For crafters with arthritis, the standard pen can make a beloved hobby genuinely painful.
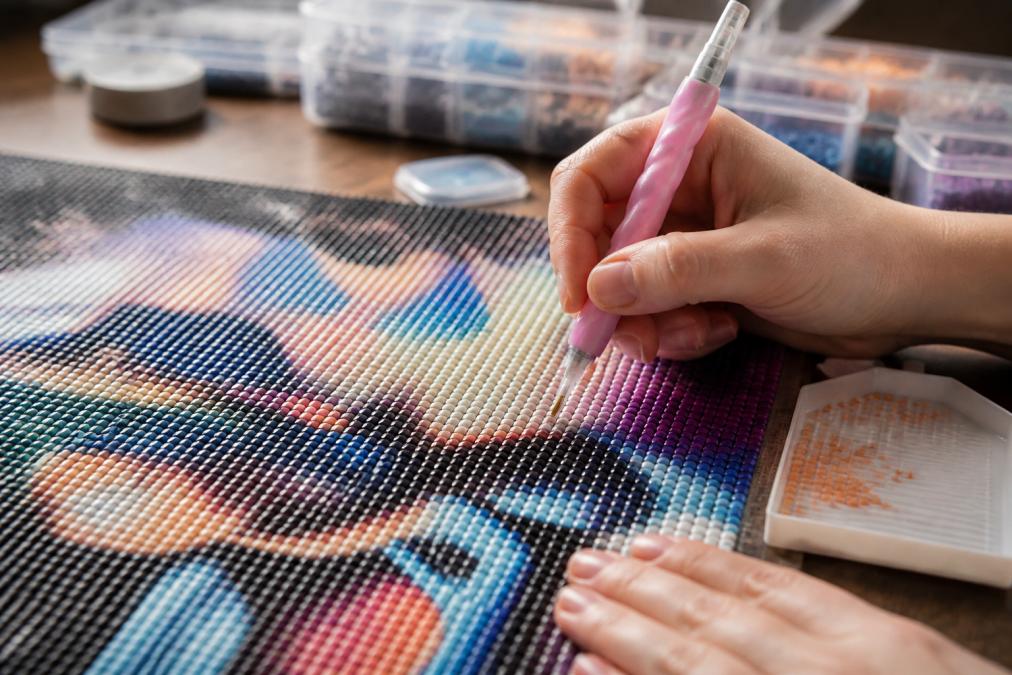
A pen with a thicker, cushioned grip distributes pressure across more of your hand. Resin or silicone bodies are heavier than plastic, so you use less finger pressure to control the tip, and angled tips reduce wrist bending.
Try the grip before you commit; the best pen is the one that disappears in your hand. Many crafters keep two pens in rotation, one with a single tip and one with a multi-placer, to switch tasks without breaking rhythm.
Diamond Painting Light Pad Benefits: See Every Symbol Clearly
A light pad sits beneath your canvas and shines light upward through the fabric, making printed symbols dramatically easier to read. This is especially valuable for full-drill canvases with busy patterns or dark backgrounds where symbols blend into the design.
The practical effect is fewer missed symbols and less squinting. When you can distinguish a 7 from a 1, you place the correct color the first time, reducing the need to pull out misplaced drills and damage the adhesive.
Choosing the Right Brightness and Color Temperature
Key specifications are brightness (lux or lumens) and color temperature (Kelvin). Most crafters find adjustable brightness between 500 and 3,000 lux covers dim evening rooms to bright daylight (aoa.org). Look for a neutral white light around 5,000K to 6,500K, which mimics natural daylight for distinguishing similar symbols and subtle color differences (nist.gov). Warmer lights (around 3,000K) wash out pale colors; cooler lights (above 7,000K) create glare on glossy canvases.
Size Selection: Match the Pad to Your Canvas
Light pads range from 8x10 inches to 16x24 inches and larger. Choose a pad at least as large as the canvas section you are actively working on; a 10x12-inch pad on a full 12x16-inch canvas leaves edges unlit, forcing constant repositioning. Many crafters work on smaller sections, using a pad that covers roughly two-thirds of the canvas and sliding it as they progress.
Reducing Eye Strain Through Even Backlighting
Light pads reduce eye strain by providing even illumination across the work area. A desk lamp creates shadows and bright spots that force your eyes to adjust constantly; backlighting eliminates those shadows, keeping contrast stable. This is particularly helpful for crafters over 40 with presbyopia, reducing the need to squint and lean forward (nei.nih.gov).
Additional Features Worth Considering
Some light pads include a dimmer with memory, USB-C power for portable battery packs, or a non-slip surface or clip to hold the canvas in place. While these features add cost, they address the specific frustrations of frequent crafters.
How to Organize Diamond Painting Drills for Faster Workflow
Knowing how to organize drills is the difference between a 20-hour project and a 40-hour one. Disorganized drills force you to constantly stop and search for the right color; an efficient system keeps your hands on the canvas.
Transfer all drills from their original bags into labeled containers before you begin, using separate compartments for each color labeled with the symbol or number from your canvas key. This 15-minute investment saves hours of searching later.
During active work, pour only the colors you are currently placing into a sorting tray, keeping the rest sealed. When you switch colors, return unused drills to their labeled container before opening the next color, preventing the dreaded mixed-drill disaster.
Troubleshooting Common Tool Failures and Fixes
Every accessory eventually fails, and knowing how to fix it keeps your project moving. The most common failure is the pen tip losing its grip on drills, usually because it is clogged with old wax or adhesive. Clean it with a small brush or release paper, and it will work like new.
Hard wax crumbles and fails to pick up drills, while soft wax leaves sticky residue. Store wax in a cool, dry place and replace it when its texture changes; many crafters prefer silicone-based alternatives, which are more consistent and last longer.
If your multi-placer stops picking up a full row, check that all prongs are aligned. A bent prong causes missed or crooked drills; gently bend it back with tweezers and test on a spare drill first.
Matching Accessories to Your Drill Type: Round vs. Square
Tool compatibility with your kit's drill shape is critical. Round drills have a domed top and sit loosely in the tray, so a narrow metal tip can struggle to pick them up; square drills have flat tops and sharp edges that catch on a clogged tip. If you switch between round and square kits, keep separate pens for each type, as a tip worn down by square drills will cause round drills to sit crooked. Label pens with washi tape to avoid mixing them up.
Fixing Static Electricity Issues with Trays and Drills
Static electricity causes drills to jump out of trays or cling to the pen barrel, worsening in dry climates or winter. Wipe the inside of your sorting tray with a dryer sheet before pouring in drills; the treatment lasts several sessions. Alternatively, place a small, open container of water nearby to add moisture. If drills stick to the canvas, gently run a dryer sheet over the back, avoiding the adhesive surface.
Clearing Clogged Pen Tips Without Damaging Them
A pen tip can become clogged with dried adhesive or wax, especially after weeks of disuse. Do not use a pin or needle, which can scratch the inside and create rough edges. Instead, soak the tip in warm, soapy water for five minutes, scrub gently with a soft toothbrush, and dry completely. For severe clogs, use a small piece of release paper folded into a cone to push out residue from the back.
When to Replace Rather Than Repair
Some tools are not worth fixing. If a pen body cracks or the grip becomes loose, replace it rather than risk mid-project failure. Multi-placers with multiple bent prongs are difficult to realign perfectly. Replace any tool that fails twice after proper cleaning, as repeated failures indicate structural wear.
Conclusion: Upgrade Your Kit, Transform Your Craft
The right accessories turn a frustrating hobby into a rewarding creative practice. Start with an ergonomic pen and a light pad, then build your organization system as projects grow. Each tool solves a specific problem, and together they let you focus on the art.
At Jeanne Argent Atelier, we design our premium full-drill kits with these principles in mind. Every kit includes specialized drill pens and trays, and our original artwork is printed on clear canvases that pair perfectly with a light pad.
Get started with Jeanne Argent Atelier and experience how quality tools and original designs elevate your diamond painting.
Frequently Asked Questions
What are the best accessories for diamond art beginners?
Start with a quality ergonomic diamond painting pen, a light pad, and a set of sorting trays with lids. These three items address the most common frustrations: hand fatigue, eye strain from unclear symbols, and spilled drills. A multi-placer tool is also worth adding early since it speeds up color-block sections significantly. You can upgrade to funnel trays and specialized storage containers once you establish a regular crafting routine.
How do ergonomic diamond painting pens reduce hand strain?
Ergonomic diamond painting pens feature thicker, cushioned grips and angled tips that keep your wrist in a neutral position. Standard plastic applicators force you to grip tightly and bend your wrist at an awkward angle, which causes fatigue during long sessions. The improved grip diameter distributes pressure across more of your hand, while the angled tip lets you place drills without twisting your wrist. This design matters most for crafters with arthritis or repetitive strain concerns.
What are the real benefits of using a light pad for diamond painting?
A light pad illuminates the canvas from below, making printed symbols dramatically easier to read, especially on darker or densely patterned sections of full-drill kits. This reduces eye strain and the need to constantly lift the canvas toward a lamp. Light pads also help you spot missed drills and check alignment more accurately. Choose one with adjustable brightness and a size that matches your largest canvas to get the most benefit.
How should I organize diamond painting drills by color code?
Use a labeling system that matches your canvas chart. Pour each drill color into a separate compartment of a sorting tray or small container, then label it with the corresponding symbol or DMC number from your kit's key. Arrange trays in the order you plan to work, not in numerical order. This setup minimizes the time spent searching for colors and prevents cross-contamination between shades that look similar under artificial light.
This article was written using GrandRanker