24 August 2026
How to Use Ergonomic Diamond Painting Pens
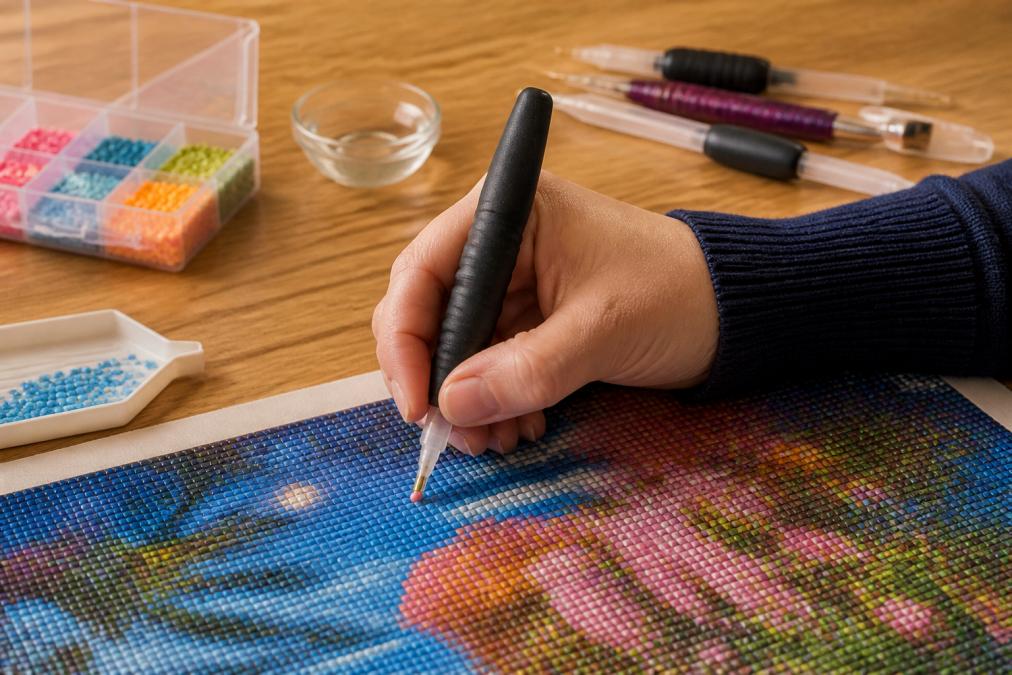
Table of Contents
- What Is an Ergonomic Diamond Painting Pen?
- Why Ergonomic Design Matters for Hand Health
- How to Load Wax Into Your Diamond Painting Pen
- Proper Grip and Hand Positioning
- Best Diamond Painting Pen Tips and Techniques
- Ergonomic Stretching and Hand Exercises
- Customization and DIY Grip Modifications
- Troubleshooting Common Pen Issues
Last Updated: August 25, 2026
What Is an Ergonomic Diamond Painting Pen?
An ergonomic diamond painting pen is a specialized stylus designed to reduce hand fatigue and strain during extended diamond painting sessions. Unlike basic pens that force your hand into unnatural angles, ergonomic diamond painting pens feature contoured grips, balanced weight distribution, and angled tips that align with your natural hand position. The pen works by picking up adhesive-coated drills (small rhinestones) from a grooved tray and placing them precisely onto the canvas grid.
A well-designed ergonomic pen reduces the repetitive stress that causes cramping, wrist strain, and hand fatigue by distributing pressure evenly across your hand. Most quality ergonomic diamond painting pens come with interchangeable tips, typically wishbone or y-shaped designs, allowing you to switch based on your preference and the canvas layout.
At Jeanne Argent Atelier, we understand that comfort directly impacts your ability to complete intricate full-drill kits. Our premium diamond painting kits include specialized drill pens and trays engineered to make hours of detailed work feel effortless, not exhausting.
Why Ergonomic Design Matters for Hand Health
The repetitive motion of picking up and placing thousands of drills takes a real physical toll. Without proper ergonomic support, your hands absorb constant pressure that accumulates over hours. Many crafters experience hand fatigue, wrist strain, and cramping by the midpoint of a project.
Ergonomic design reduces the muscular effort required for each placement. When your grip aligns with your hand's natural biomechanics, you use less force per drill placement. Over a multi-hour session, this compounds into dramatically reduced fatigue. Your wrist stays neutral instead of bent, your fingers don't cramp from gripping too hard, and your forearm doesn't burn from repetitive strain.
Regular crafting with poor ergonomics can lead to chronic wrist issues, tendonitis, and repetitive strain injury (the CDC). An ergonomic diamond painting pen protects your hands so you can enjoy this hobby for years without pain (osha.gov).
How to Load Wax Into Your Diamond Painting Pen
Preparing Your Wax and Adhesive
Diamond painting adhesive comes in two forms: traditional wax (soft, moldable, reusable) and gel (stickier, longer-lasting, harder to remove). Most ergonomic diamond painting pens work best with wax because it's easier to manage and doesn't dry out as quickly.
Prepare your wax by rolling it between your fingers until it forms a small, uniform ball roughly the size of a pea. The wax should be soft enough to mold but firm enough to hold shape. If your wax is too cold and crumbly, warm it slightly by rolling it in your hands for a few seconds. If it's too warm and sticky, let it cool for a moment.
Many crafters make the mistake of loading too much wax at once. A ball the size of a pea is sufficient for 10-15 drill placements. Loading more wax doesn't speed you up; it actually slows you down because the pen becomes harder to control and excess wax smudges onto your canvas.
Loading the Grooved Tray
The grooved tray has parallel grooves designed to align your drills in a single layer. Pour your drills into the tray and gently shake it side to side so the drills settle into the grooves, all facing the same direction with their flat adhesive-side up.
Take your ergonomic diamond painting pen and press the waxed tip gently into the first drill. You should feel slight resistance as the wax makes contact. Don't press hard; a light touch is all you need. Lift the pen straight up. The drill should come away cleanly attached to the wax. If the drill stays in the tray, your wax wasn't sticky enough. If it doesn't come up at all, you may have pressed too lightly. This takes practice, usually three to five attempts before you find the right pressure point.
Proper Grip and Hand Positioning
The correct grip positions your wrist in a neutral, straight alignment, not bent forward, backward, or to the side. Your hand should feel relaxed, not tense.
Hold the pen with a light grip, using your thumb and first two fingers. Your grip should be firm enough to control the pen but loose enough that someone could gently pull it from your hand without significant resistance. A lighter grip can help reduce muscle activation over extended sessions.
Position the pen at a 45-degree angle to your canvas. This angle naturally aligns your wrist and reduces the reach your fingers need to make. Your elbow should rest comfortably on the table or armrest. Your forearm should be roughly parallel to the ground, not angled sharply upward or downward.
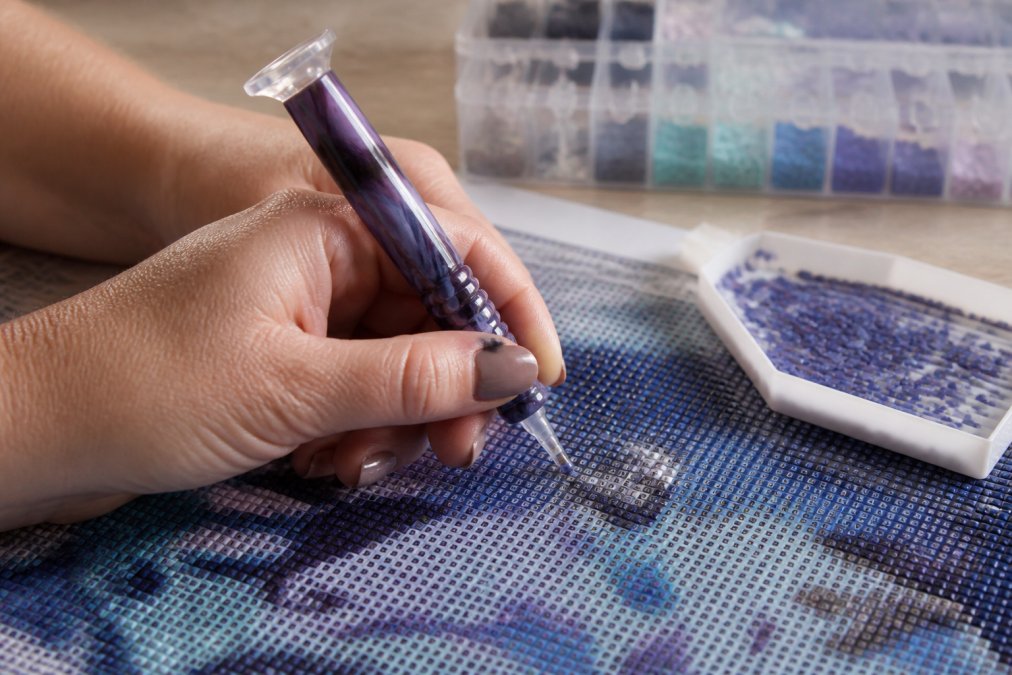
Keep your hand and forearm relaxed. Tension in your shoulders, neck, or upper back signals that your positioning is off. Adjust your chair height or canvas angle until you can work without strain. If your wrist starts to ache or your hand begins to cramp, stop immediately and reposition rather than pushing through.
Best Diamond Painting Pen Tips and Techniques
Understanding Tip Types: Wishbone vs. Y-Shaped
Two main tip designs dominate ergonomic diamond painting pens: the wishbone (U-shaped) and the y-shaped tip.
The wishbone tip features two parallel prongs that cradle the drill on either side. This design offers excellent stability and works well for standard full-drill layouts where drills are tightly packed. The wishbone tip is forgiving; even if your placement angle is slightly off, the prongs guide the drill into position. Most beginners find the wishbone tip easier to control because the dual-contact points provide feedback about whether the drill is seated correctly.
The y-shaped tip has a single point of contact that splits into a fork at the tip. This design excels at precision placement in tight spaces and partial-drill sections where drills are sparse. However, it requires slightly more accuracy during placement because there's only one contact point guiding the drill.
Many serious crafters keep both tip types available and switch based on the canvas section they're working on. Dense, full-drill areas benefit from the wishbone's stability. Partial-drill sections or intricate detail work benefit from the y-shaped tip's precision.
Pressure and Placement Precision
Placement pressure is where most crafters struggle. You need enough pressure to seat the drill firmly into the canvas adhesive, but not so much that you damage the drill or leave wax residue on the canvas. The sweet spot is "firm but not hard," like pressing a keyboard button rather than hammering a nail.
Approach each grid square straight-on, perpendicular to the canvas. Avoid placing drills at angles, which can cause them to slip or sit unevenly. Once the drill contacts the adhesive, hold steady for one second before lifting. This brief pause lets the adhesive set the drill's position.
If a drill pops off immediately after placement, your canvas adhesive is degrading. Refresh it by lightly misting the canvas with a spray bottle of water mixed with a tiny amount of dish soap, which reactivates the adhesive. Let it dry completely before resuming work.
Precision placement becomes easier with rhythm. Develop a consistent sequence: pick up a drill, position it, press lightly, hold one second, lift, move to the next grid square. This rhythm becomes automatic after a few hundred placements, improving both speed and accuracy.
Ergonomic Stretching and Hand Exercises
Diamond painting is a repetitive activity that demands active recovery. Stretching and hand exercises between sessions prevent the cumulative strain that leads to chronic pain. These exercises take 3-5 minutes and should become part of your crafting routine.
Wrist Flexor Stretch: Extend one arm straight out, palm down. Use your other hand to gently press the back of your extended hand downward, stretching the top of your forearm. Hold for 15-20 seconds, then repeat on the other side. Do this three times per hand.
Wrist Extensor Stretch: Extend one arm with your palm facing up. Use your other hand to gently press your fingers back toward your body, stretching the underside of your forearm. Hold for 15-20 seconds, repeat three times per hand.
Finger Flexion and Extension: Make a fist, then slowly extend all fingers wide. Repeat 10 times. This activates the muscles you've been using and prevents stiffness.
Grip Strength Exercise: Squeeze a soft stress ball firmly for 3 seconds, then release. Repeat 10-15 times per hand. This strengthens the muscles that support your grip.
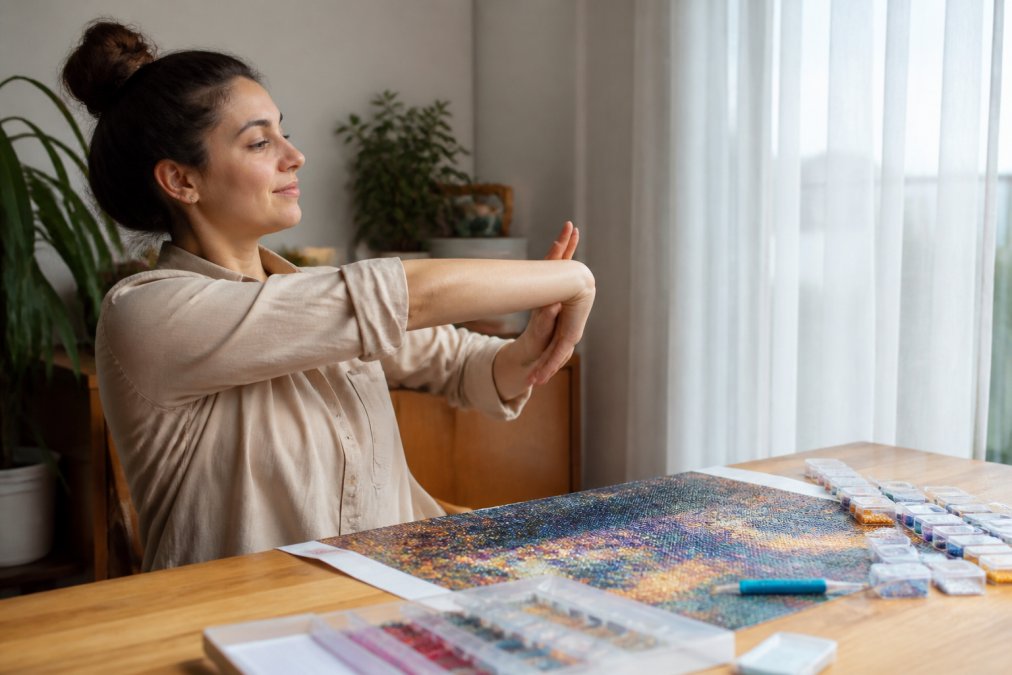
If you're planning a long crafting session (2+ hours), do these stretches every 45 minutes (the NIH). If you craft regularly, do these stretches daily, even on days you're not working on a project. Consistency prevents problems far better than reactive stretching after pain develops.
Customization and DIY Grip Modifications
Not every ergonomic diamond painting pen works perfectly for every hand. Some crafters have smaller hands and find standard grips too thick. Others have arthritis or reduced grip strength and need additional support. You can customize your pen's grip with simple modifications.
Grip Wrapping: Wrap athletic tape, foam tape, or self-adhesive foam around the pen's grip to increase its diameter. This distributes pressure across a larger surface area, reducing fatigue for those with smaller hands or reduced grip strength. Wrap in a spiral pattern, overlapping slightly as you go.
Grip Padding: Add cushioning by wrapping closed-cell foam around the grip before adding tape. This creates a softer, more forgiving surface that reduces pressure points.
Weight Balancing: If your pen feels tip-heavy, add small weights to the handle end. Fishing weights or small ball bearings wrapped in fabric and inserted into a hollow grip can balance the pen, requiring less muscular effort to control.
Angle Adjustment: Some pens come with fixed-angle tips. If the angle doesn't work for your hand geometry, you can carefully adjust it slightly using warm water to soften the material, then adjust the angle and let it cool.
These modifications are simple and reversible. Start with grip wrapping if you're unsure; it's the easiest change and often solves discomfort issues immediately.
Troubleshooting Common Pen Issues
Drills Won't Stick to the Wax
If drills consistently fail to adhere to your wax, the wax has likely degraded or compressed. Old wax loses its stickiness. Replace it with fresh wax from a new kit or purchase replacement wax. Replace your wax ball every 2-3 hours of crafting.
Wax Smudges on Canvas
Excess wax on the canvas creates a cloudy appearance. This happens when you load too much wax or press too hard during placement. Reduce the amount of wax you load and use lighter pressure when placing drills. If smudging has already occurred, gently wipe the affected area with a soft, dry cloth.
Drills Pop Off After Placement
Drills that pop off immediately indicate weak canvas adhesive. Reactivate it by lightly misting the canvas with water. Let it dry completely before resuming. If the problem persists throughout a new kit, the kit's adhesive may be substandard. Quality kits like those from Jeanne Argent Atelier use premium adhesive formulations that maintain stickiness throughout the entire project.
Hand Cramping Mid-Session
Cramping usually indicates one of three issues: too-tight grip, incorrect wrist angle, or inadequate breaks. Loosen your grip significantly. Check your wrist angle; it should be straight, not bent. Take a 5-minute break every 45 minutes and do the stretches described earlier. If cramping persists, your pen may not be ergonomic enough for your hand size or shape.
Pen Tip Wears Out
Over extended use, the wax-contact surface of the tip can become rough or worn. Most quality ergonomic diamond painting pens have replaceable tips. Order replacement tips from the manufacturer and swap them out when wear becomes noticeable.
Using an ergonomic diamond painting pen transforms the entire crafting experience from a source of hand pain into a genuinely relaxing activity. The right pen, combined with proper technique and regular stretching, lets you work for hours without discomfort. Jeanne Argent Atelier's premium kits include specialized drill pens and grooved trays engineered specifically to support extended, comfortable crafting sessions. Start with proper grip positioning, use the stretching techniques outlined here, and customize your pen's grip if needed. The investment in ergonomic tools pays dividends in both comfort and completion rates.
Frequently Asked Questions
Q: Why should I switch to an ergonomic diamond painting pen?
A: Ergonomic diamond painting pens reduce hand fatigue and wrist strain during long crafting sessions by distributing pressure evenly across your hand and providing proper grip support. The angled tips and balanced weight alignment minimize repetitive motion stress, making it easier to complete detailed projects without cramping. Serious hobbyists who spend hours placing drills find these pens essential for both comfort and precision when working on full-drill canvases.
Q: How do I load wax into an ergonomic diamond painting pen?
A: First, ensure your pen tip is clean and dry. Dip the angled or y-shaped tip lightly into the adhesive wax in your grooved tray, rotating it gently to coat the surface. The wax should form a thin, even layer on the tip. Avoid over-loading, as excess wax can cause drills to stick improperly or fall off your canvas. Test the adhesion on a spare drill before returning to your project.
Q: Do ergonomic pens help with hand cramps during diamond painting?
A: Yes. Ergonomic pens can help reduce cramping by promoting neutral wrist alignment and reducing pressure concentration on specific hand areas. The grooved grip can help prevent your hand from gripping too tightly, and the balanced weight distribution can lower fatigue during repetitive motion. Combined with proper hand positioning and periodic stretching, an ergonomic pen can extend your comfortable crafting time, making diamond painting hand pain relief achievable even for longer sessions.
Q: What's the difference between wishbone and y-shaped pen tips?
A: Wishbone tips have a wider, more open design that works well for picking up larger drills and provides stability during placement. Y-shaped tips are narrower and more precise, ideal for tight spaces and detailed alignment on your canvas. Y-shaped tips also allow better control over individual drills. Your choice depends on your canvas design complexity and drill size, many crafters keep both tip types on hand for different project needs.
This article was written using GrandRanker