4 August 2026
How to Prevent Diamond Painting Gaps: A Complete Guide
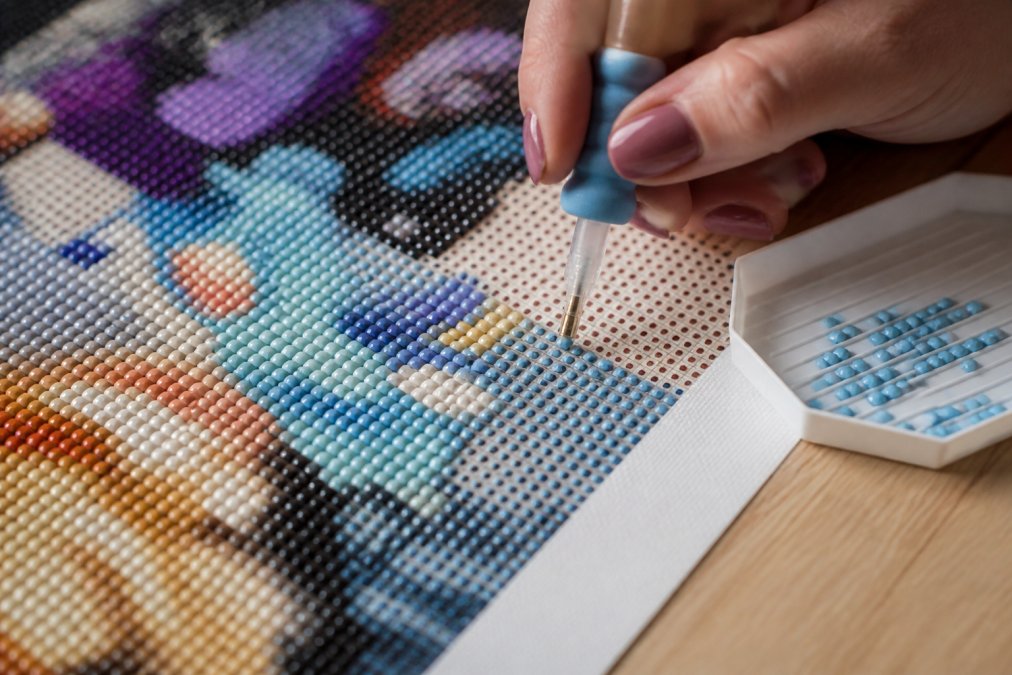
Table of Contents
- Understanding Why Diamond Painting Gaps Occur
- Step 1: Prepare Your Canvas for Precision
- Step 2: Master Drill Placement Techniques
- Step 3: Use the Right Tools to Prevent Gaps
- Step 4: Correct Misaligned Drills as You Work
- Step 5: Seal and Finish Your Project Properly
- Common Mistakes to Avoid When Preventing Diamond Painting Gaps
- Conclusion
Last Updated: August 5, 2026
Understanding Why Diamond Painting Gaps Occur
Diamond painting gaps are empty spaces where drills fail to adhere properly to the canvas, leaving visible gaps in your finished artwork. These gaps compromise visual impact and stem from three interconnected factors: the drills themselves, canvas preparation, and the adhesive system. Fixing gaps requires a multi-step approach rather than a single solution.
Drill Size Variance and Manufacturing Defects
Not all diamond painting drills are created equal. Manufacturing defects in lower-quality kits mean some drills are slightly undersized, oversized, or warped. When a drill is even 0.5mm smaller than the canvas holes, it won't seat properly no matter how much pressure you apply. Warped drills rock in the hole rather than sit flush, creating visible shadows or empty spaces around the edges.
Square drills are especially problematic when undersized. Since they're edge-to-edge with neighboring drills, a single undersized square drill creates a visible line gap between it and its neighbors, compounding across a large canvas into noticeably uneven appearance.
Canvas Tension and Environmental Factors
Canvas stored rolled too tightly or in humid conditions may have reduced adhesive tackiness. Temperature and humidity during painting also matter: cold environments below 65°F slow adhesive activation, while high humidity above 60% interferes with adhesive bonding and causes drills to pop off.
Canvas tension affects drill seating. If stretched too tightly, the membrane becomes rigid and drills don't seat deeply into the adhesive layer. Loose canvas allows drills to sink too far, causing them to tilt or shift.
Adhesive Quality and Application
Premium kits use poured glue that creates a consistent, thick adhesive layer. Budget kits often use thinner double-sided adhesive tape, providing less surface area for drills to grip. Adhesive also degrades over time; kits stored for months may have partially dried or lost tackiness.
Step 1: Prepare Your Canvas for Precision
Proper canvas preparation prevents gaps that would plague your entire project. Taking 10 minutes to prepare correctly makes a significant difference.
Checking Grid Alignment and Canvas Condition
Before opening the drill tray, inspect your canvas for defects. Look for creases, wrinkles, or misaligned grid patterns. Gently flatten creases by placing the canvas face-down under a heavy book for 30 minutes, avoid heat or moisture, which can damage the adhesive layer.
Check that the grid pattern is consistent and regular across the entire canvas. If you notice skewed areas or irregular holes, document with photos and contact the supplier. Verify that canvas edges are clean and protective film is fully removed, as leftover film creates air pockets that prevent proper adhesion.
Managing Canvas Tension
Position your canvas on a clean, flat work surface that's firm but not rigid. A padded craft mat works better than a hard desk because it allows slight give when you press drills, helping them seat properly.
If using a canvas holder or frame, ensure it holds the canvas flat without stretching it tight. Check your workspace temperature and humidity, ideally 65-75°F with humidity below 55%. Cold environments slow adhesive activation, while humidity interferes with bonding.
Step 2: Master Drill Placement Techniques
Correct placement technique prevents gaps through proper pen grip, angle, and pressure application.
Using the Diamond Painting Checkerboard Method
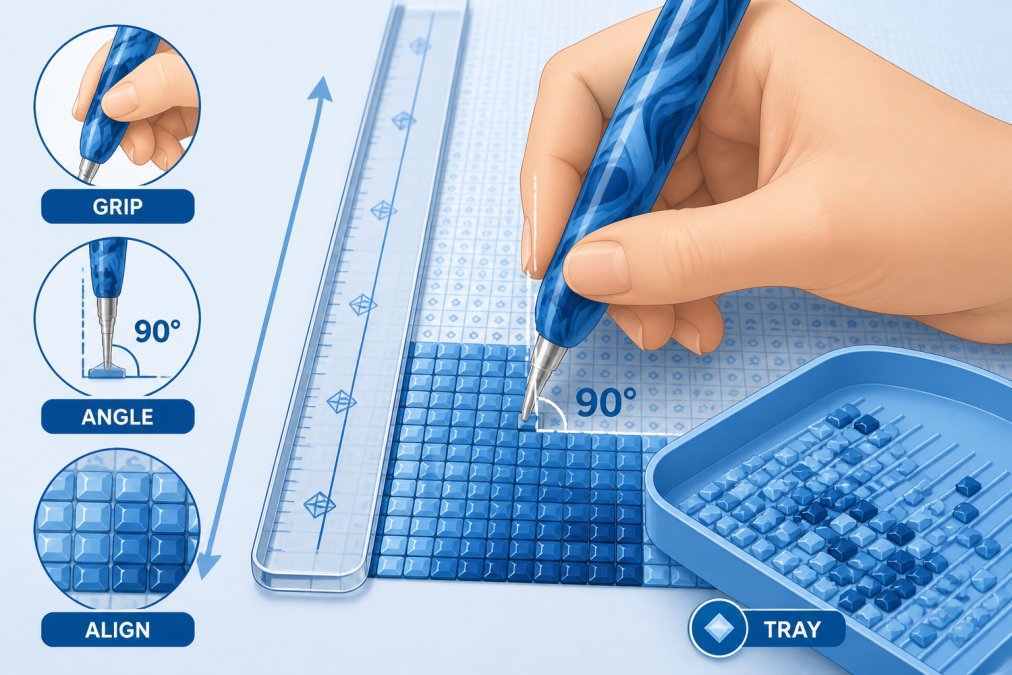
The checkerboard method prevents gaps by ensuring consistent spacing and alignment. Rather than filling rows sequentially, fill every other square in a checkerboard pattern. This lets you see the overall layout and catch misalignments before they compound across the canvas.
Start in one corner and place drills in a checkerboard pattern, then go back and fill remaining holes. This method forces you to maintain visual alignment across the whole canvas and reduces fatigue from repetitive hand motions, helping you maintain consistent pressure and accuracy.
Maintaining Straight Lines with a Ruler
A ruler prevents gaps caused by row drift. Even small angle variations accumulate across a wide canvas, creating visible misalignment. Place a ruler along the top edge of the row you're working on, aligning it with the center of target holes. Maintain consistent distance from the ruler's edge as you move the pen.
For square drills, the ruler method is essential since they're edge-to-edge and even 1mm deviation creates visible gaps. Round drills are more forgiving, but using a ruler still prevents visual misalignment.
Applying Consistent Pressure and Gentle Touch
The ideal technique is a firm press held for 2-3 seconds, then release. Approach each hole at a 90-degree angle, straight down, not at an angle. An angled approach causes the drill to tilt, creating gaps on one edge.
Press down until you feel resistance, then hold steady for 2-3 seconds. This duration lets the adhesive activate and grip the drill's grooves. Pressing too quickly doesn't give adhesive time to bond; pressing too hard can warp the drill or compress the canvas.
Step 3: Use the Right Tools to Prevent Gaps
The tools you choose directly impact your ability to execute proper technique. Quality tools make precision feel natural.
Selecting an Ergonomic Drill Pen
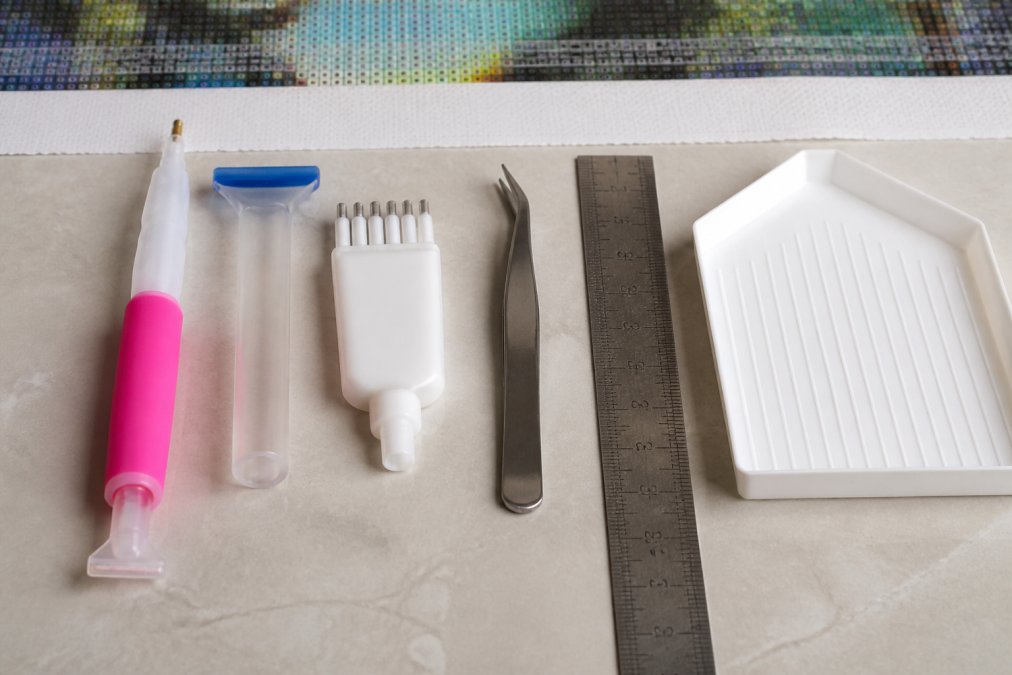
Your drill pen is the single most important tool. A poor pen forces tight gripping, leading to hand fatigue and inconsistent pressure. An ergonomic pen has a wider barrel, textured grip, and balanced weight distribution that maintains consistent pressure without strain.
Look for a barrel diameter of at least 0.5 inches and textured or padded grip. Weight should be around 0.5-0.75 ounces, substantial enough to feel controlled but light enough for hours of use. The pen tip should be slightly rounded, not sharp, to seat drills reliably.
Using a Diamond Painting Straightening Tool
A straightening tool is a flat, hard surface designed to press drills flat without damaging them. After placing a row of drills, run the tool across them in one smooth motion, pressing gently from left to right. This ensures every drill is seated at exactly the same depth and angle.
Use the straightening tool every 5-10 rows, not just at the end. This prevents gaps from accumulating as you work.
Using a Multiplacer Tool Correctly
A multiplacer holds multiple drills at once, speeding up work significantly when used correctly. Fill slots with drills of the same color, orienting them consistently with the flat side facing down. Press straight down with even pressure across the entire tool, held for 2-3 seconds.
The critical mistake is pressing unevenly, if you press harder on one side, some drills seat deeper than others, creating visible gaps. Use the multiplacer for large color blocks; revert to single-drill placement for detail areas where precision is critical.
Step 4: Correct Misaligned Drills as You Work
Even with perfect technique, some drills will be misaligned. Correcting these problems immediately prevents gaps in the finished piece.
Using Tweezers for Precision Adjustments
Precision tweezers let you nudge misaligned drills into position without removing them. Use tweezers with fine tips and smooth grip. Grab the drill gently at the side and apply lateral pressure to shift it into alignment. The adhesive has give for the first 10-15 minutes after placement, giving you a window to make corrections.
If a drill is severely misaligned or adhesive has set, use tweezers to pry it out and place a new drill in the correct position.
Row Straightening Techniques
After completing each row, visually inspect it for drills that are tilted, sunken too deep, or sitting too high. Use your straightening tool to press any problem drills flush with their neighbors, working from one end to the other.
For rows with square drills, this step is essential. Square drills must be perfectly aligned edge-to-edge or gaps between them become obvious.
Step 5: Seal and Finish Your Project Properly
How you finish your project affects whether gaps remain sealed or reopen as the piece ages. Apply a thin, even coat of clear sealant across the entire finished canvas using a brush or foam applicator. Let it dry completely according to product instructions, usually 24 hours.
Framing also protects your work by holding the canvas flat and preventing rolled or folded storage that causes drills to pop off or shift. Choose a frame that holds the canvas under slight tension without stretching it, keeping drills seated properly.
Common Mistakes to Avoid When Preventing Diamond Painting Gaps
Don't skip the checkerboard method for speed. Sequential row-by-row placement causes alignment drift that creates gaps. The checkerboard method takes the same total time and produces far fewer gaps.
Don't assume all drill pens are equivalent. A cheap pen forces poor ergonomics that lead to inconsistent pressure and misalignment. Invest in a quality ergonomic pen to prevent gaps and make work more enjoyable.
Don't rely on sealing to fix gaps that happened during painting. Sealing protects finished work but doesn't repair gaps caused by poor placement. Gaps must be corrected during the painting process.
Don't work in cold or humid environments. These conditions directly affect adhesive performance and guarantee gaps regardless of technique. Create proper working conditions first.
Don't overfill the multiplacer tool. Using one with 2-3 drills is easier to control than one with 6, resulting in more even pressure and fewer gaps.
Gaps in diamond painting come from a combination of factors, drill quality, canvas preparation, technique, and environmental conditions, that compound each other. Addressing them requires a systematic approach starting before you place the first drill and continuing through finishing.
Premium diamond painting kits like those from Jeanne Argent Atelier are designed to minimize these variables. With consistent drill sizing, quality adhesive, and clear grid patterns, you have fewer obstacles to overcome. But even with premium materials, proper technique and environmental control separate finished pieces with gaps from those that look flawless. The steps outlined above work with any kit quality, but they make the most dramatic difference when combined with materials that support precision work.
Frequently Asked Questions
Why are there gaps between my square diamond drills?
Gaps occur due to several factors: inconsistent drill placement pressure, slight drill size variations from manufacturing, canvas tension issues, or low-quality adhesive. Using the checkerboard method, a straightening tool, and maintaining even pressure during placement prevents most gaps. Premium kits with quality adhesive and consistent drill sizing reduce gaps significantly.
What is the best tool for straightening diamond painting drills?
A dedicated diamond painting straightening tool is specifically designed to align misplaced drills without damaging the canvas or adhesive. These tools apply gentle, even pressure to nudge drills into proper position. For smaller adjustments, fine-tipped tweezers work well. A ruler helps maintain straight rows and prevents gaps from forming during initial placement.
Can you fix gaps in a finished diamond painting?
Yes, but prevention is easier than correction. Once finished, you can carefully use tweezers to reposition any visibly misaligned drills or add missing drills by gently lifting the edge of nearby drills and inserting a new one with fresh adhesive. However, the best approach is to prevent gaps during the painting process by using proper placement techniques and quality materials from the start.
Does the quality of the canvas affect diamond painting gaps?
Absolutely. High-quality canvas with strong, consistent adhesive and clear grid alignment significantly reduces gaps. Poor-quality canvas may have uneven glue application, weak adhesive that fails to hold drills securely, or unclear symbols that make precise placement difficult. Premium kits feature superior canvas with double-sided adhesive or poured glue that holds drills firmly in place.
This article was written using GrandRanker