7 September 2026
How to Frame a Finished Diamond Painting: Step-by-Step
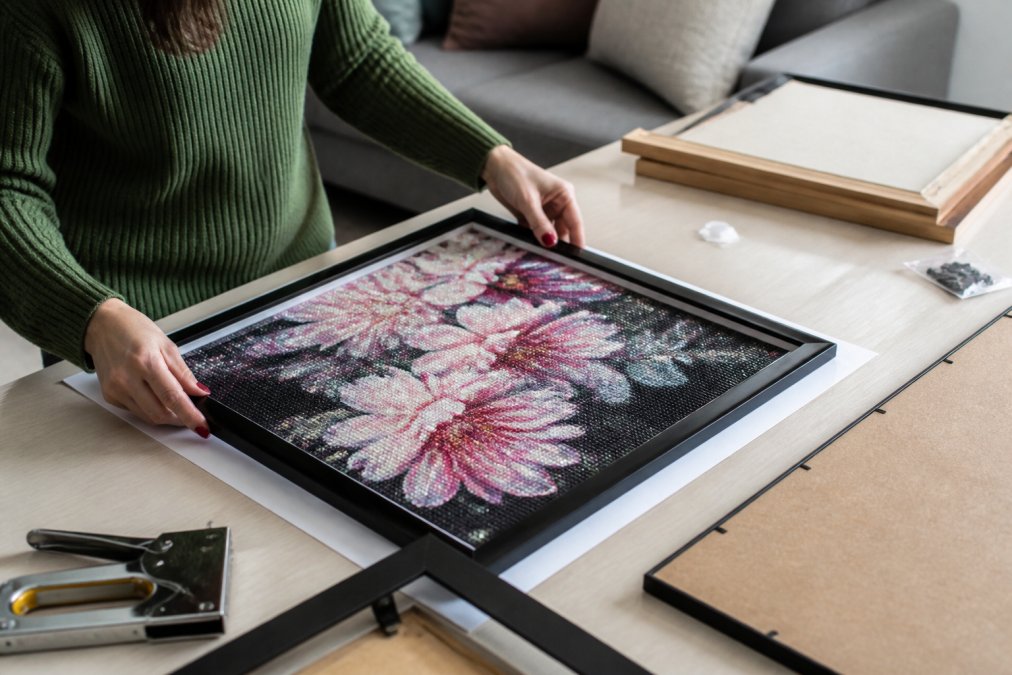
Table of Contents
- What You'll Need to Frame a Finished Diamond Painting
- Step 1: Prepare and Flatten the Diamond Painting Canvas
- Step 2: Trim the Diamond Painting Edges and Borders
- Step 3: Find the Best Sealant for Diamond Painting Protection
- Step 4: How to Mount Diamond Painting on Canvas Board
- Step 5: Choose the Right Frame Size and Style
- Step 6: Frame Your Diamond Painting With or Without Glass
- Step 7: Hang and Display Your Finished Diamond Art
- Frequently Asked Questions
Last Updated: September 8, 2026
Knowing how to frame a finished diamond painting is the difference between a craft project tucked in a drawer and a piece of art you actually want to display. The process is straightforward once you know the order of operations. This guide from Jeanne Argent Atelier walks you through exactly how to frame a finished diamond painting, from flattening the canvas to hanging it on your wall.
Most people rush to the frame store before prepping the canvas, or skip sealing entirely and watch drills pop off months later. Below are the seven steps that protect your work and make it look professionally mounted. The whole process takes an afternoon, and the payoff is a finished piece that holds up for years.
What You'll Need to Frame a Finished Diamond Painting
Before you start, gather your supplies. Trying to improvise mid-project leads to crooked mounts and wasted adhesive.
- Framing tools: A frame in your desired size, backing board, and framing hardware
- Adhesives: Double-sided tape or a spray adhesive for mounting
- Cutting tools: Sharp scissors or a craft knife for trimming the canvas
- Sealant: A dedicated diamond painting sealer or clear acrylic spray
- Flattening tools: Heavy books or a rolling pin
- Cleaning supplies: A lint-free cloth and gentle brush for loose drills
A common mistake is buying the frame before prepping the canvas. Wait until Step 5, after you've trimmed and sealed, so you measure the actual finished size. Premium full-drill kits already have crisp, even borders, which makes trimming far easier than with cheaper kits.
Step 1: Prepare and Flatten the Diamond Painting Canvas
Shipping rolls canvases into tight tubes, and those creases will show through the frame if you don't address them. The goal is a perfectly flat, drum-tight surface that sits flush against the backing board.
The Weight Method (Most Reliable)
Lay your diamond painting face down on a clean, flat surface. Cover the back with a soft, lint-free towel, then distribute weight evenly. A stack of large hardcover books works best because they spread pressure across a wide area. Avoid a single heavy object like a dumbbell, which can create new indentations.
Leave the weights in place for 24 hours, or 48 for canvases rolled tightly for weeks. Check the edges and corners specifically, these are the last areas to relax. If the corners still curl, add a thin strip of acid-free tape before re-applying the weights.
The Ironing Method (For Stubborn Creases)
For creases that survive the weight method, use a low-heat iron set to the lowest setting with no steam. Place a thin, damp cotton cloth (not paper towel, which can stick) over the back of the canvas. Glide the iron gently in slow circles for 10-15 seconds at a time, lifting frequently to check the canvas temperature, it should feel warm, never hot. The heat relaxes the polymer while the moisture prevents scorching. Let the canvas cool completely under a flat, heavy book before moving on.
The Reverse-Roll Method (For Severe Curling)
If your canvas has a strong curl from being stored face-inward in a tube, gently roll it in the opposite direction around a large-diameter cylinder (a clean paint can or thick cardboard tube works well), with the back facing outward. Secure with soft fabric ties or rubber bands. Leave for 2-3 hours, then unroll and lay flat under weights. This pre-stretches the fibers and speeds up flattening.
Why Flattening Is Non-Negotiable
A canvas with a center bump or curled corners will never sit flush against the glass, creating a wavy, unprofessional appearance. Worse, the uneven surface puts uneven pressure on the drills, which can cause them to crack or pop off over time. Take your time here, because every later step depends on a flat foundation. If significant creasing won't relax after 48 hours, check with the manufacturer about replacement policies before you invest hours in framing.
Step 2: Trim the Diamond Painting Edges and Borders
Once your canvas lies flat, examine the white border around your design. Most canvases include a generous margin that you need to remove before mounting. Use sharp scissors or a craft knife with a straightedge to cut along the printed design line, leaving about half an inch of blank canvas. This margin gives you room to attach the canvas to the backing board without covering any drills.
For square drill paintings, check that your cuts are perfectly straight. A slightly angled cut becomes obvious once the canvas is mounted in a frame. If you're framing a custom or non-standard size, measure twice and cut once, since you won't be able to hide mistakes under a pre-sized mat.
Step 3: Find the Best Sealant for Diamond Painting Protection
Sealing is the step most hobbyists skip, and it's the one that protects your hours of work. Beyond locking drills in place, the right sealant is your primary defense against the two silent killers of diamond art: UV damage and adhesive failure. This section covers what you need for a piece that stays vibrant for 5+ years.
The Two Types of Sealant: What Actually Matters
There are two broad categories of sealant you'll encounter: water-based acrylic sealers and solvent-based sprays. For diamond painting, water-based acrylic sealers are the safer choice. They dry flexible, which is critical because the canvas expands and contracts slightly with humidity changes. A rigid sealant will crack and pull drills loose over time. Solvent-based sprays (like some clear enamel sprays) can be too aggressive and may react with the glue on the drills, causing them to lose adhesion.
UV Protection: The Non-Negotiable Feature
The #1 cause of faded, dull diamond paintings is not dust, it's ultraviolet light. UV rays break down the dye in the resin drills and yellow the canvas adhesive (the NIH). When you buy a sealant, look for one that explicitly states "UV-resistant" or "UV-inhibitor" on the label. Not all do. A sealant without UV protection will leave your drills vulnerable to fading within 18-24 months of sunlight exposure (peer-reviewed research).
For maximum protection, apply two thin coats of a UV-resistant acrylic sealer. The first coat seals the gaps between drills; the second adds the UV-blocking layer. Let the first coat dry completely (typically 2-4 hours) before applying the second. This double-coat method is the single most effective thing you can do for long-term color retention.
How to Apply Without Streaks or Pooling
Use a wide, soft flat brush (a 2-inch foam brush works well) and work in small 6x6 inch sections. Dip the brush lightly, you want a damp brush, not a dripping one. Apply in one direction, then lightly cross-hatch with a second pass. The sealant should soak into the canvas between the drills, not sit on top of them. If you see puddles, spread them immediately. After 10 minutes, check for shiny spots that indicate pooling and blot them gently with a clean, dry cloth.
The Gloss vs. Matte Trade-Off
Gloss sealants enhance sparkle but can create a reflective sheen that washes out the design under direct light. Matte sealants reduce glare but can slightly mute the facets on 3D-style drills. For most pieces, a satin finish offers the best balance, it preserves sparkle without glare. Test your sealant on a spare corner before committing to the full piece.
The No-Sealant Alternative: When It's Okay
If your painting will be framed behind UV-protective glass or acrylic, the glass itself blocks most UV rays, making a sealant optional for UV protection though still recommended for dust and moisture resistance. However, if you're framing without glass (covered in Step 6), a UV-resistant sealant is not optional, it's your only defense against fading. In that scenario, apply three thin coats.
Let the sealer dry completely, typically a few hours depending on your brand. Store your sealed canvas flat while it cures, since hanging it too soon can cause the sealant to sag or pool. If you're using a sealant without UV protection, hang the piece away from any window or direct light source.
Step 4: How to Mount Diamond Painting on Canvas Board
Mounting your canvas to a rigid board keeps it flat and gives the frame something solid to grip. A backing board is the standard choice because it's lightweight, acid-free, and won't warp over time. Lay your trimmed canvas face up on the board and center it, then fold the excess border over the edges and secure it with double-sided tape.
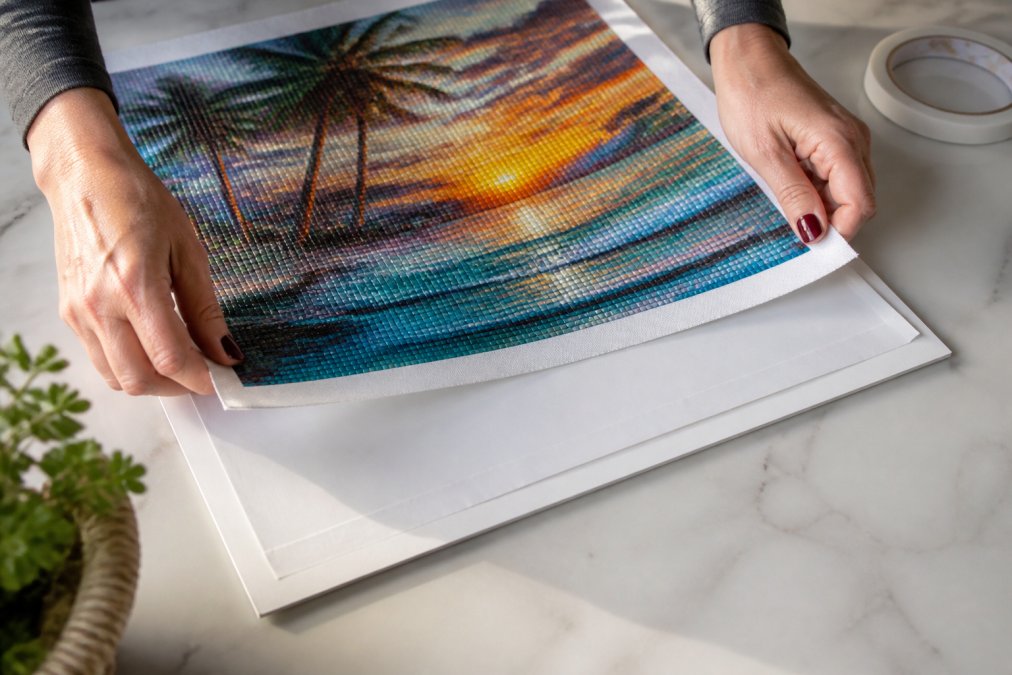
For how to mount diamond painting on canvas board correctly, use acid-free tape to prevent yellowing and adhesive failure years down the line. Press firmly along each edge, working from the center outward to avoid trapping air bubbles. For large or heavy canvases, add a few strips of tape across the center of the board for extra security. Check that the design remains perfectly square to the board edges before the tape sets.
Step 5: Choose the Right Frame Size and Style
Now that your canvas is mounted, measure the exact dimensions of the board. This is your frame size. A frame that matches the board precisely looks clean and gallery-like, while a slightly larger frame with matting creates a more traditional, decorative presentation.
| Frame Choice | Best For | Considerations |
|---|---|---|
| Exact fit, no mat | Modern, minimalist pieces | Requires precise trimming |
| Slightly larger with mat | Traditional or ornate decor | Adds visual breathing room |
| Floating frame | Canvas edges you want visible | Needs a gap around the board |
| Custom frame | Non-standard canvas sizes | Costs more but guarantees fit |
Matting is a personal choice, but it does more than look nice. A mat lifts the glass away from your drills, preventing them from being crushed or flattened against the cover. If you skip matting, ensure your frame has enough interior depth to accommodate the canvas thickness. Jeanne Argent Atelier kits use full-drill canvases that sit slightly higher than partial-drill versions, so account for that extra depth when shopping for frames.
Step 6: Frame Your Diamond Painting With or Without Glass
The glass question comes down to where the painting will live. Glass and acrylic covers protect your drills from dust, moisture, and curious fingers, which matters in kitchens, bathrooms, or homes with pets and children. Acrylic covers are lighter and shatter-resistant, making them the safer choice for large canvases, while standard glass offers better clarity at a lower weight.
For paintings over 24 inches wide, weight management becomes a real concern. Acrylic covers weigh considerably less than glass, which reduces strain on your wall anchors. Whichever you choose, verify that the frame's backing clips hold the mounted board securely without bending the edges.
Step 7: Hang and Display Your Finished Diamond Art
The final step is choosing the right spot and hanging your piece securely. Diamond paintings are heavier than they look, especially with a backing board and glass, so use appropriate wall anchors rather than simple nails. For pieces over 15 pounds, use two anchors spaced apart for stability (the CDC).
- Lighting: Avoid direct sunlight to prevent drill and canvas fading
- Humidity: Keep away from bathrooms and kitchens where moisture can seep behind the frame
- Level: Use a spirit level before pressing the anchors into the wall
- Height: Hang at eye level, roughly 57 to 60 inches from the floor to the center
Framing hardware should match the weight of your piece. A small 8x10 painting can hang from a single sawtooth hanger, while larger works need D-rings and wire for even weight distribution. Step back and check that the painting sits straight, then enjoy your finished diamond art as the display-worthy piece it was meant to be.
Framing a finished diamond painting takes patience and a few inexpensive supplies, but the result transforms your work from a folded canvas into lasting wall art. Start with a flat, sealed canvas, mount it on an acid-free board, and choose a frame that protects without hiding your drills. At Jeanne Argent Atelier, we design our full-drill kits to produce crisp, display-ready results, and pairing them with the right framing approach ensures your masterpiece stays vibrant for years.
Frequently Asked Questions
Should I seal my diamond painting before framing?
Yes, sealing is a smart step before framing. It locks in the drills and prevents them from popping off over time, especially if you plan to frame without glass. Use a brush-on sealer or a spray-on clear acrylic sealer. Apply thin, even coats and let each layer dry completely. Sealing also protects the surface from dust and moisture. It is a quick step that adds long-term durability to your finished piece.
What is the best way to frame a diamond painting to prevent popping drills?
The best defense starts with a strong adhesive canvas and a good sealant. Before framing, apply a clear sealer to lock in the drills. When mounting, use a rigid backing board and double-sided tape to keep the canvas flat. Avoid glass that touches the drills directly; if you use glass, choose a frame with a mat or spacer. This prevents pressure on the drills, which is a common cause of them popping off.
Can you use a standard picture frame for diamond art?
Yes, you can use a standard picture frame, but it often requires extra work. Standard frames are sized for paper prints, so your diamond painting canvas may not fit perfectly. You will likely need to trim the canvas to size or have a custom mat cut to fill the gap. The challenge is that the canvas is thicker than paper, so a standard frame's glass may press against the drills. Look for frames with a deeper rabbet or use spacers.
How do you display a finished diamond painting without glass?
Displaying without glass is popular because it lets the diamond facets sparkle. First, seal the drills with a high-gloss or matte sealer to protect them. Mount the canvas onto a sturdy backing board to keep it flat. Then, place it in a frame that has no glass, or use a floating frame. This approach works best in low-traffic areas to minimize dust accumulation on the textured surface.