7 August 2026
How to Fix Creased Diamond Painting Canvas
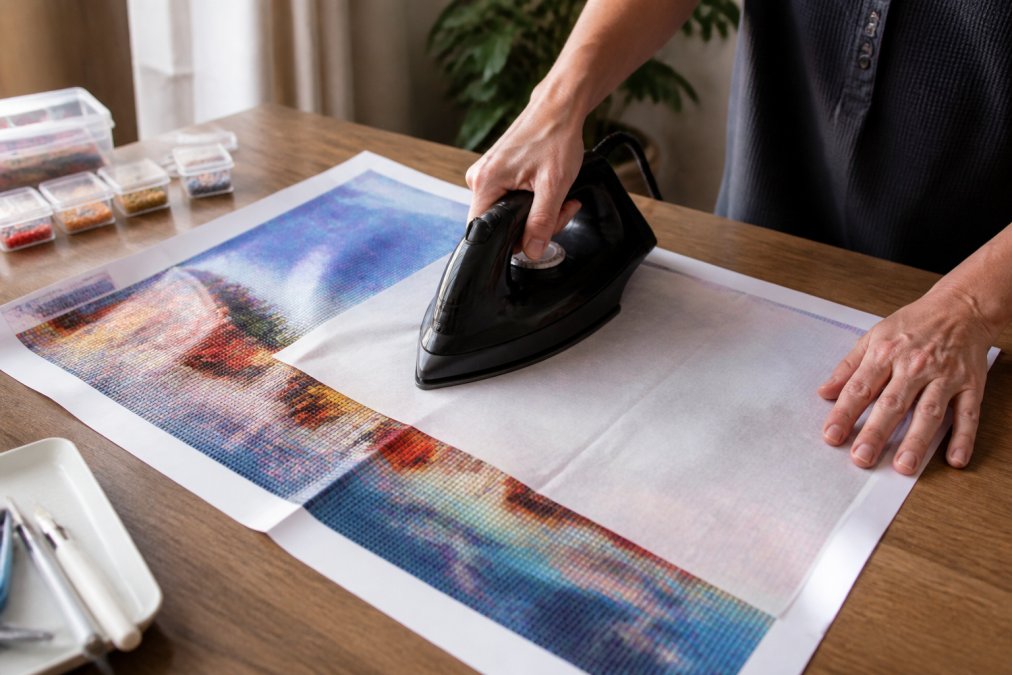
Table of Contents
- Why Creases Matter in Diamond Painting
- How to Fix Creased Diamond Painting Canvas: The Reverse Roll Method
- Best Way to Flatten Diamond Painting Using Low Heat
- Diamond Painting Tools for Beginners to Prevent Creases
- Dealing with Air Bubbles After Flattening
- Safety Precautions When Flattening Canvas
- Post-Flattening Maintenance and Storage
- Common Mistakes to Avoid
Last Updated: August 8, 2026
Why Creases Matter in Diamond Painting
Creases affect how the adhesive layer performs and how your finished piece looks when displayed. A creased canvas causes drills to sit unevenly, creating visible gaps and reducing visual impact. The crease becomes a permanent line across your artwork, drawing the eye away from the intricate detail you've spent hours applying. Most creases develop during storage, shipping, or from rolling the canvas too tightly. When the canvas is bent sharply, the adhesive can crack or lose contact with the backing. The good news is that creases are fixable with the right technique and tools.
How to Fix Creased Diamond Painting Canvas: The Reverse Roll Method
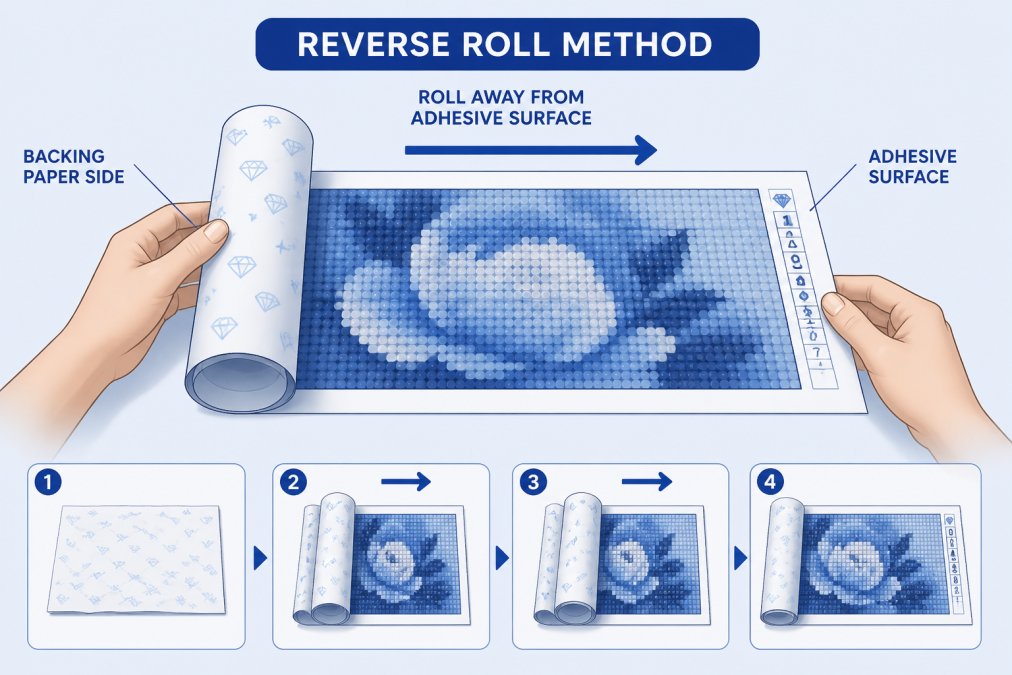
The reverse roll method is the safest approach because it works with the canvas structure rather than against it. This technique involves carefully rolling the canvas backward, opposite to the direction of the crease, which gradually releases tension and flattens the material without compromising the adhesive.
What You'll Need
- Your creased diamond painting canvas
- A clean, flat work surface
- Heavy books or weights
- The backing paper or protective covering that came with your kit
- Optional: a craft roller or brayer
- Clean hands or cotton gloves
Step-by-Step Process
Step 1: Assess the Crease
Examine your canvas carefully to understand the direction and severity of the crease. Run your hand gently across the affected area to determine if it's sharp or gentle.
Step 2: Prepare Your Work Surface
Clear a large, flat area where your canvas can lay completely flat. Remove any objects that could create new creases or pressure points.
Step 3: Position the Canvas
Lay your canvas flat with the design side facing up. Smooth out any loose areas by hand, working from the center outward.
Step 4: Begin the Reverse Roll
Starting at one end of the canvas, gently roll it in the opposite direction of the crease. If the crease bends upward, roll it downward. Roll slowly and deliberately, applying gentle, even pressure.
Step 5: Apply Gradual Pressure
Once rolled, secure it loosely and let it sit in this reverse-rolled position for several hours or overnight. This allows the canvas fibers to relax and adjust.
Step 6: Unroll and Check Progress
Carefully unroll the canvas and lay it flat again. If the crease is significantly reduced, you've made progress. Most creases require 2-3 cycles of rolling and resting to flatten completely.
Step 7: Weight the Canvas
Place heavy books or weights across the canvas to hold it flat while it sets. Distribute the weight evenly across the entire surface and leave in place for 24-48 hours.
Best Way to Flatten Diamond Painting Using Low Heat
Low heat is an effective secondary method for stubborn creases that don't respond to the reverse roll technique alone. Heat relaxes canvas fibers and can help set them flat, but excessive heat damages the adhesive and can melt the drills.
Iron Method for Stubborn Creases
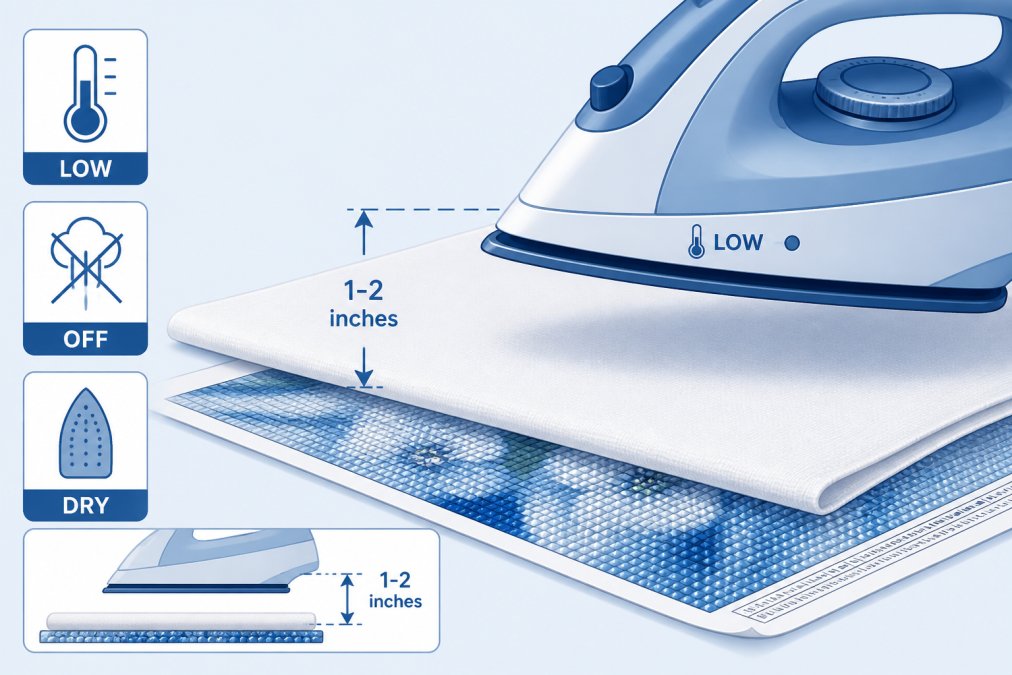
An iron set to the lowest heat setting can flatten persistent creases without damaging your work. Remove the clear plastic cover from your canvas. Place a clean, thin cloth over the creased area to act as a barrier between the iron and canvas. Set your iron to the lowest heat setting, usually marked as "silk" or "delicate." Never use steam. Hold the iron 2-3 inches above the cloth and move it slowly across the creased area in a back-and-forth motion. Spend 30-60 seconds on each section, then check progress. Limit total heat exposure to under 5 minutes per session. Allow the canvas to cool completely before removing the protective cloth.
Heat Gun Alternative
A heat gun offers more controlled heat distribution than an iron. Set it to the lowest temperature setting and hold it 6-8 inches away from the canvas. Move it slowly across the creased area in smooth, overlapping passes. Heat guns are particularly useful for creases along the edges. Spend 20-30 seconds on each section, then check progress. Limit total heat exposure and allow the canvas to cool completely afterward.
Diamond Painting Tools for Beginners to Prevent Creases
Investing in the right tools from the start prevents many creasing issues. Jeanne Argent Atelier includes specialized drill pens and trays with every kit. The ergonomic drill pen reduces hand fatigue, making you less likely to accidentally crease your canvas. A proper tray keeps your canvas supported and flat while applying drills.
Beginners often roll their canvas too tightly. Instead, roll it loosely or fold it gently when storing between sessions. If you must roll your canvas, place a protective tube or paper towel roll inside to create space and prevent sharp creases. Store your canvas flat whenever possible.
A craft roller or brayer is useful for pressing drills into place without creating pressure points. These tools distribute pressure evenly across a larger area than your fingers alone.
Dealing with Air Bubbles After Flattening
When you flatten a creased canvas, air pockets sometimes appear between the canvas and backing paper. These bubbles reduce adhesion and can cause drills to pop off later.
Small bubbles (smaller than a pencil eraser) often disappear on their own as the adhesive settles over 24-48 hours. Larger bubbles require intervention. Use a craft roller or brayer to gently press the bubble outward, working from the center toward the edges. Apply even, moderate pressure.
If the bubble persists, lift the clear plastic cover slightly at the edge and use a small, thin tool like a craft knife to gently separate the canvas layers. This allows trapped air to escape. Smooth the area back down and let it rest under weights for several hours.
For air bubbles under already-placed drills, avoid pressing directly on the drills. Work around the bubble, pressing the surrounding canvas flat.
Safety Precautions When Flattening Canvas
Never use high heat on your canvas. Temperatures above 200°F can melt the synthetic drills and damage the adhesive permanently. Test the temperature on scrap material first.
Avoid using chemical solvents or strong cleaners on your canvas, as these can dissolve the adhesive. Use only cool water and a soft cloth, and allow it to dry completely.
When applying pressure with weights or a roller, distribute the weight evenly. Concentrated pressure on a small area can create new creases or damage the adhesive bond.
If your canvas has already-placed drills, work slowly and check progress frequently to avoid damaging your completed work.
Post-Flattening Maintenance and Storage
Once you've successfully flattened your canvas, proper storage prevents new creases from forming. Store your finished or in-progress diamond painting flat in a cool, dry location. If you must store it vertically, use a canvas frame or stretcher bar to keep it rigid.
Avoid stacking heavy objects on top of your canvas. If storing multiple canvases, place acid-free tissue paper or cardboard between them. Keep your canvas away from direct sunlight, as UV exposure can fade the design and weaken the adhesive.
Check on stored canvases every few months for new creases or adhesive issues. Address minor creases immediately using the reverse roll method before they become permanent.
For completed diamond paintings awaiting framing, keep them flat and protected. Frame your finished work within a few months of completion to protect your investment.
Common Mistakes to Avoid
The most common mistake is applying too much heat too quickly. More heat doesn't work faster and damages the adhesive and drills. Always use the lowest heat setting and move slowly.
Another frequent error is pressing too hard with weights or a roller. Gentle, even pressure is far more effective than aggressive force. Rolling your canvas too tightly during storage creates permanent creases that are harder to fix. Always roll loosely or fold gently, and store flat whenever possible.
Don't attempt to flatten a canvas immediately after it arrives, before the adhesive has fully cured. Wait 24-48 hours to allow the adhesive to set properly.
Avoid using aggressive methods on canvases with drills already applied. The drills are fragile, and excessive pressure or heat will dislodge them. Finally, avoid storing your canvas in humid environments or near heat sources. A cool, dry storage location is ideal.
Creased canvases are frustrating, but they're not permanent problems. With patience and the right approach, you can restore your diamond painting to a smooth, beautiful finish. Whether you choose the reverse roll method, low-heat flattening, or a combination of techniques, the key is working gently and allowing time for the canvas to adjust. Take your time, follow these steps carefully, and your finished diamond painting will be ready for display.
| Flattening Method | Best For | Time Required | Risk Level |
|---|---|---|---|
| Reverse Roll | All creases, especially new ones | 24-48 hours | Very Low |
| Low-Heat Iron | Stubborn creases, final touch | 30-60 minutes | Low |
| Heat Gun | Detailed areas, edge creases | 20-30 minutes | Low |
| Weights Alone | Gentle wrinkles, maintenance | 24-48 hours | Very Low |
Frequently Asked Questions
Can you iron a diamond painting canvas?
Yes, but only with extreme caution. Use low heat (under 250°F) with a protective cloth barrier between the iron and canvas. Never apply direct heat to the adhesive side, as high temperatures can damage the glue layer and cause drills to pop off. Always test on a small, inconspicuous area first. The reverse roll method is safer for most creases.
How long does it take to flatten a diamond painting?
The reverse roll method typically takes 24-48 hours for creases to fully release, though you may see improvement within hours. Low heat methods work faster, usually 15-30 minutes, but require more skill to avoid damage. The time depends on crease depth, canvas material, and how long the canvas was folded.
What's the best way to flatten diamond painting without damaging the drills?
The reverse roll method is safest: gently roll the canvas backward (adhesive side inward) to gradually release creases over 24-48 hours. Use heavy books or craft rollers to apply even, gentle pressure. Avoid direct heat, moisture, or sharp folding. This method protects the adhesive layer and prevents drill displacement better than heat-based techniques.
Is it safe to use a hair dryer on a diamond painting canvas?
Hair dryers are not recommended. They produce uneven, often excessive heat that can damage the adhesive layer and cause drills to loosen or fall off. Even on low settings, the concentrated airflow can shift drills and create new problems. Stick to the reverse roll method or a low-heat iron with protective cloth for safer results.
This article was written using GrandRanker