6 August 2026
Diamond Painting Tips for Serious Artists: A 2026 Guide
Table of Contents
- Kit Preparation and Organization for Serious Work
- Best Diamond Painting Tools for Professionals
- Diamond Painting Drill Organization Ideas
- Sectioning and Alignment Techniques for Large Canvases
- How to Fix Diamond Painting Gaps and Gapping Issues
- Diamond Painting Sealing Techniques for Professional Finish
- Managing Static Electricity and Preventing Fatigue During Long Sessions
- Advanced Techniques: Round vs. Square Drills and Color Theory
Last Updated: August 6, 2026
Kit Preparation and Organization for Serious Work
The difference between a frustrating diamond painting session and a rewarding one often comes down to preparation. Before you open a single drill, your workspace setup determines whether you'll spend your time creating or searching for supplies.
Unboxing and Inventory Management
When your kit arrives, resist the urge to dive straight in. A proper unboxing process catches manufacturing issues early and prevents headaches mid-project. Lay out every component on a clean, flat surface and verify against the contents list. Check that your canvas is free of creases, your drills are sorted correctly, and your tools are all present and functional.
Many serious artists maintain an inventory log for each kit, noting drill colors, canvas dimensions, and the date received. This prevents duplicate purchases and helps you track which colors you've used across multiple projects. Organize your drills immediately after unboxing by transferring them to labeled storage containers where you can see each color clearly. This single step saves hours of frustration when you need a specific shade mid-project.
Release Paper and Canvas Protection
The release paper protecting your canvas adhesive is your first line of defense against contamination. Keep it in place until you're ready to work. When you do remove it, peel slowly at a shallow angle rather than pulling straight up to prevent the canvas from lifting with the paper. Work in sections if your canvas is large, leaving the rest protected until needed.
Store your unused canvas sections flat in a clean, dry environment. Humidity and temperature fluctuations can affect adhesive performance. If you're working over multiple weeks, check the canvas periodically for dust accumulation and gently brush it clean with a soft, dry cloth.
Best Diamond Painting Tools for Professionals
Quality tools transform the experience. Cheap drill pens cause hand fatigue within minutes. Poor trays waste time and create frustration. The right equipment makes hours of detailed work genuinely enjoyable.
Drill Pens and Multi-Placers
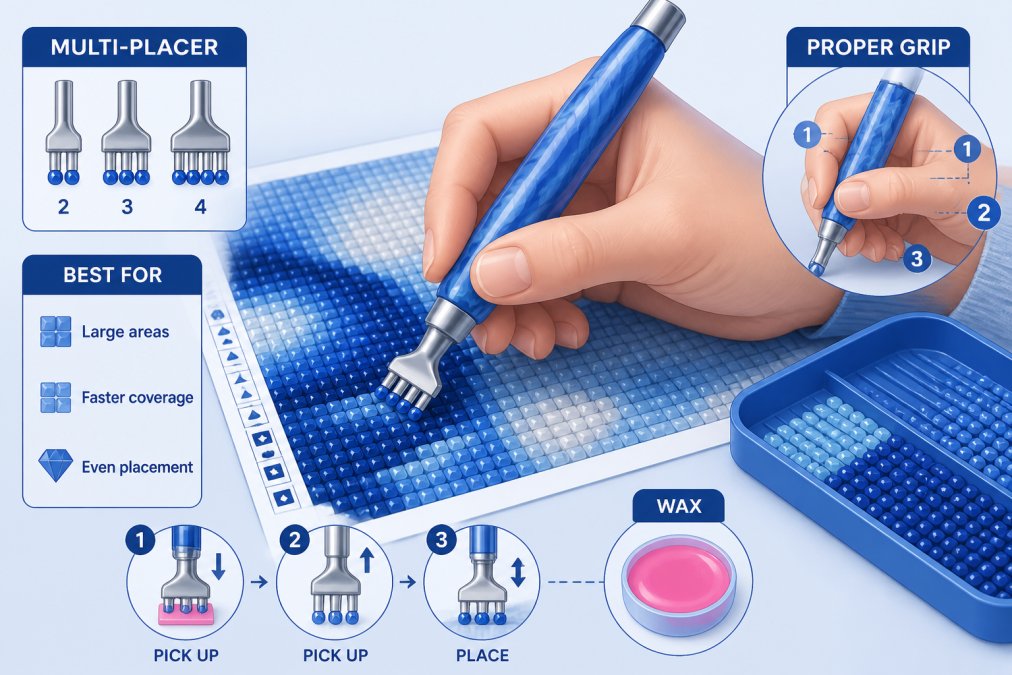
A basic drill pen works, but a multi-placer changes everything. Multi-placers hold multiple drills simultaneously, letting you place 2, 3, or even 6 drills at once, dramatically accelerating your workflow on large canvases. The best multi-placers have adjustable spacing to match your specific drill size, as square drills require different spacing than round drills.
Ergonomics matter more than speed. Your drill pen should feel balanced in your hand with a grip that doesn't require white-knuckle pressure. After a 3-hour session, your hand should feel relaxed, not cramped. Many serious artists prefer pens with cushioned grips or rubberized barrels that reduce fatigue during extended work.
Trays, Wax, and Ergonomic Accessories
Your tray is your command center. A quality tray has deep wells that prevent drills from rolling out and a comfortable lip for resting your wrist. Deep, compartmentalized trays keep colors organized and reduce wasted motion.
Premium wax grips drills consistently without leaving residue on your canvas. Store your wax in a cool environment and refresh your wax puddle every 30-45 minutes for optimal performance. A light pad transforms your work environment by making symbols on your canvas crystal clear, reducing eye strain and improving accuracy. Consider a wrist rest or ergonomic support for long sessions, as repetitive strain on your forearms and wrists can develop during extended work on large canvases.
Diamond Painting Drill Organization Ideas
Organization directly impacts speed and enjoyment. A disorganized drill collection forces you to search constantly, breaking your creative flow and introducing errors.
Color-Coding and Symbol Systems
Develop a color-coding system that matches your working style. Some artists organize by hue families; others use a numeric system that matches the kit's legend. Label your storage containers clearly with printed labels or a permanent marker to identify each color number and shade. Create a visual reference guide by photographing your organized drills and printing a small reference sheet to tape to your workspace.
Storage Containers and Long-Term Inventory
Invest in clear storage containers that stack efficiently so you can see every drill color without opening the lid. Separate round drills from square drills completely, as they require different handling. For long-term storage, keep containers in a cool, dry place away from direct sunlight. Label the outside of your storage system with a complete inventory to help you spot missing or or damaged drills quickly.
Sectioning and Alignment Techniques for Large Canvases
Large canvases intimidate many artists. The solution is systematic sectioning that breaks the project into manageable chunks.
Creating Grid Sections
Start by lightly marking your canvas into sections using a pencil and ruler, dividing it into 4-inch or 6-inch squares depending on design complexity. Use a light pencil, as dark marks show through light-colored drills. Work one section at a time, completing it fully before moving to the next. This approach prevents discouragement and reduces the risk of misalignment across section boundaries.
Achieving Perfectly Straight Lines
Alignment errors compound across large canvases. Use a straightedge or metal ruler to verify that your rows are perfectly level, checking frequently for any drills that sit noticeably higher or lower. The release paper underneath your canvas matters significantly, if it's wrinkled or bunched, your canvas won't lie flat and alignment becomes impossible. Smooth it out before you start and check it periodically.
How to Fix Diamond Painting Gaps and Gapping Issues
Gaps appear when drills don't sit flush against each other. This common problem ranges from minor cosmetic issues to alignment disasters.
Identifying and Correcting Misalignment
Examine your completed work in bright light, ideally with a light pad beneath it. Look for rows where drills sit at different heights or angles. If misalignment is localized to a small area, remove the affected drills and re-place them, ensuring each one sits firmly against its neighbors. If the problem spans multiple rows, you likely have an adhesive issue rather than a placement problem.
Addressing Adhesive Failure and Loose Drills
Loose drills indicate that the canvas adhesive has lost grip. Test the affected area by gently pressing drills with your fingernail, they should not shift. If only a few drills are loose, remove them and re-place them with firm pressure. If the entire section feels loose, the adhesive has likely failed completely. Prevent adhesive failure by storing your canvas flat in a cool, dry environment and checking it periodically for degradation.
Diamond Painting Sealing Techniques for Professional Finish
Sealing transforms a completed canvas into a display-worthy piece. It protects your work, enhances the visual impact, and ensures long-term durability.
Archival Sealers and UV Protection
Choose an archival-grade sealer specifically formulated for diamond painting. Apply sealer in thin, even coats using a foam brush or roller. Most sealers require 24 hours of drying time between coats. Apply 2-3 thin coats rather than 1 thick coat for optimal protection. UV-protective sealers are essential if your finished piece will hang in sunlight or near windows, as UV exposure fades drills over time.
Framing and Long-Term Preservation
Use a frame with UV-protective glass or acrylic. Mount your canvas on acid-free backing board, as acidic materials cause yellowing and deterioration over time. Store unframed finished pieces flat in acid-free storage boxes, never rolled or stored vertically. Keep storage areas cool and dry, away from direct sunlight.
Managing Static Electricity and Preventing Fatigue During Long Sessions
Static electricity causes drills to stick to your pen unexpectedly and creates confetti. Fatigue compounds the problem, making your hands sloppy and your concentration fragile.
Static Control and Light Pad Setup
Humidity is your primary defense against static. Maintaining 40-50% humidity dramatically reduces static issues. Avoid synthetic materials that generate static, and wear natural fibers when possible. A light pad serves double duty by illuminating your canvas and providing a grounding surface that reduces static buildup.
Ergonomic Health and Posture for Extended Work
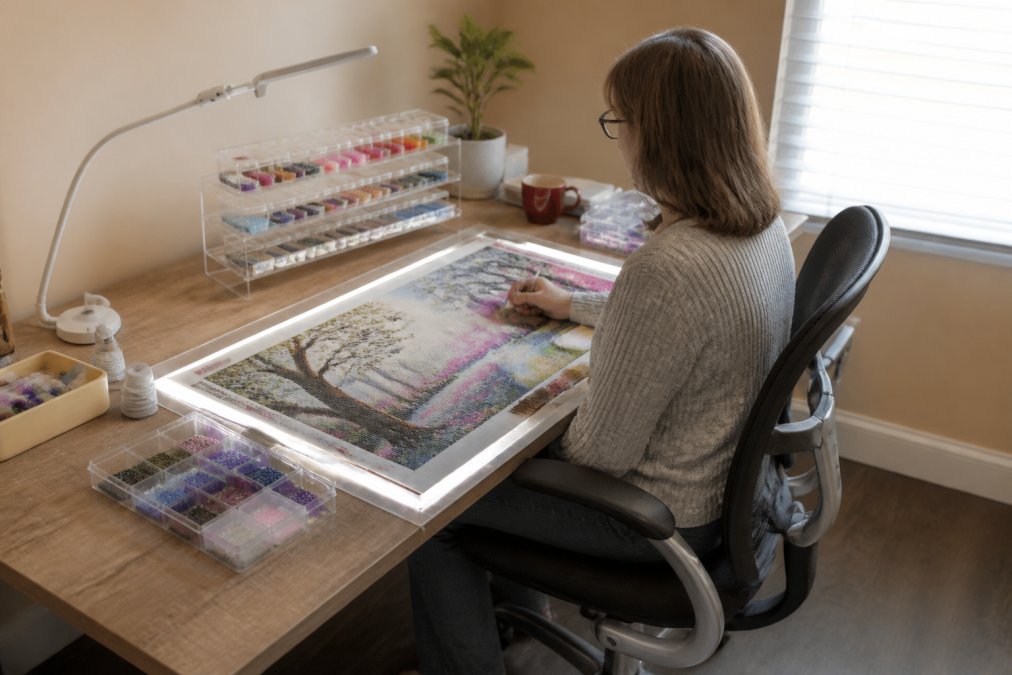
Position your canvas at eye level or slightly below so your neck remains neutral. Invest in a chair with proper lumbar support. Your elbows should rest comfortably on the work surface or armrests with forearms roughly parallel to the floor. Take breaks every 60-90 minutes to stand, stretch, and walk around. This breaks up repetitive motion and resets your posture.
Advanced Techniques: Round vs. Square Drills and Color Theory
Choosing between round and square drills is more than aesthetic preference. Each shape creates different visual effects and requires different handling techniques.
Choosing Drill Shapes for Your Project
Square drills create a uniform, mosaic-like appearance with no gaps, producing a dense, finished look ideal for detailed designs with fine lines. Round drills create a softer, slightly textured appearance with small gaps between them, working beautifully for landscapes and florals. At Jeanne Argent Atelier, our full-drill kits are designed with the drill shape carefully selected to complement the artwork.
Custom Color Modification and Blending
Advanced artists modify kit colors to enhance specific areas by blending two similar colors in adjacent areas to create smooth transitions. Consider the color wheel when planning modifications, complementary colors create vibrancy while analogous colors create harmony. Subtle modifications enhance the work; extreme changes can undermine the original vision.
Creating serious diamond paintings requires intention, preparation, and the right approach. From the moment you unbox your kit through the final sealing, every decision impacts your finished piece. The tools you choose, how you organize your workspace, and the techniques you master determine whether your work looks amateur or professional.
At Jeanne Argent Atelier, we design our full-drill kits specifically for serious artists who want their finished pieces to be display-worthy. Our specialized drill pens and ergonomic trays make extended sessions comfortable. Our canvases are crafted from original artwork, ensuring that every detail deserves your attention. Start with a premium kit that respects your time and effort, and your finished masterpiece will show the difference.
Frequently Asked Questions
What are the top diamond painting tips for beginners who want to work like professionals?
Start by organizing your drills before opening the release paper. Use a multi-placer tool to speed up placement, and work in small sections rather than randomly. Keep your wax puddle fresh by stirring it regularly, and use a light pad to reduce eye strain. These fundamentals separate casual painters from serious artists who produce gallery-quality finished projects.
How do you organize drills for large-scale diamond painting projects?
Color-code your drill containers and match them to the legend on your canvas. Use storage containers with divided compartments, and keep confetti (mixed drills) in a separate labeled section. Create an inventory list as you unbox the kit. For long-term storage, keep drills in airtight containers away from moisture. This system prevents frustration during multi-week projects and ensures you never run short mid-session.
What's the best way to seal a diamond painting for a professional finish?
Apply an archival-quality sealer after your final drills are placed, ensuring all diamonds are secure. Use a brush or spray application depending on the product. Choose sealers with UV protection to prevent color fading over years. Once sealed, frame your finished project behind glass or acrylic with a mat to protect the surface. This preserves the clarity of the diamonds and ensures your work remains vibrant for decades.
How do you fix gapping and misalignment issues in diamond painting?
Gapping occurs when drills don't sit flush against each other. Use tweezers to gently reposition loose drills, and apply a small amount of adhesive to secure them if needed. For alignment problems, work in grid sections and use a ruler to verify straight lines. If adhesive failure is widespread, it indicates a canvas quality issue. Quality kits with proper adhesive formulation prevent this problem entirely.
What tools do professional diamond painters use to improve comfort during long sessions?
Invest in an ergonomic drill pen with a comfortable grip designed for hours of work. Use a light pad to reduce eye fatigue and improve canvas visibility. Organize your trays at elbow height to minimize reaching and strain. Take breaks every 45 minutes and stretch your hands and shoulders. Proper posture and tool selection prevent repetitive strain injuries and allow you to work on larger, more complex projects without discomfort.
Is it better to use round drills or square drills for diamond painting?
Square drills create a more uniform, seamless finished appearance with minimal gaps between stones. Round drills are slightly faster to place but leave small spaces that can be visible in the final project. For serious artists creating display-worthy pieces, square drills deliver a more professional, gallery-quality result. Your choice depends on your desired finish and time commitment.
How do you prevent static electricity from interfering with diamond placement?
Work on a light pad or non-static surface rather than directly on a table. Keep the air humidity moderate, as very dry conditions increase static buildup. Avoid synthetic clothing that generates static, and consider an anti-static wrist strap for extended sessions. These precautions prevent drills from clinging to your pen or jumping off the canvas, which slows progress and creates frustration.
This article was written using GrandRanker